Implementing LiveRamp's Advertiser Direct Solution
LiveRamp's Advertiser Direct solution (FKA "Consumer Social") allows brands and agencies to use third-party data across a wide variety of verticals from the LiveRamp Data Marketplace for optimization on designated destination platforms, such as Facebook, X, Pinterest, LinkedIn, Snapchat, and TikTok.
When you activate a Data Marketplace segment on an Advertiser Direct platform, you’re billed directly by LiveRamp at the Advertiser Direct percentage of media listed for your license of that segment from the Data Marketplace data seller and based on usage.
Distributing Data Marketplace data to Advertiser Direct destination platforms requires a separate agreement with LiveRamp. If you're interested, contact your LiveRamp representative.
Note
If you do not have a LiveRamp representative, fill out our New Customer Form and someone from our team will contact you within 72 hours about either working with a certified Advertiser Direct reseller or implementing on your own.
Data sellers cannot distribute directly to Advertiser Direct destinations, due to third-party data regulations. Distributions must be made by data buyers. For more information, see "Sell Data to Data Buyers Distributing to Advertiser Direct Destinations".
Benefits include:
Seamless Distribution: Easily distribute your selected segments to all major social platforms.
Automatic Reporting: Free up your time with automatic reporting for Facebook and X.
One Agreement Works For All Social Platforms: With a single contract you can seamlessly distribute segments to all major social platforms.
Straightforward Pricing: Percentage of media spend pricing applies to all social platforms.
Overall Steps to Implement Advertiser Direct
In most ways, the steps to request and distribute Data Marketplace segments to Advertiser Direct destinations are similar to those for distributions to other destinations. However, distributions to certain Advertiser Direct platforms require monthly usage reporting.
Note
If you're an agency and want separate billing invoices for each client, there are some additional steps to perform and some steps vary slightly. See the instructions below for more details.
After the necessary agreements are in place, perform the following steps:
If you're an agency and want separate billing invoices for each client, create a client child account from within your parent account and then notify your LiveRamp account team.
Note
If you're not an agency that wants separate billing invoices for each client, skip to the step to activate Data Marketplace destination accounts.
If you created a client account in the previous step, add users to the client account.
Note
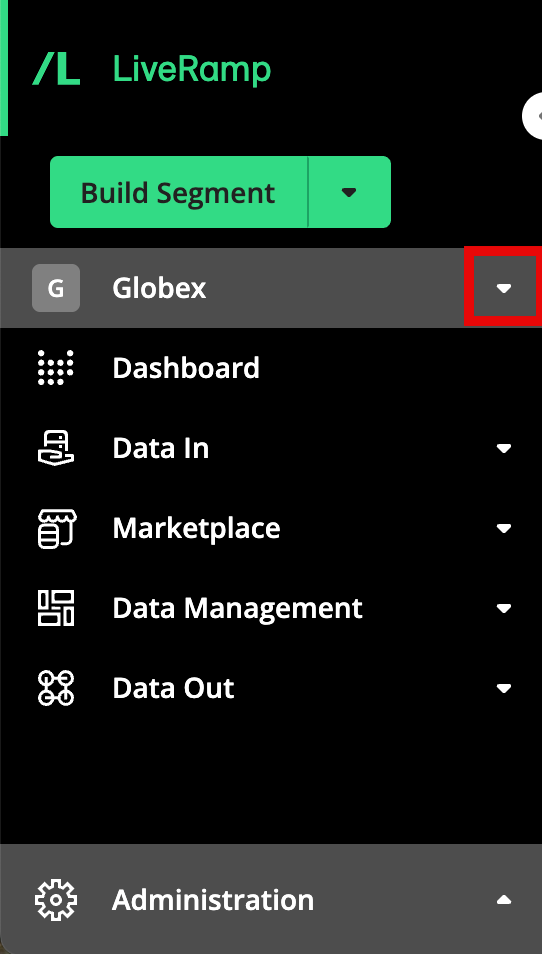
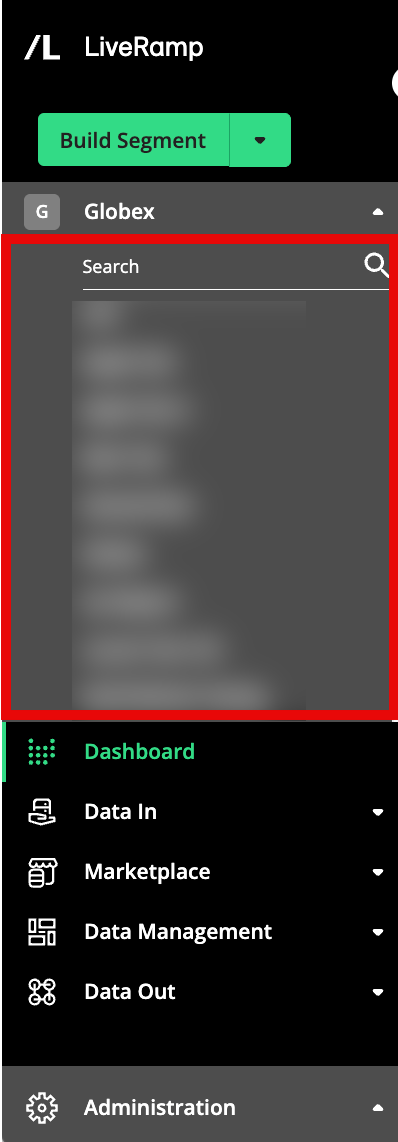
To switch between your client accounts, click anywhere in the account switcher area and then use the account dropdown list to change from one account to another. If you have a large number of accounts, you can also use the search bar to locate the desired account.
For Data Marketplace distributions to Facebook, you will need to add LiveRamp as a partner in Facebook with "View performance" access (if you're an agency, your client will need to perform these steps). This is a one-time step to enable automated usage reporting and needs to be done for each Facebook Ad Account.
Caution
When following the steps in "Add LiveRamp as a Partner" below, disregard the information on distributing first-party data (you do not need to add LiveRamp as a partner with the ability to manage campaigns).
Activate any necessary Data Marketplace destination accounts for the Advertiser Direct destinations you want to distribute to.
Note
Most Advertiser Direct destinations require that an authorization using OAuth be performed by a user with the appropriate permission level before any distributions can be made to that destination. If you're an agency, make sure that your client has given you the required permissions to perform OAuth. See "Activate a Destination Account for OAuth Destinations" for more information.
If the Data Marketplace destination integration tile for the desired destination is greyed out, either confirm with your Customer Success Manager that you have been enabled for Advertiser Direct or create a support case.
To distribute standard segments, browse and request Data Marketplace segments from the Data Marketplace Segments page, using the Platform dropdown to filter for the destination platform you want to send the segments to.
Tip
If you aren't finding the segments that fit your needs, LiveRamp's Audience Solutions team can help match you with the data sellers that are best suited to your goals, across diverse data sets like demo, location, behavior, and more. Click in Connect to contact us or email the Audience Solutions team at DataMarketplace@liveramp.com to get started.
To distribute custom segments from a specific data seller, use the Allowlist for Data Marketplace Custom Segment Sharing quick case to create a support case to request being added to the data seller's allowlist for custom segments. Include the data seller name and your account ID (the 6-digit number that appears after "customer_id=" in the Connect URL).
If you're an agency, include the account ID for the client account (the 6-digit number that appears after "customer_id=" in the Connect URL for that account).
Once you receive notification that the data seller has shared the custom segments to your account (via email and in Connect), the segments should appear on the Segment Distribution page in the destination accounts for the destinations they have been enabled for. See "Distribute Custom Segments to Data Buyers" for more information on custom segments.

Tip
Make sure that the data seller enables the specific social destination for the custom segment. Only custom segments that have been enabled for a particular destination will appear in the destination account for that destination.
Distribute Data Marketplace segments to your desired destinations.
You should see your segments in the destination platform within 2-3 days. To check on the delivery status, see “View Delivery Status”. If your segments are not showing up on the platform, see “Troubleshoot Distributions to Destination Accounts”.
Note
When activating Advertiser Direct segments at destination platforms, keep the pricing guidelines listed in the "Pricing Information for Advertiser Direct Segments" section below in mind.
If you're distributing to LinkedIn, Pinterest, or Snapchat, report usage on a monthly basis (usage reporting for X and Facebook is automated).
See the sections below for more information on performing these steps and see "Buying Segment Data from the Data Marketplace" for additional details on buying Data Marketplace segments.
Note
When creating support cases, make sure to create the cases at the parent account level, and reference the appropriate reseller client account.
Pricing Information for Advertiser Direct Segments
When activating Advertiser Direct segments at destination platforms, keep the following pricing guidelines in mind:
You pay based on data usage once the segments have been activated at the destination platform. You are not charged for distributing the segments to the destination platforms.
If you are using multiple segments that are priced differently in the same audience or group at the destination platform (such as within one ad group or ad set, depending on the platform’s terminology), the price for the highest-priced segment that each consumer matches to will be applied to the impressions for that consumer (no matter what pricing model the platform uses). For example, if you are using segment A that is priced at 250% PoM and another segment B that is priced at 15% in the same audience or group, the 250% would apply toward the impressions for any consumers who were included in segment A.
For purposes of exclusion audience usage, you shall report and pay to LiveRamp the applicable fees for the actual targeted audience remaining and served ads after the excluded individuals have been suppressed from the target audience.
Try to limit segments or audiences used in an ad group or ad set from LiveRamp only. If other data sources outside LiveRamp are used, you will still be billed based on the total gross media spend, even if other data in addition to LiveRamp was used.
Create a Client Child Account
If you're an agency and want separate billing invoices for each client, create a client child account from within your parent account and then notify your LiveRamp account team:
Note
Only users with “Admin” level permissions can add client child accounts: Contact your LiveRamp representative if you need your permission level changed.
For agencies whose advertisers will be distributing Data Marketplace data to Facebook: If you will be distributing all data to your own Facebook account, you will need your own LiveRamp agreement and Facebook audience sharing relationship with LiveRamp. Since you will be distributing data through your own account, you do not need to create a new client in Connect.
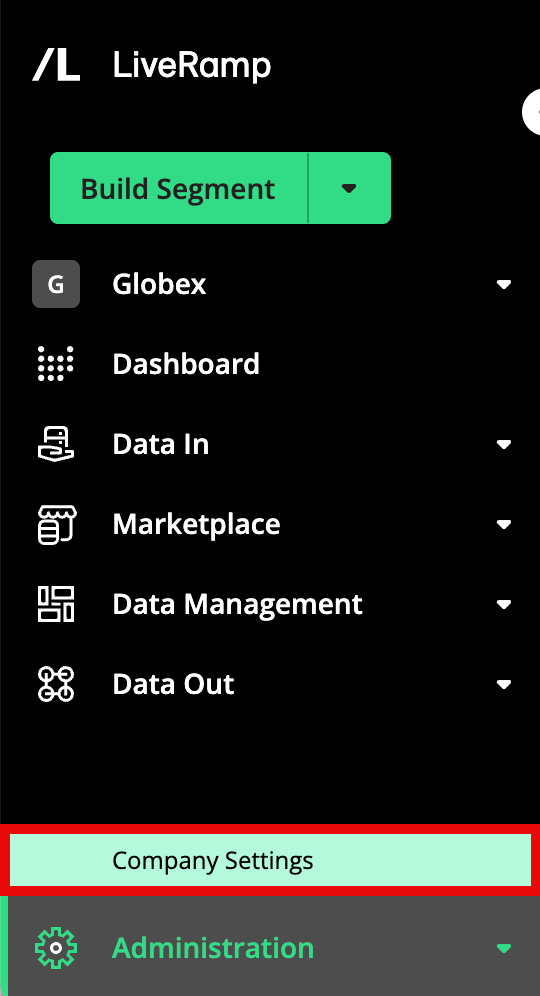
From the navigation menu, select Administration → Company Settings to navigate to the Company Settings page.
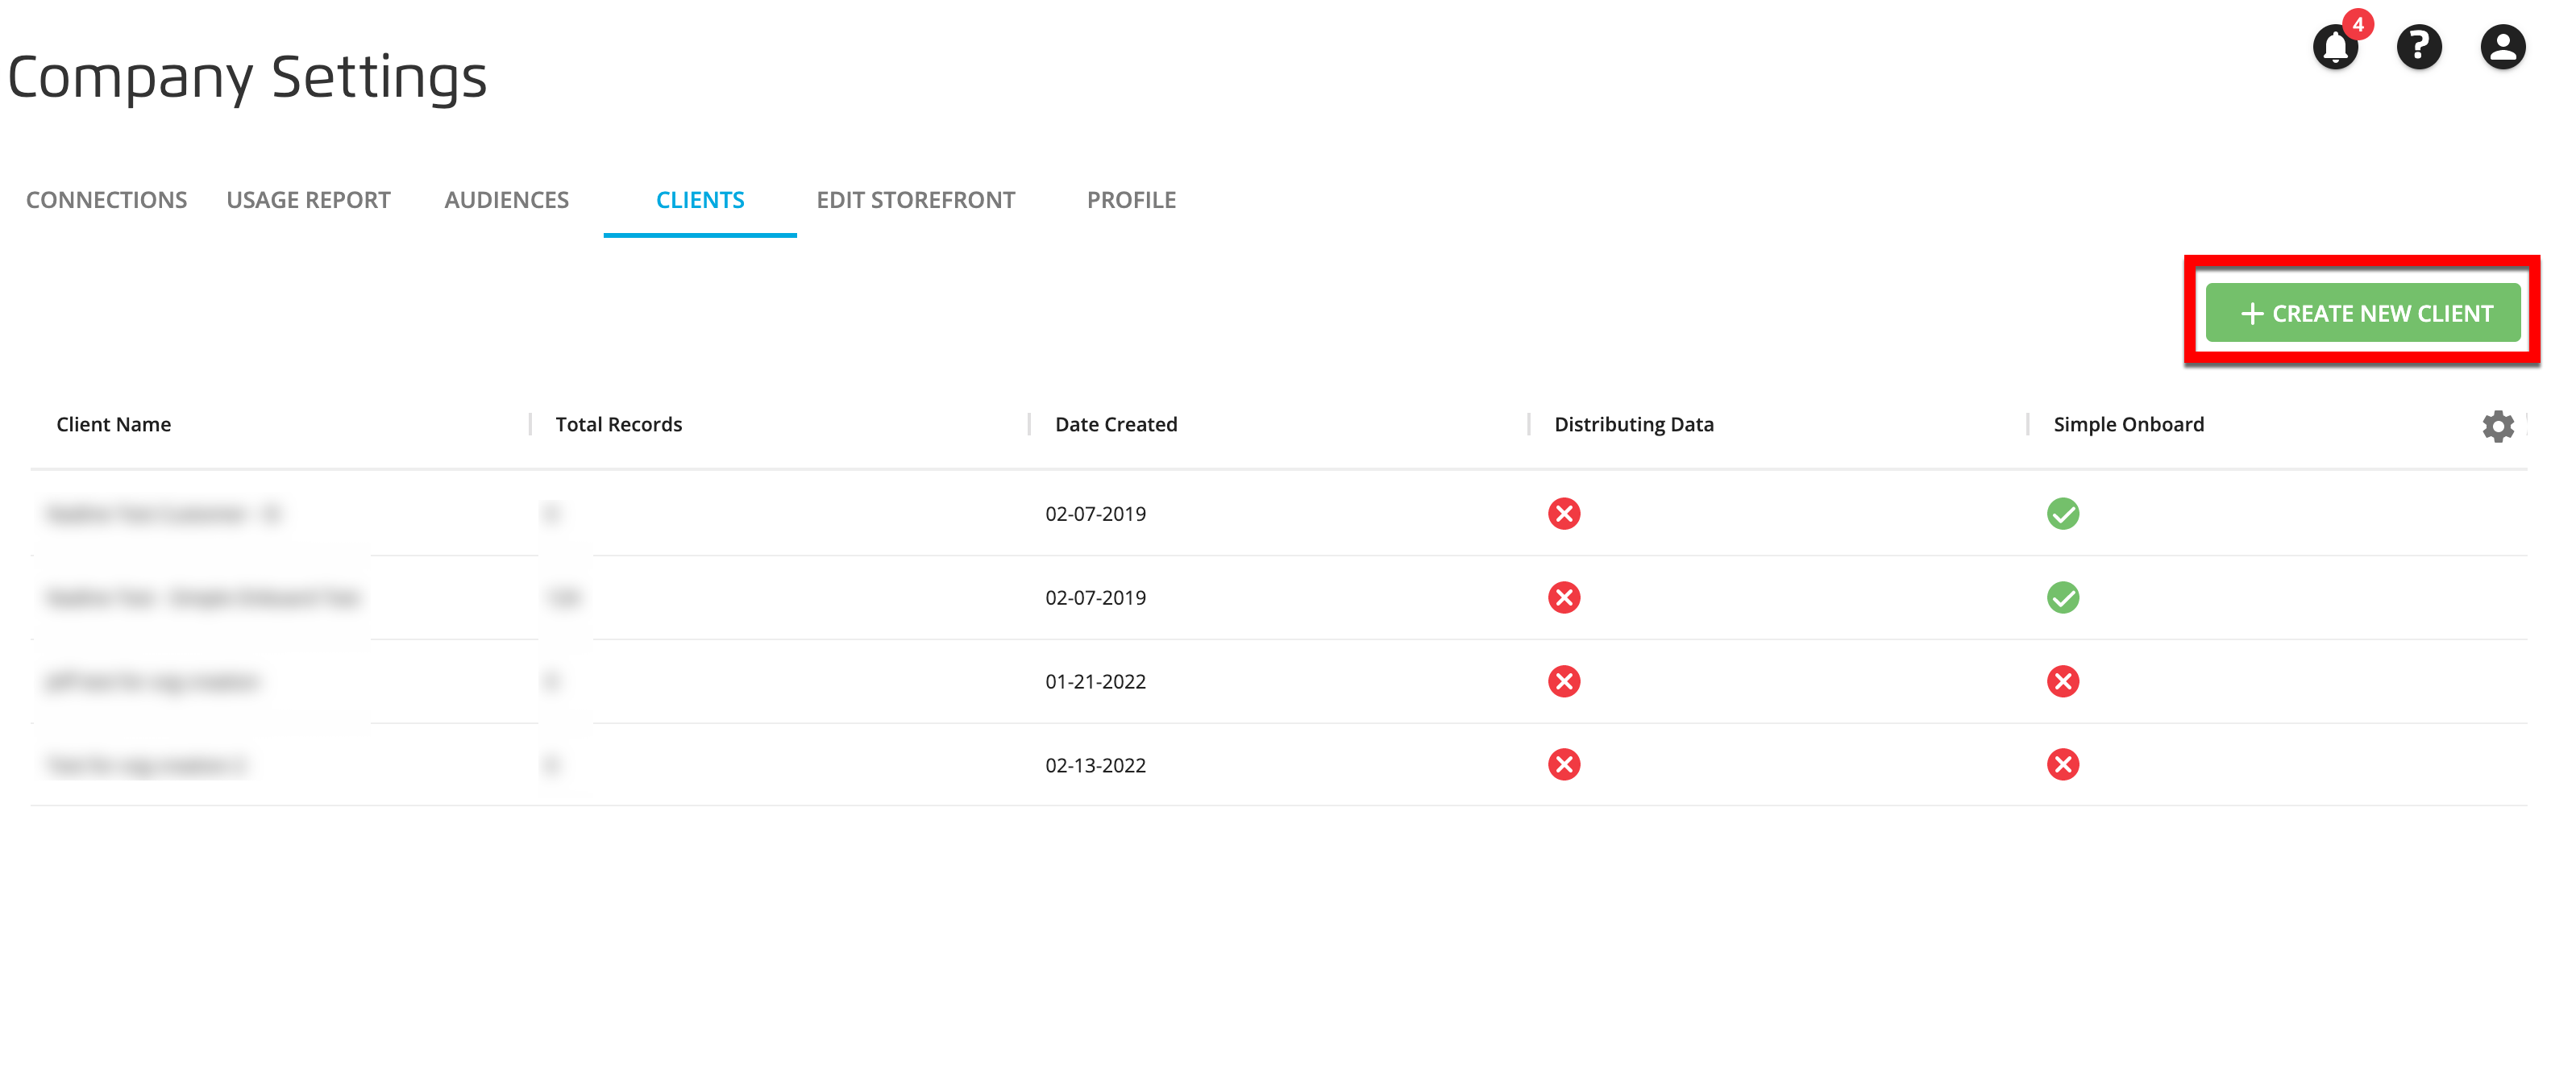
Select the Clients tab. This displays a summary of your current clients and their data.

Note
If the Clients tab is not available, contact your LiveRamp representative.
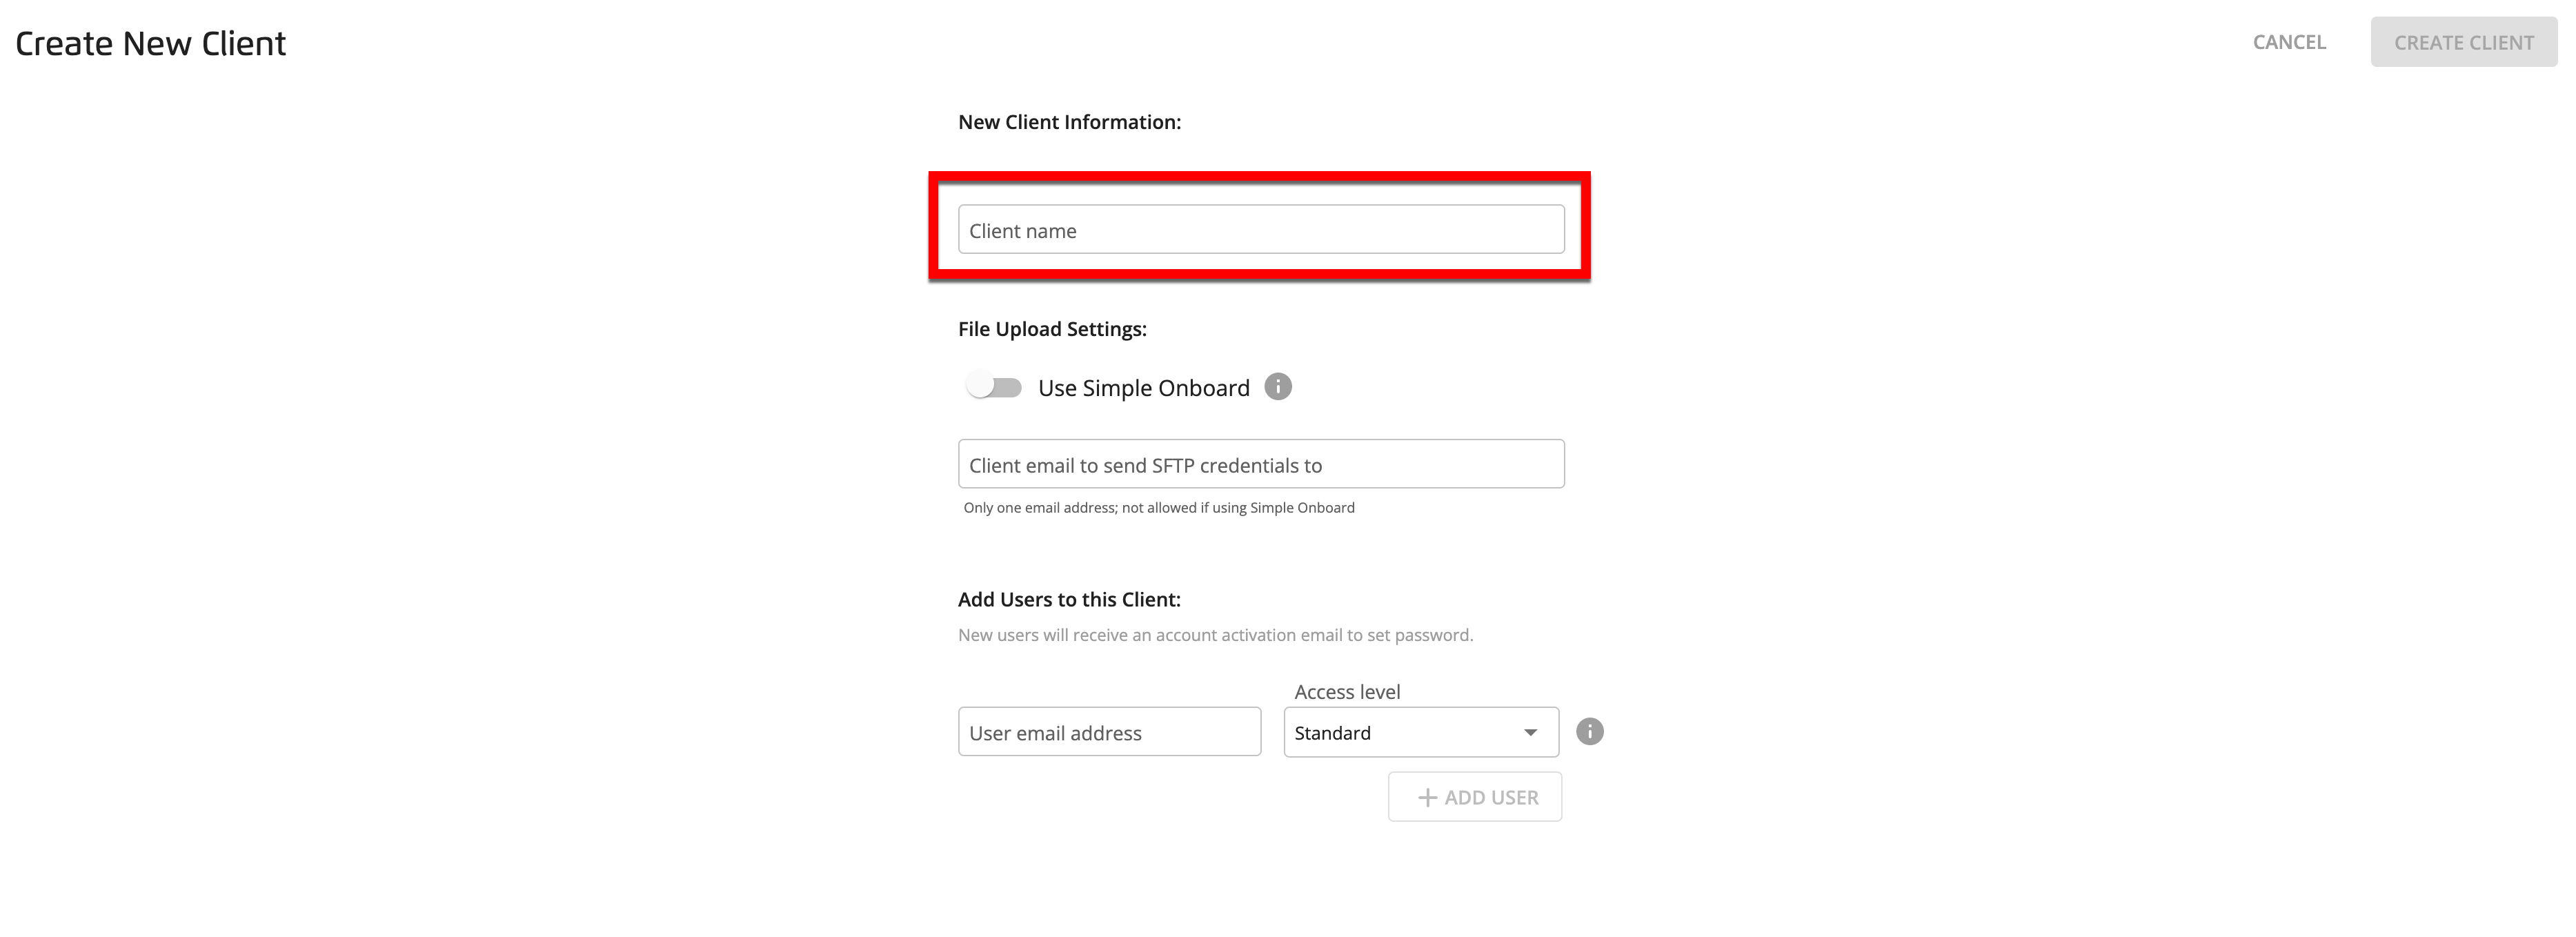
Click .
From the Create New Client window, enter the name for the new client in the "Client name" field in the following format: [Agency name] - [Customer name].
Add a user to this client by entering a user email address and then selecting the appropriate access permission level for the user:
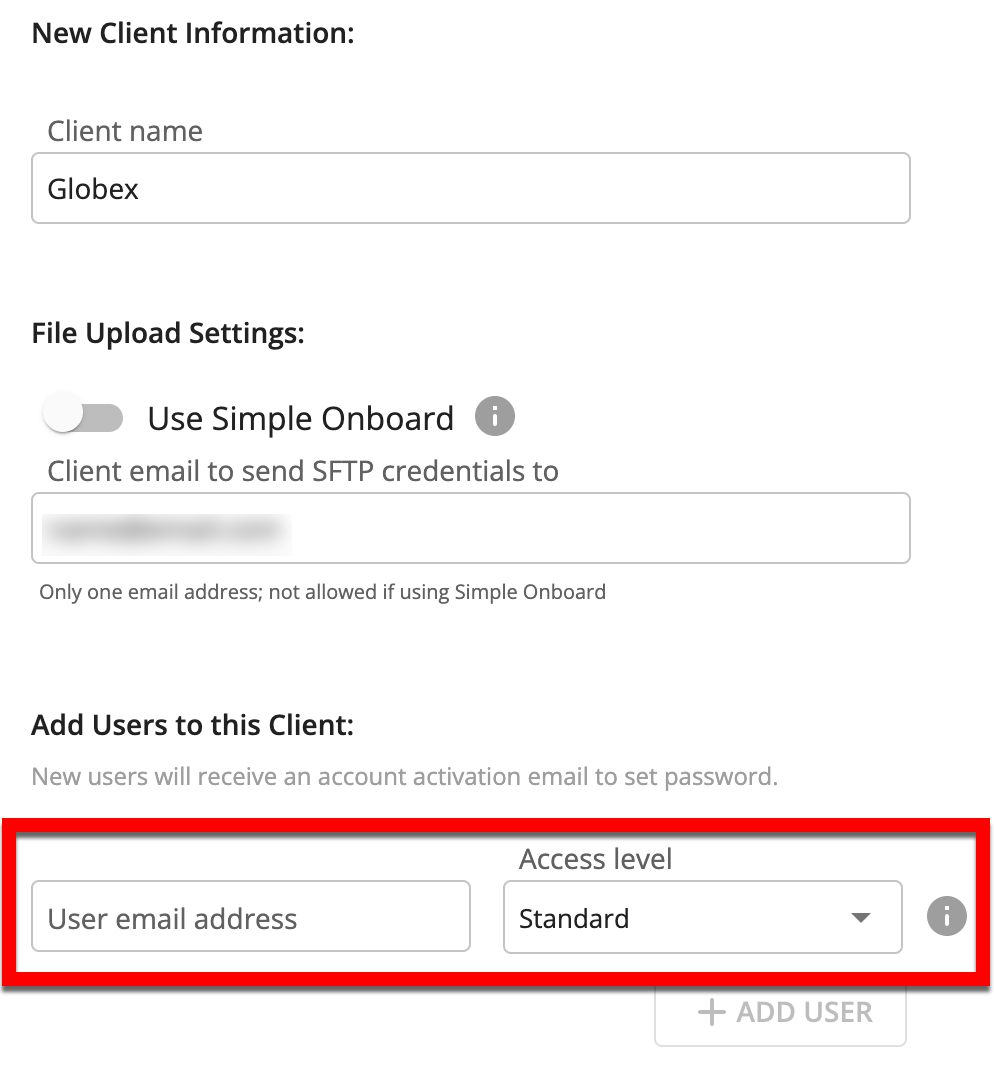
Select "Admin" for users who need to perform account management tasks, such as creating additional audiences, deleting audiences, and managing users.
Select "Standard" for users who do not need to perform account management tasks.
For more information on the capabilities available for each access permission level, see "Roles and Restrictions for Connect Users".
Note
Creating reseller client audiences: An audience will need to be created for this reseller client account. You can do that, or you can give one of the reseller client users the ability to create audiences by giving them Admin-level permissions.
Click to finish the process of adding the user.
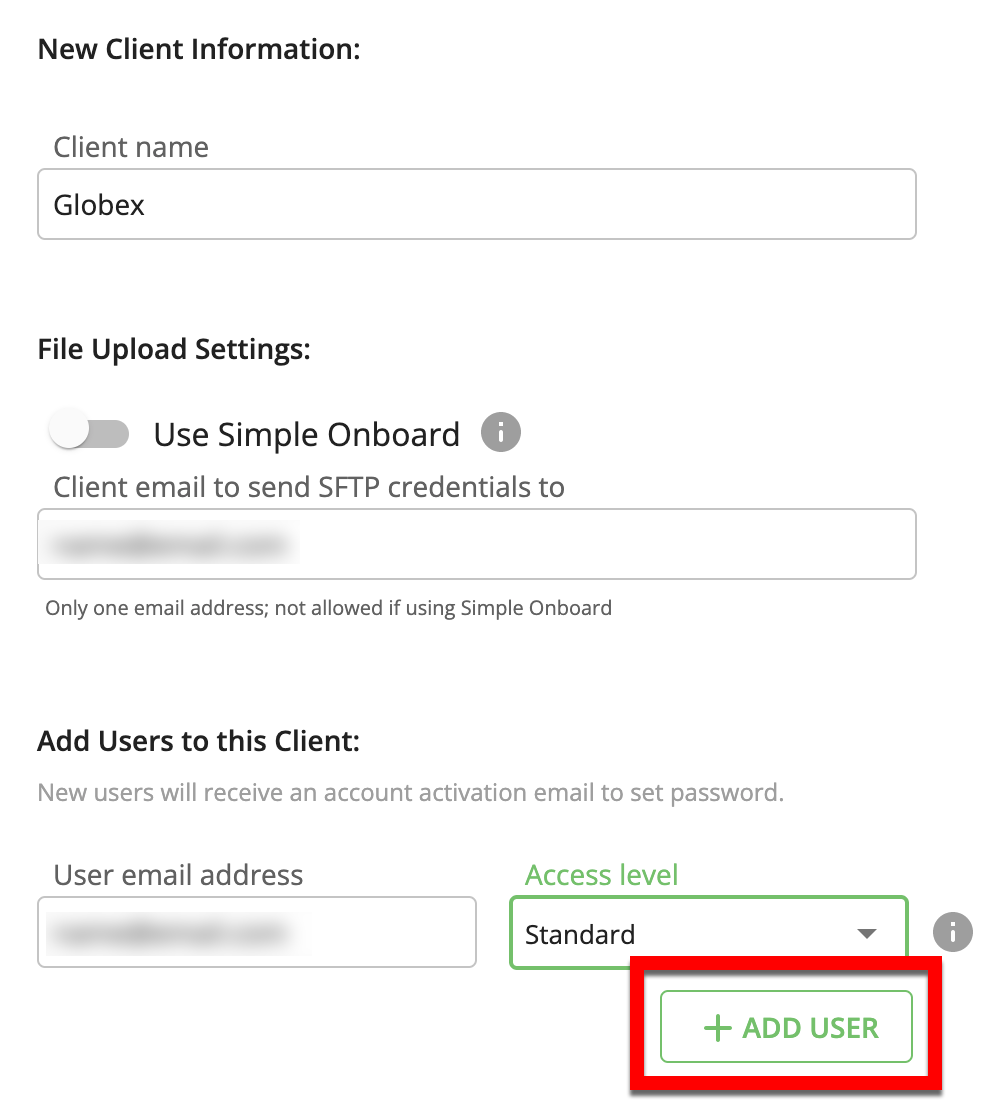
To add additional users, repeat the previous two steps.
Note
You don't need to add yourself as a user: You automatically have access to your client accounts, so you don’t have to add yourself as a user.
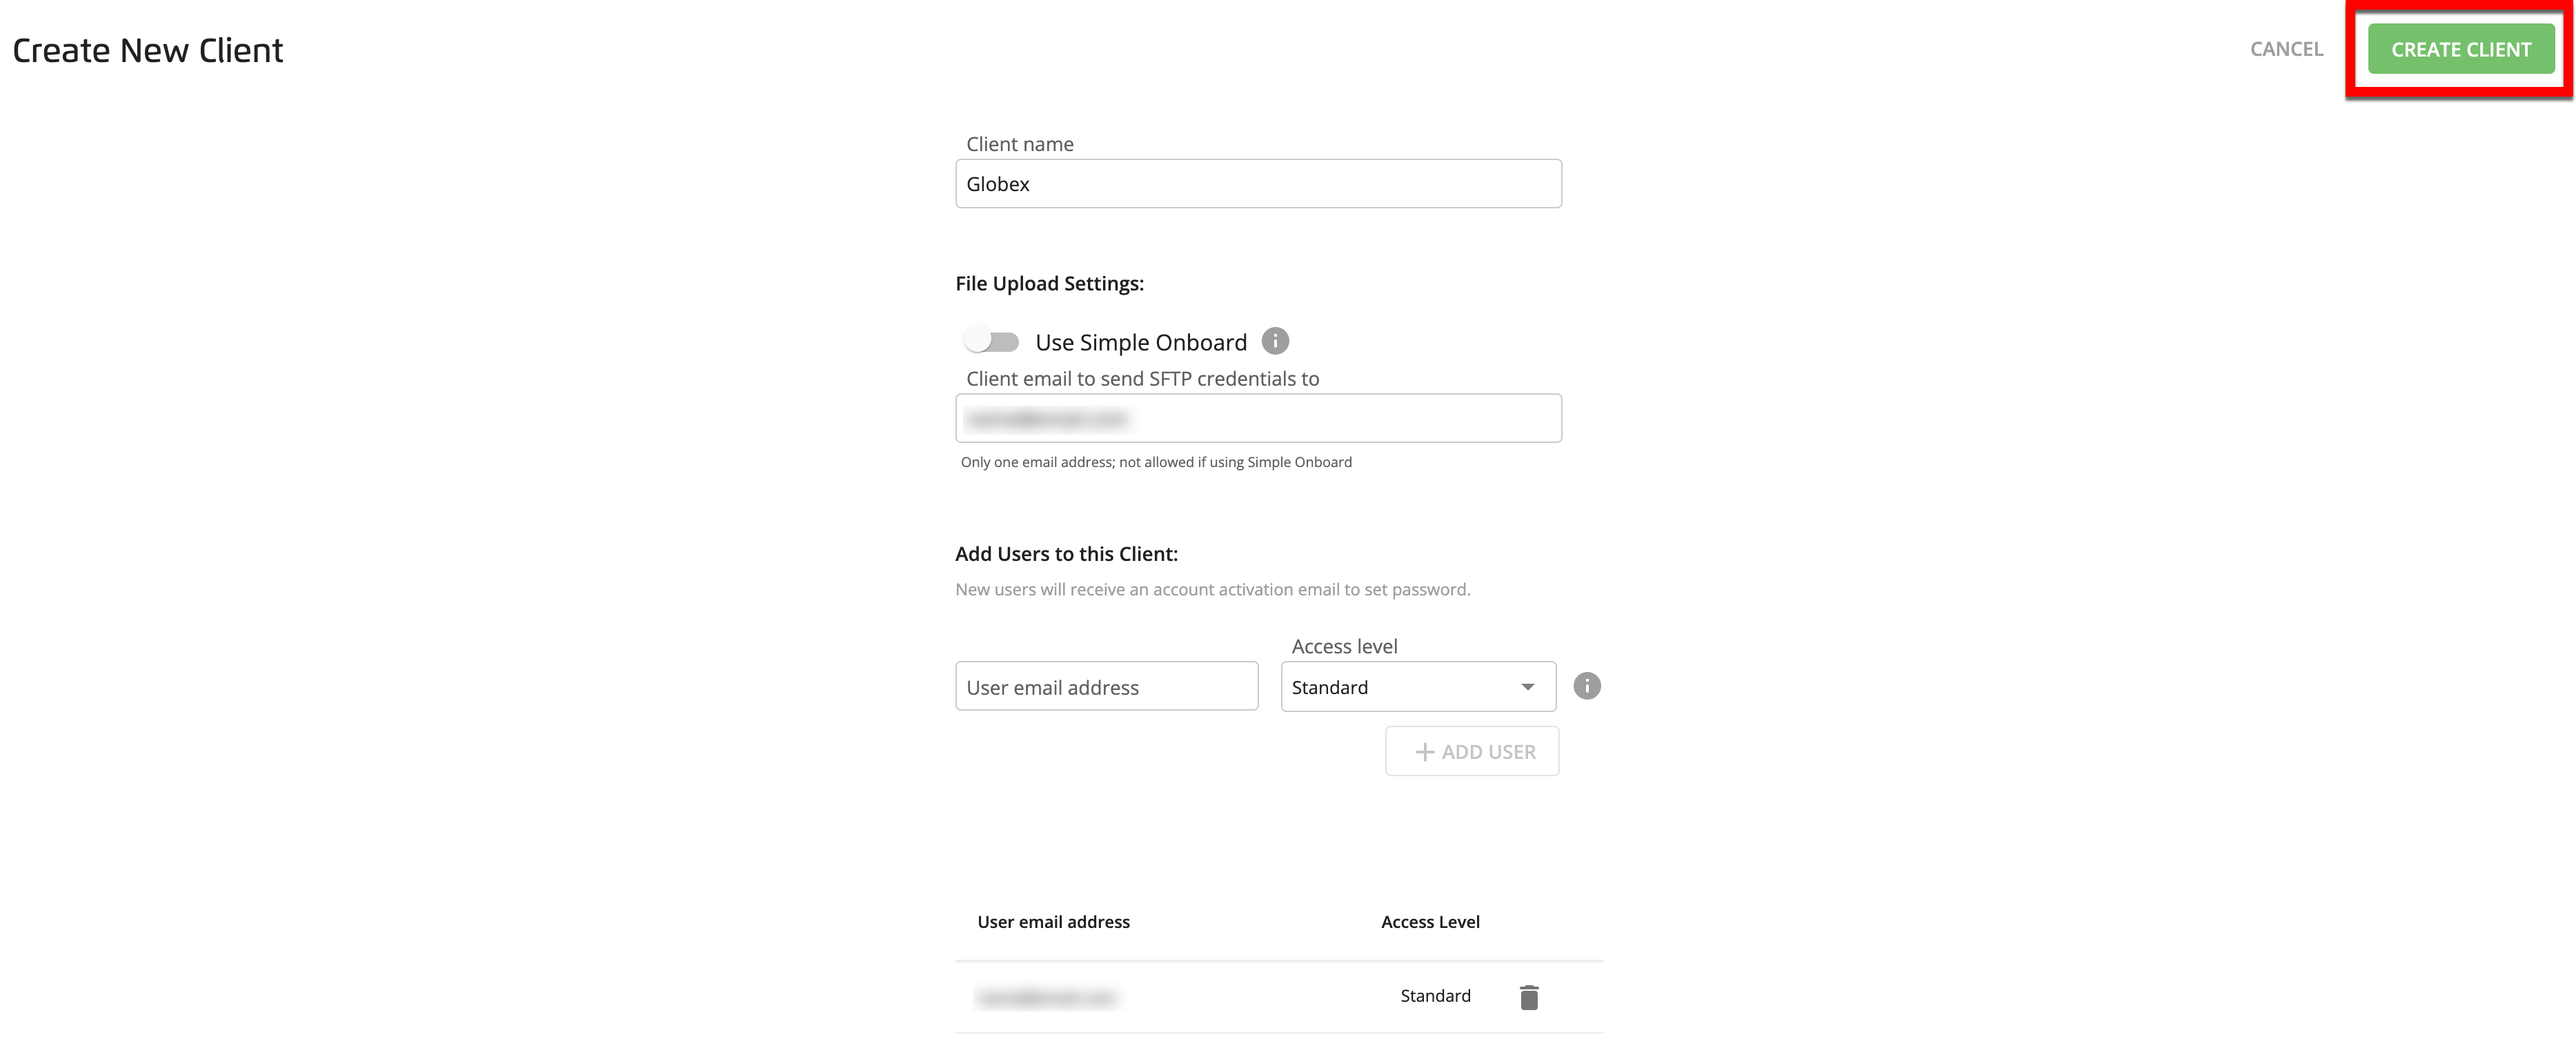
Click CREATE CLIENT.
Add Users to Your Company Account
Multiple users can be enabled so that each user can log into Connect with their own unique credentials. These users can view and manage every audience in your Connect account.
Note
The Accounts page is currently being rolled out to all users in phases. If you have an admin-level role and do not see the Accounts page in your Connect UI, you can add users through the Users tab on the Company Settings page. For instructions, see "Add Users to Your Company Account via Company Settings".
Note
LiveRamp Clean Room users are managed in a separate flow. They don't need to be added to Connect to gain access to your Clean Room organization. See "Managing Clean Room Users" to learn more.
To add a new user:
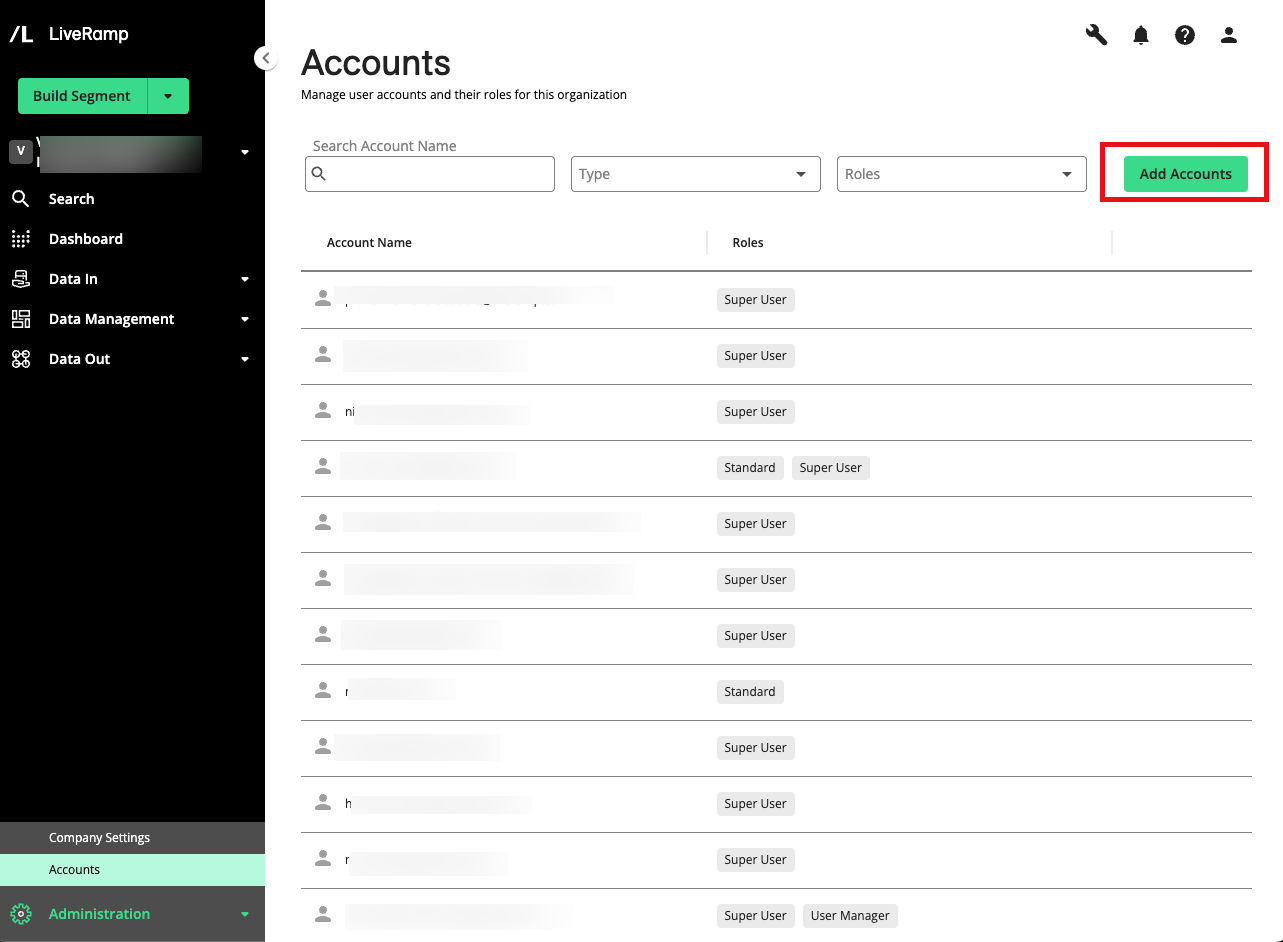
From the navigation menu, select Administration → Accounts to navigate to the Accounts page.

Caution
Only admins can add users. If you don't have admin permissions, you will not see the "Accounts" section on the navigation pane. Contact your LiveRamp representative if you believe you should have an admin role. LiveRamp recommends that only one person per company should be responsible for managing users in Connect.
Click .
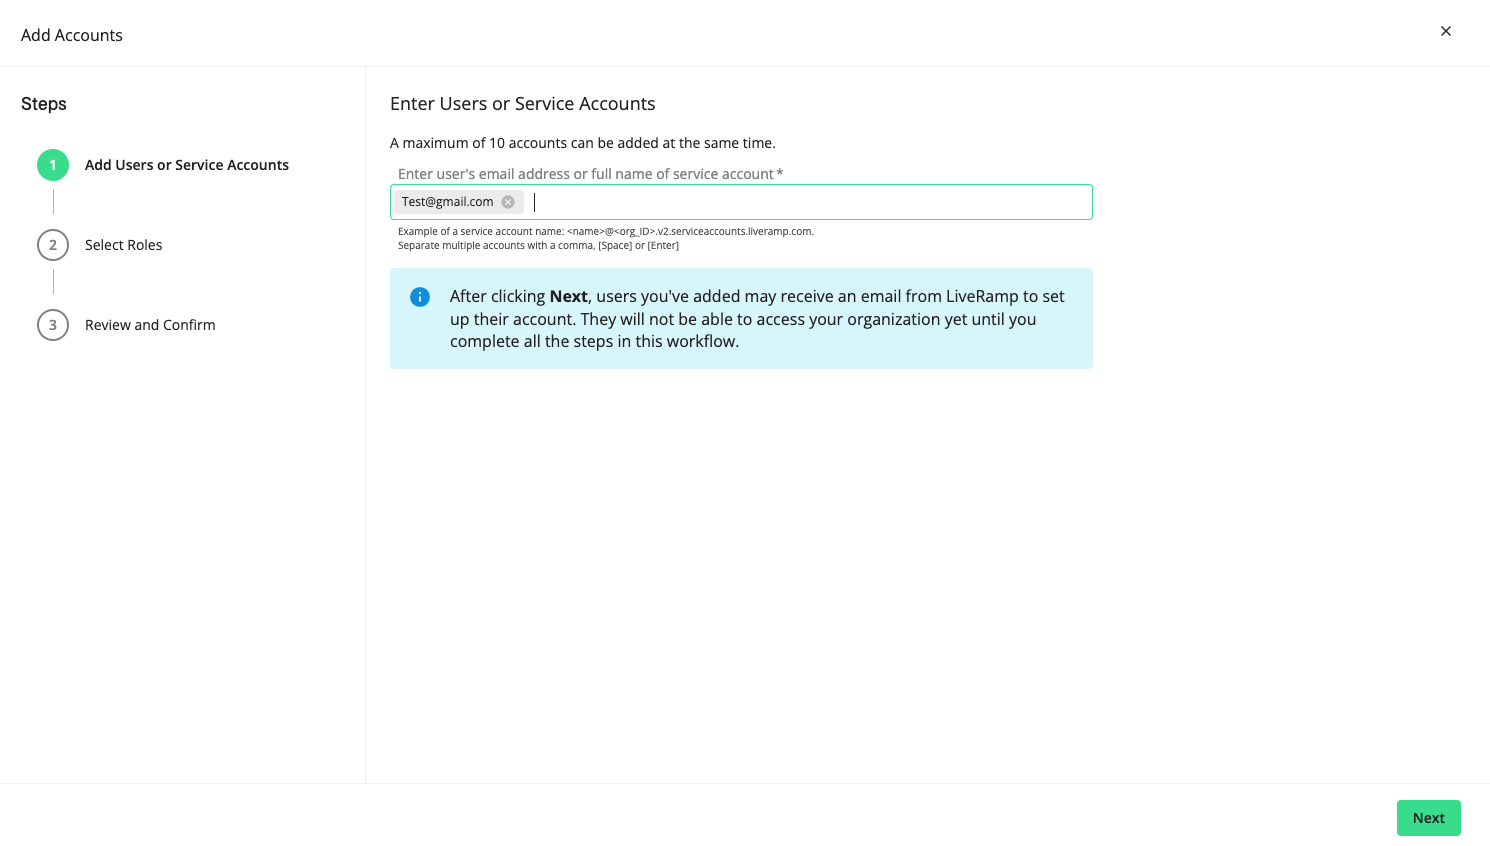
Enter the new user's email address and press Enter, Space, or comma on your keyboard. Enter another email address in the field if you'd like to add more users. Click .
Tip
You can add up to 10 users at the same time if they are granted the same role.
Select the desired role for the user, and click .
Note
Admin or standard role? LiveRamp recommends that each company have only one admin user. For a breakdown of the various capabilities each role has access to, see "Roles and Restrictions for Connect Users."
Review your selection, and click .
Caution
No aliases! Do not enter an email alias as the email address.
The user will receive an automated email to create credentials for Marketplace Essentials.
Caution
The link to create credentials for the new user will expire after 24 hours.
Add LiveRamp as a Partner
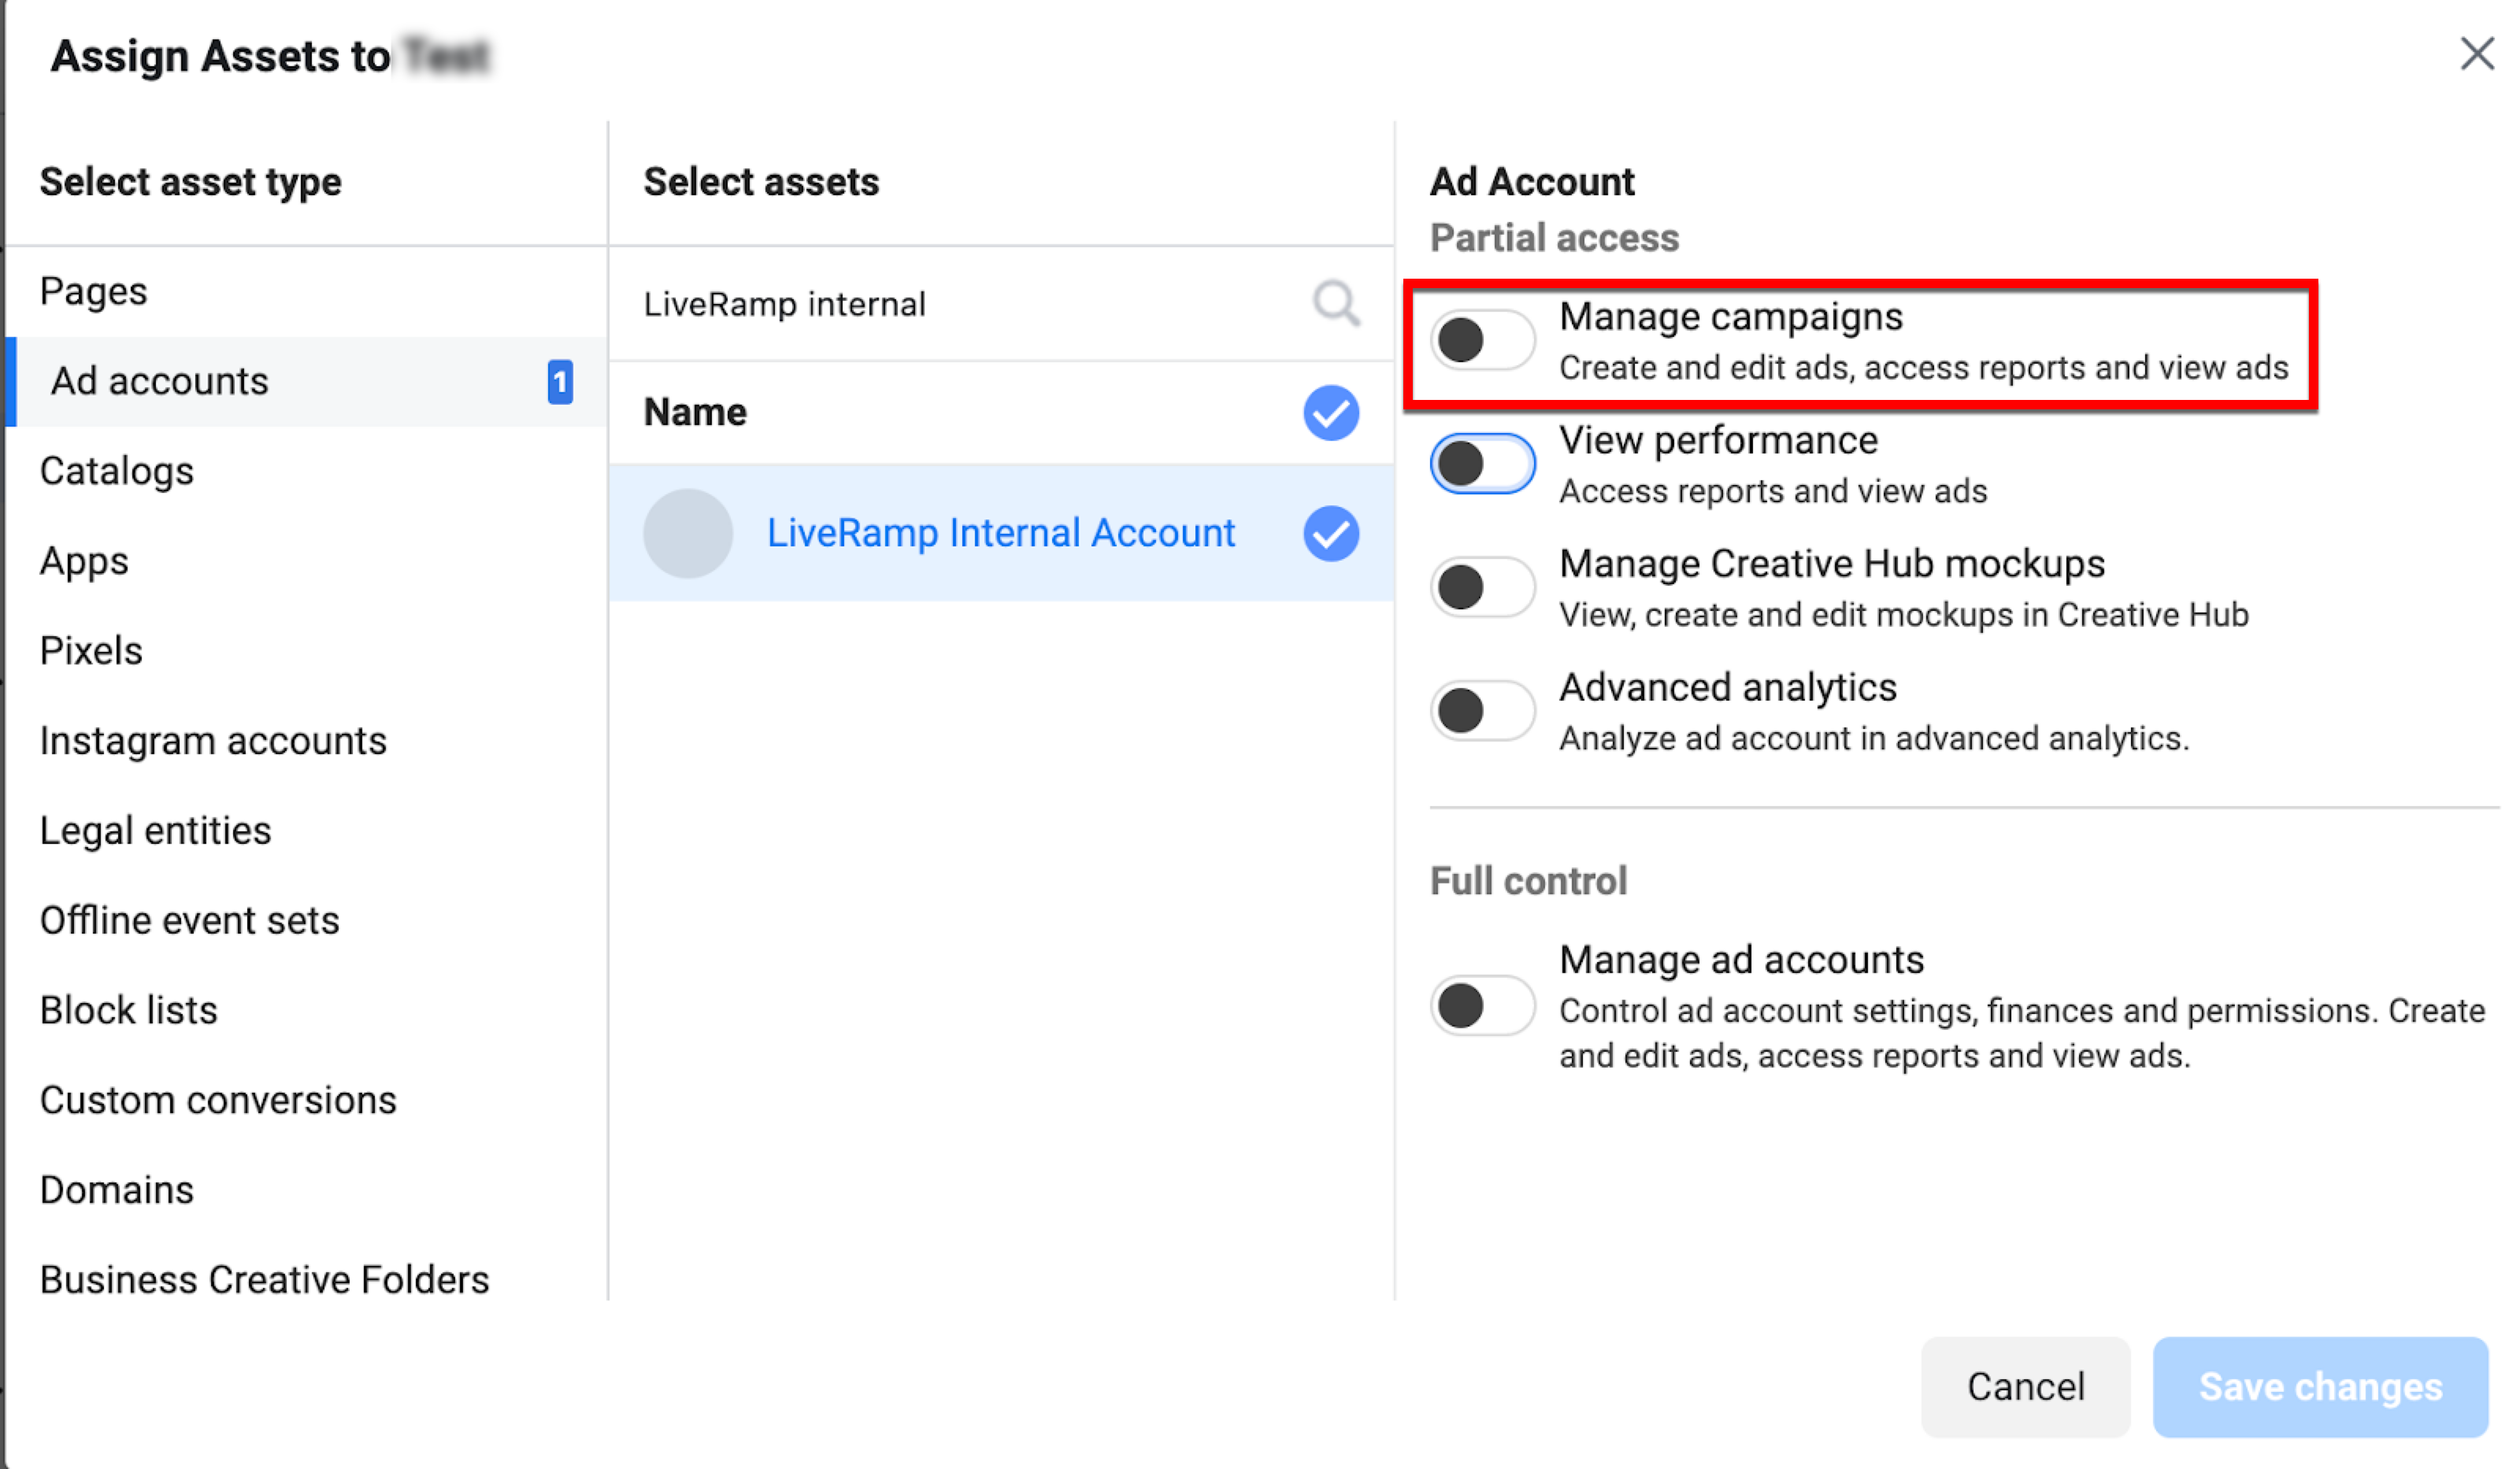
To distribute first-party U.S. data using LiveRamp's Direct Integration with Facebook, you need to add LiveRamp as a partner with "Manage campaigns" access within your Facebook Ad Accounts. This must be done before you activate a Facebook Direct destination account.
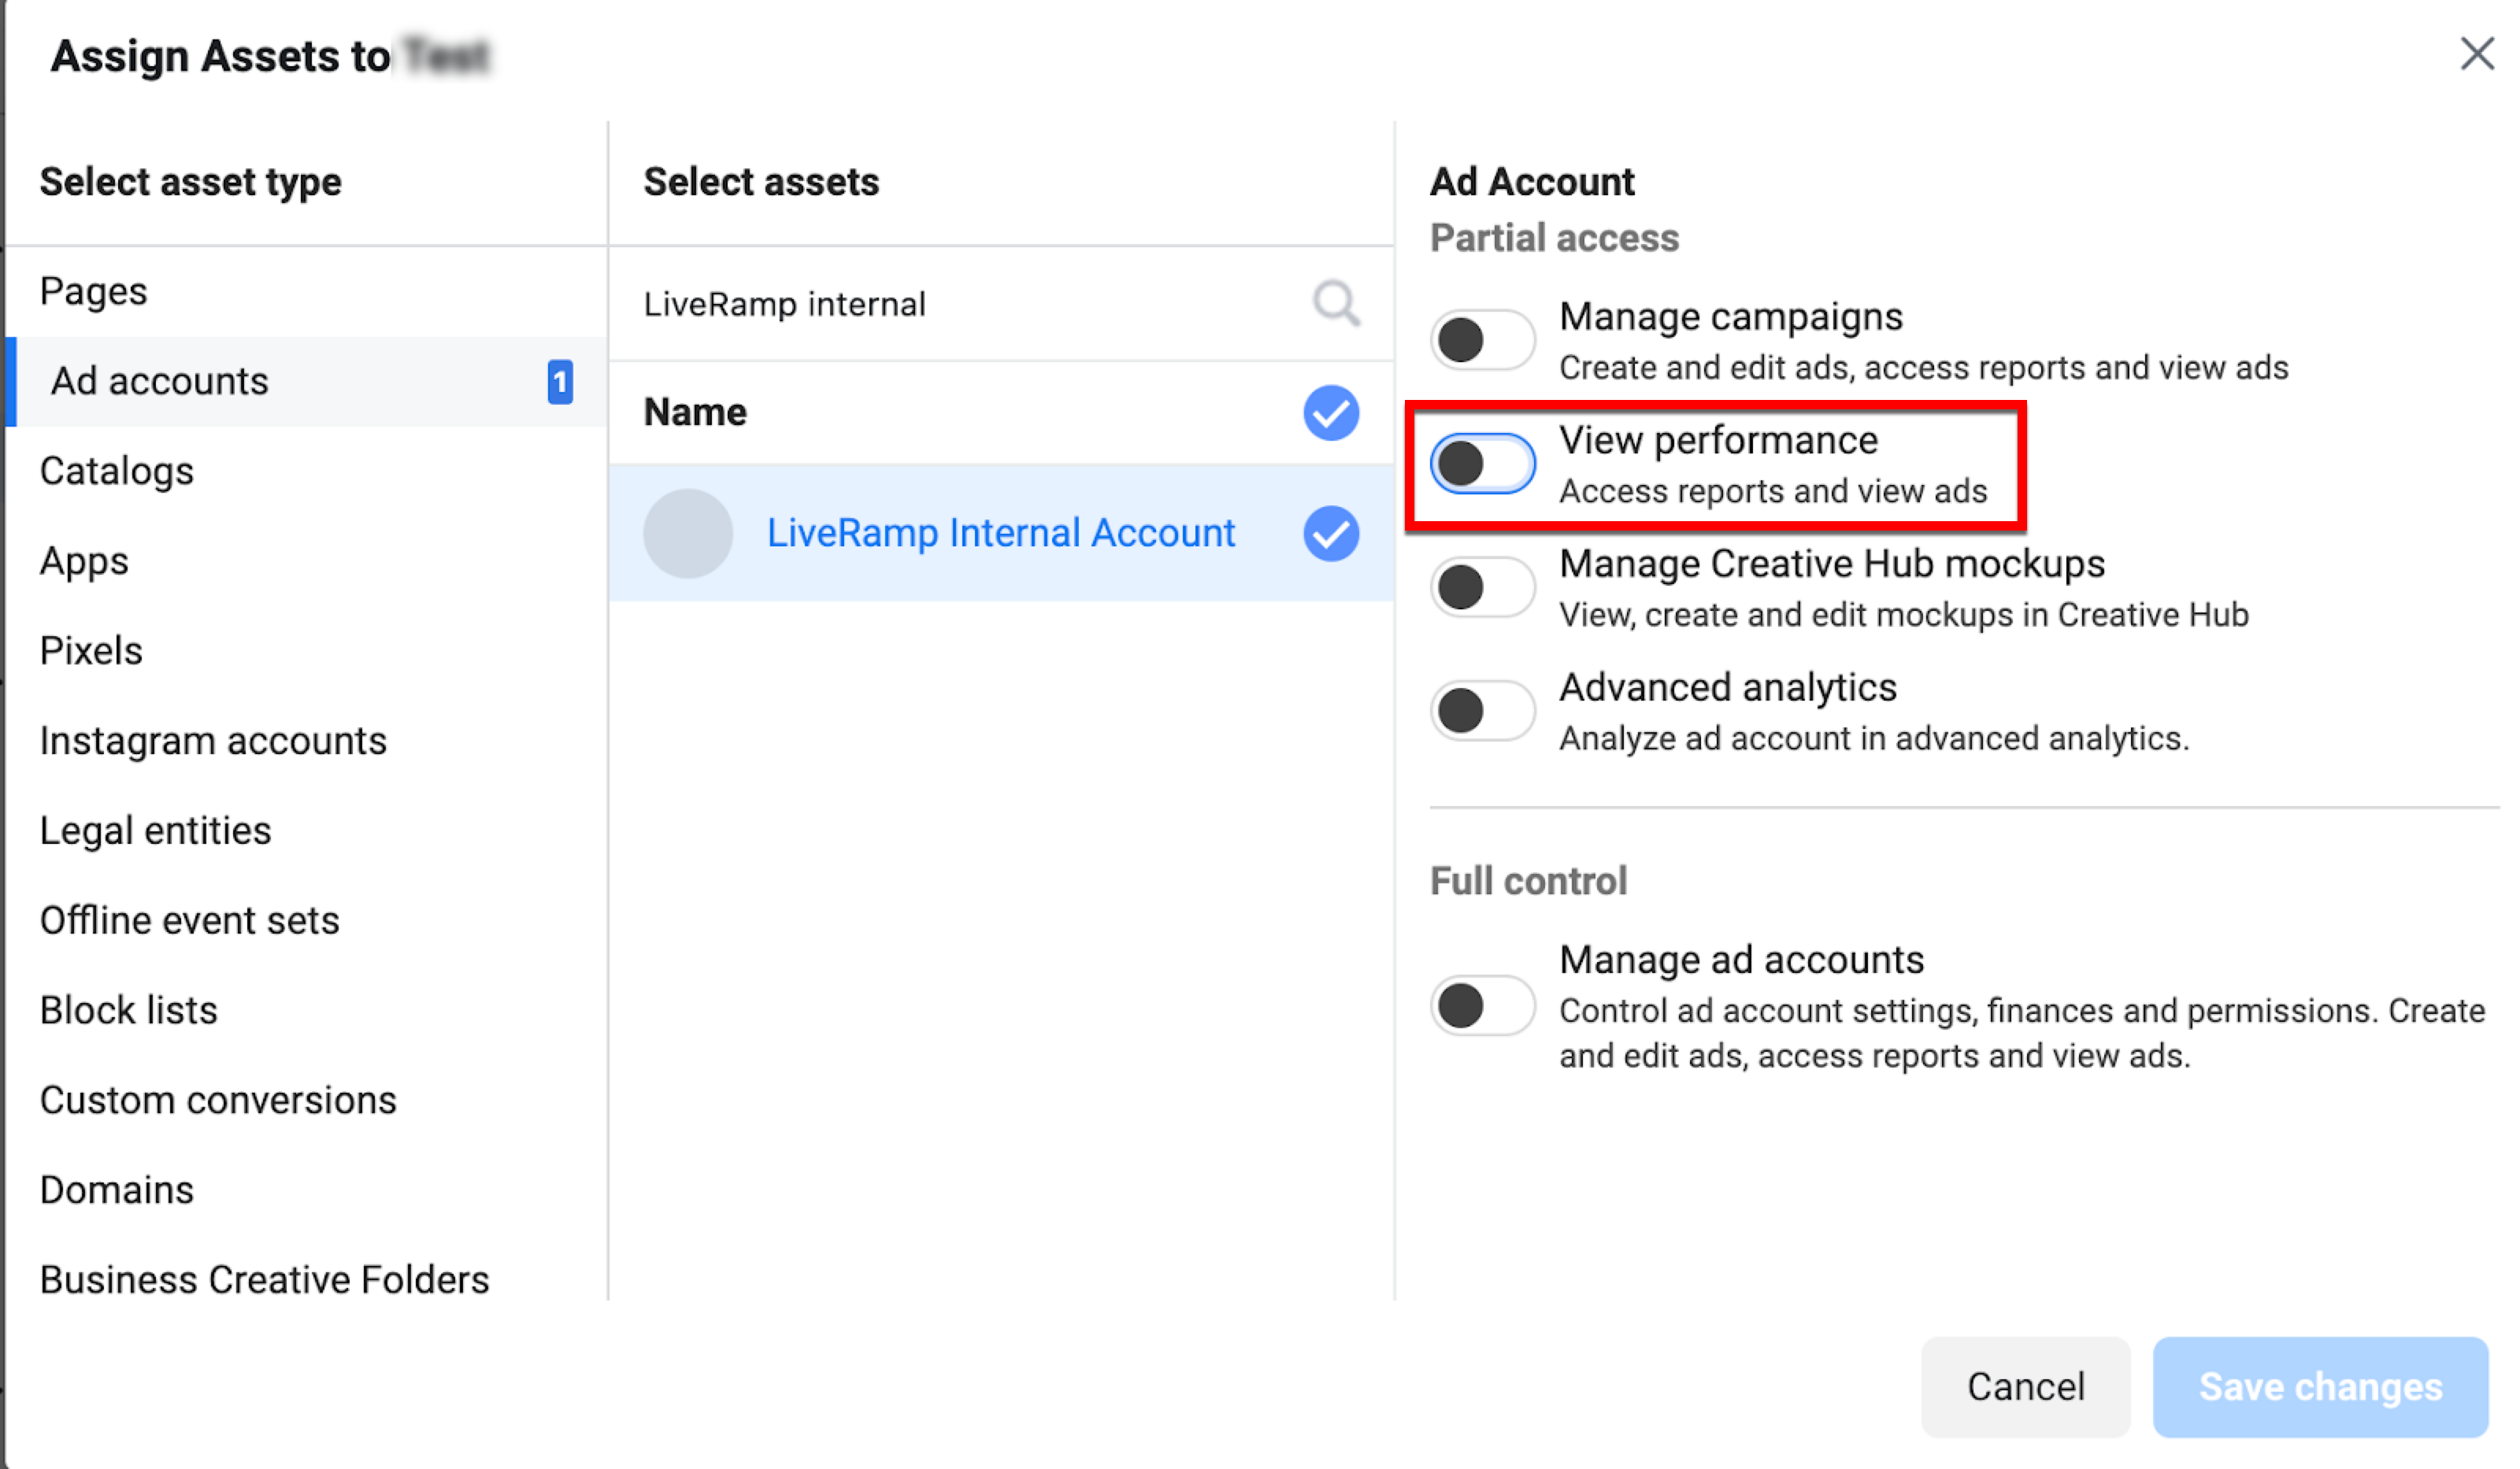
To distribute Data Marketplace data to Facebook, you need to add LiveRamp as a partner with "View performance" access within your Facebook Ad Accounts to enable automated usage reporting. This must be done before you activate a Facebook Data Marketplace destination account.
Note
If you try to activate a Facebook Direct First-Party Data or Facebook Data Marketplace destination account without first adding LiveRamp as a partner, you will not be able to activate the destination account.
Note
If you try to activate a Facebook Direct First-Party Data or Facebook Data Marketplace destination account without first adding LiveRamp as a partner, you will not be able to activate the destination account.
Data Marketplace distributions also include any distribution of lookalike segments created in Customer Profiles.
To add LiveRamp as a partner in Facebook:
Caution
These instructions were accurate at the time of publication, but are subject to change depending on future updates to Meta Business Manager.
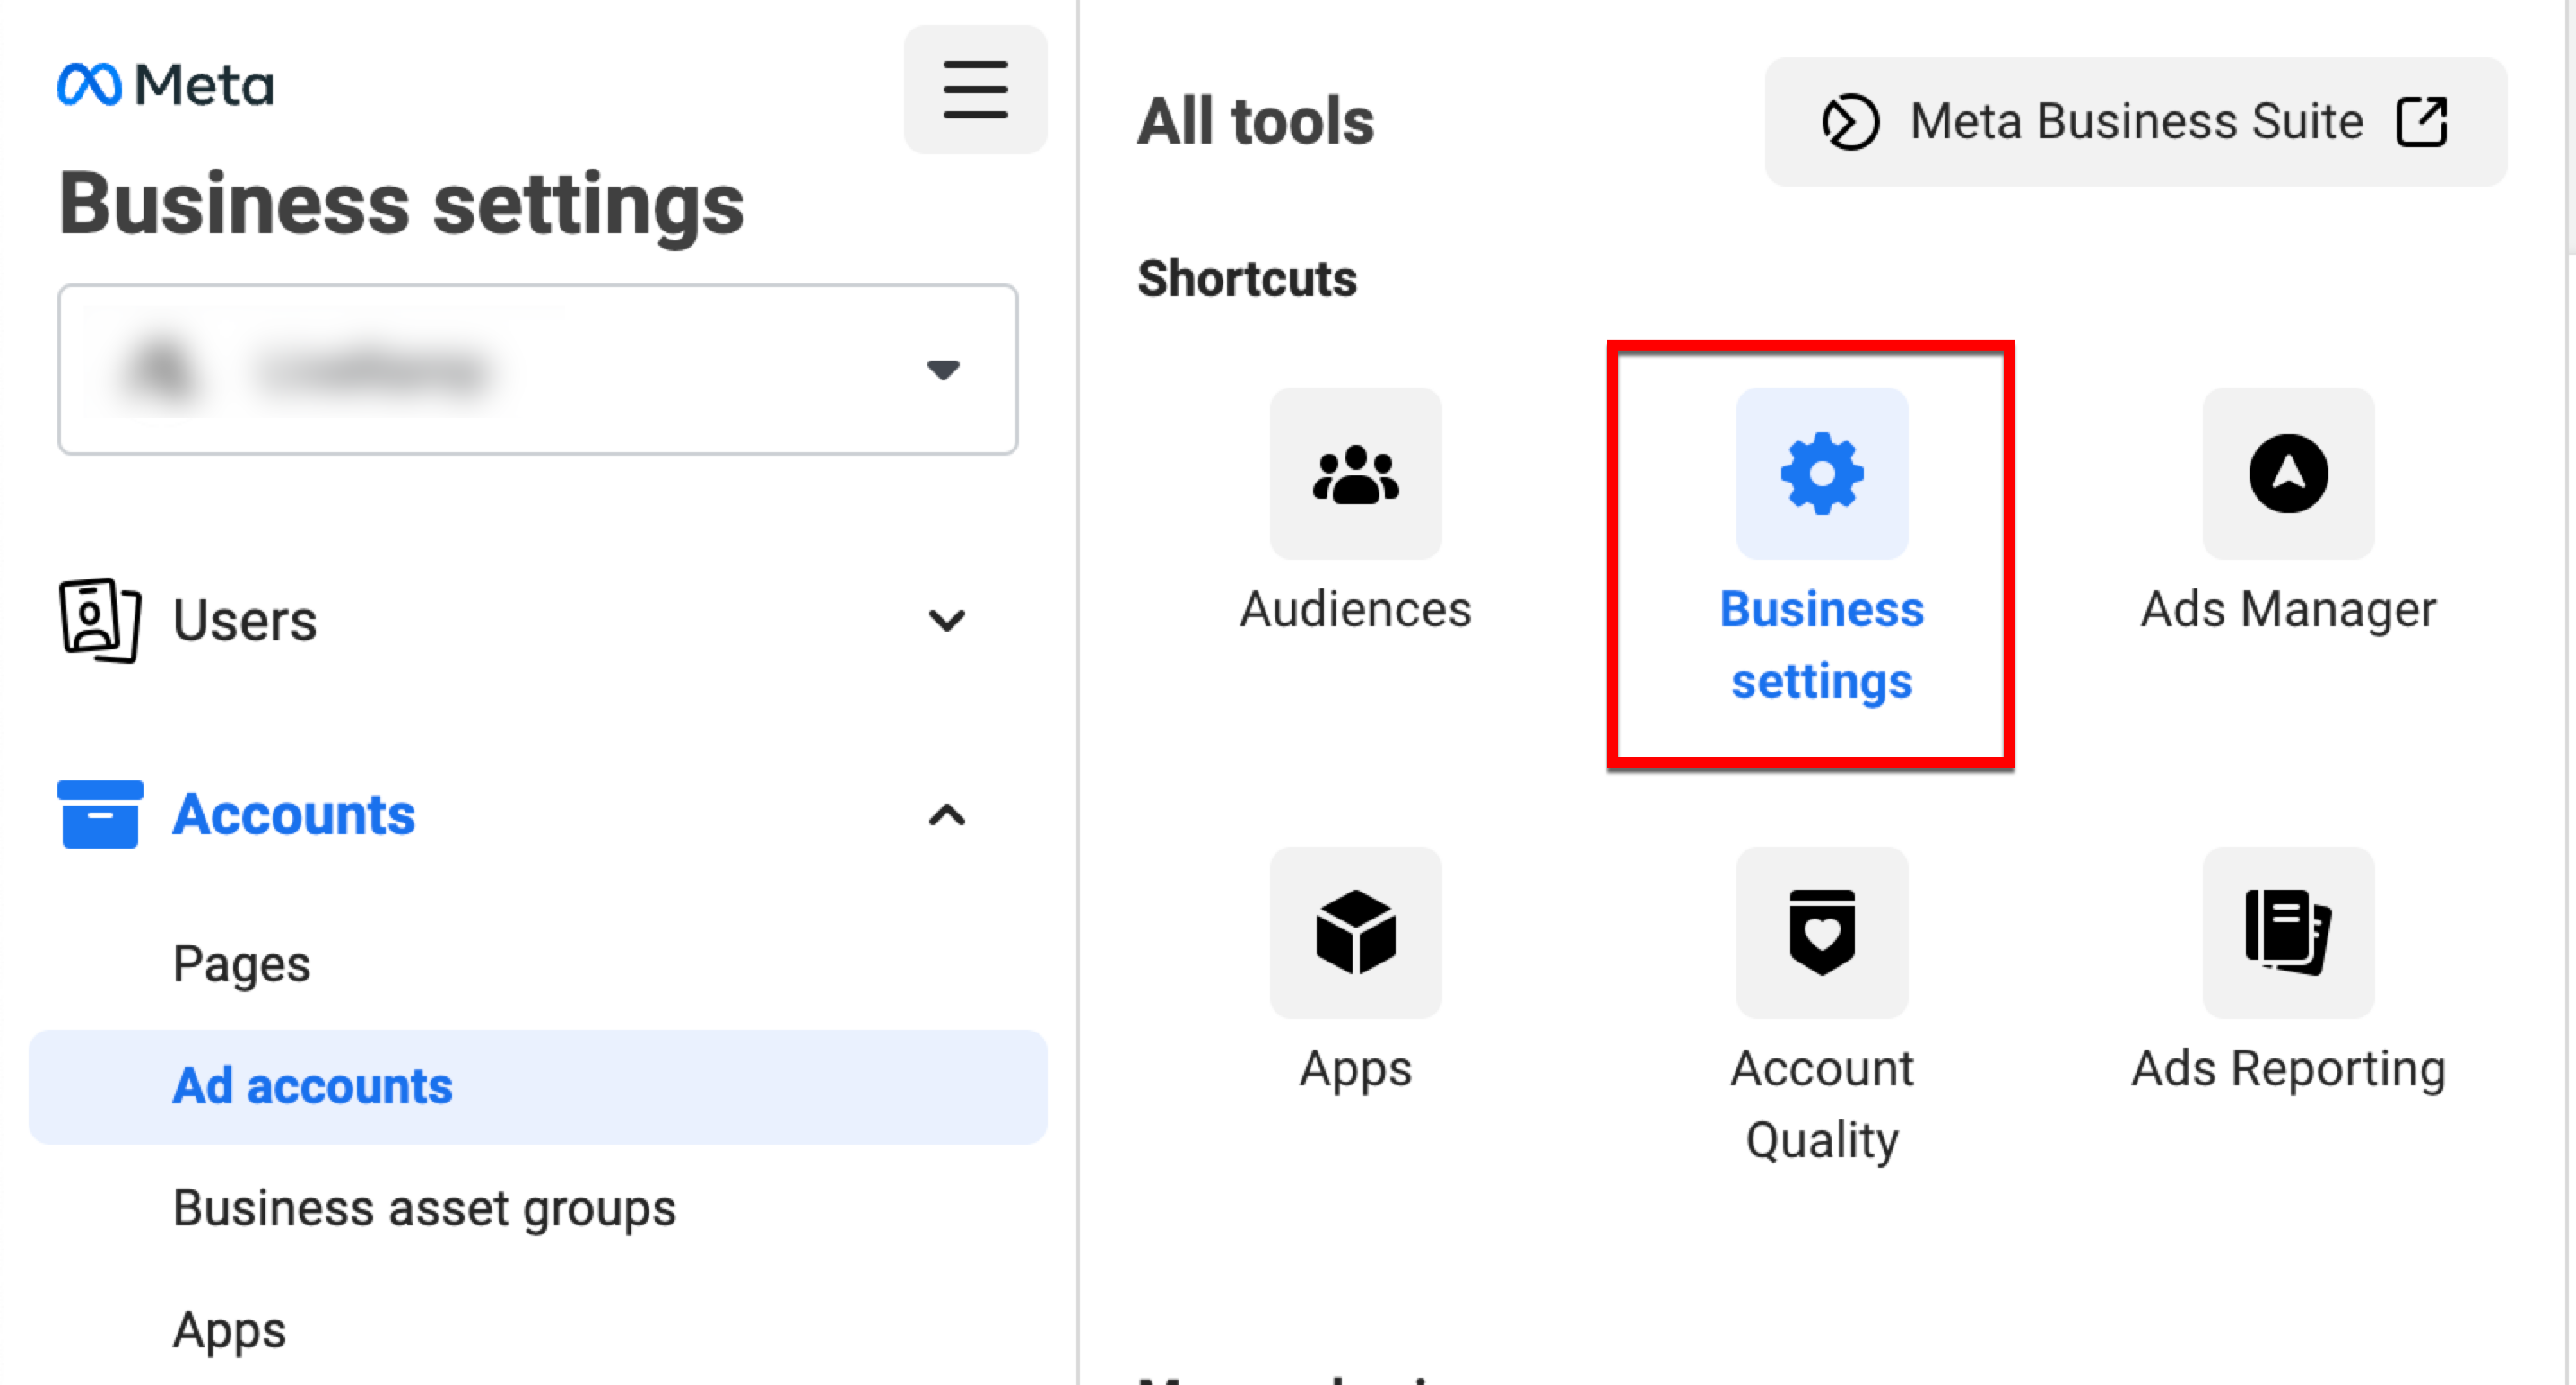
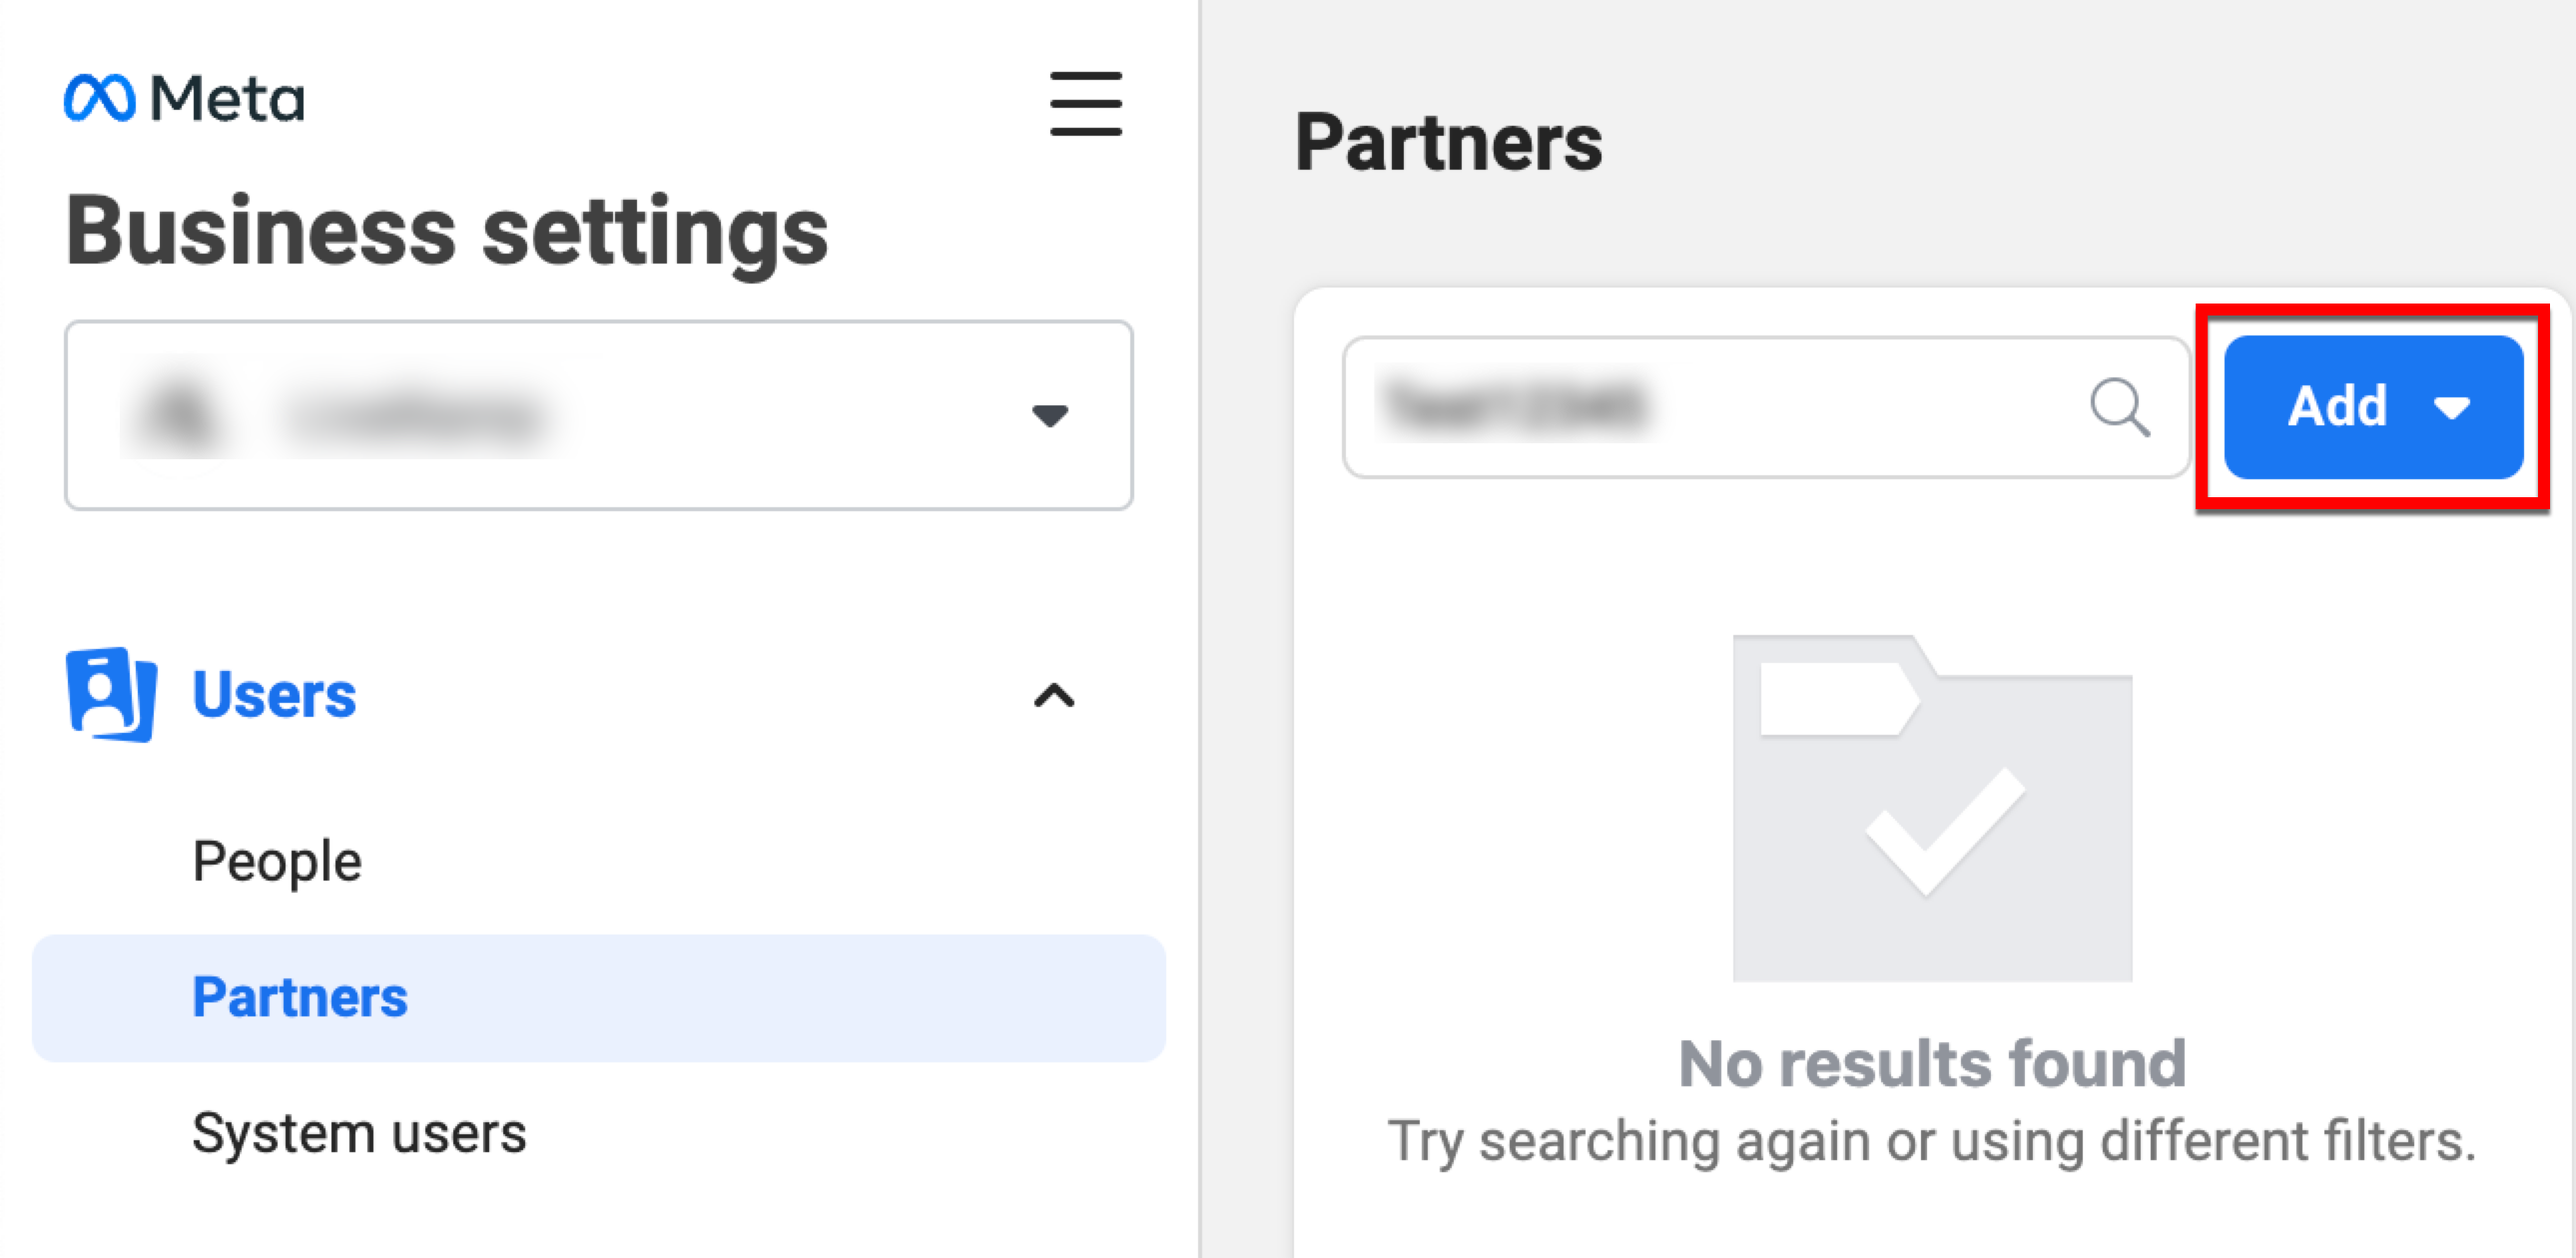
In Meta Business Suite and Manager, click Business Settings.
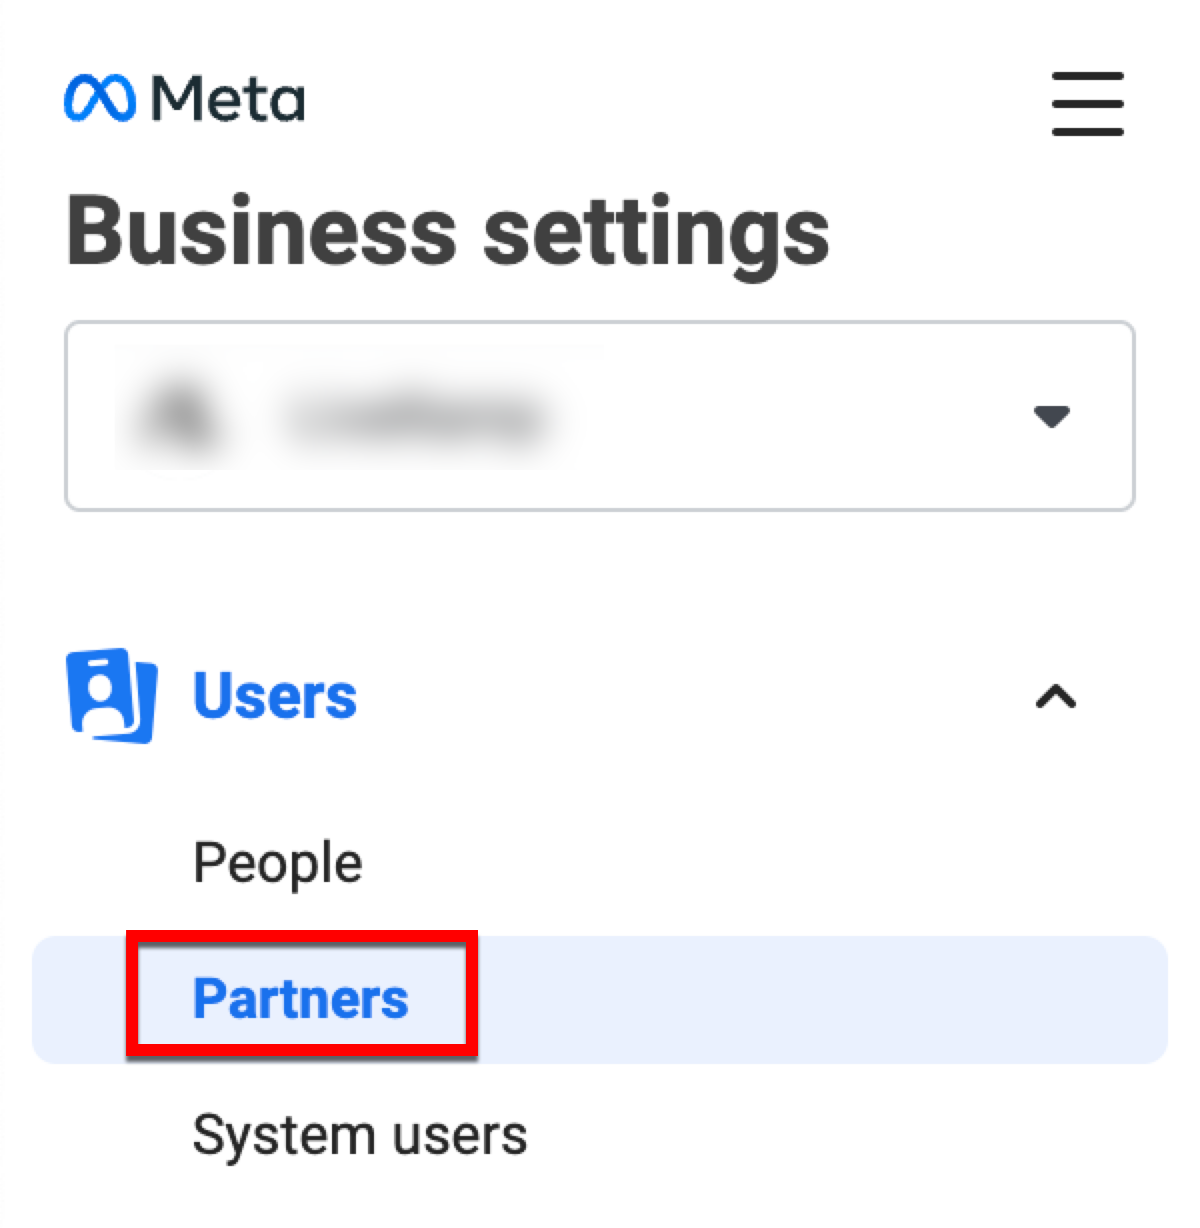
Click Partners.
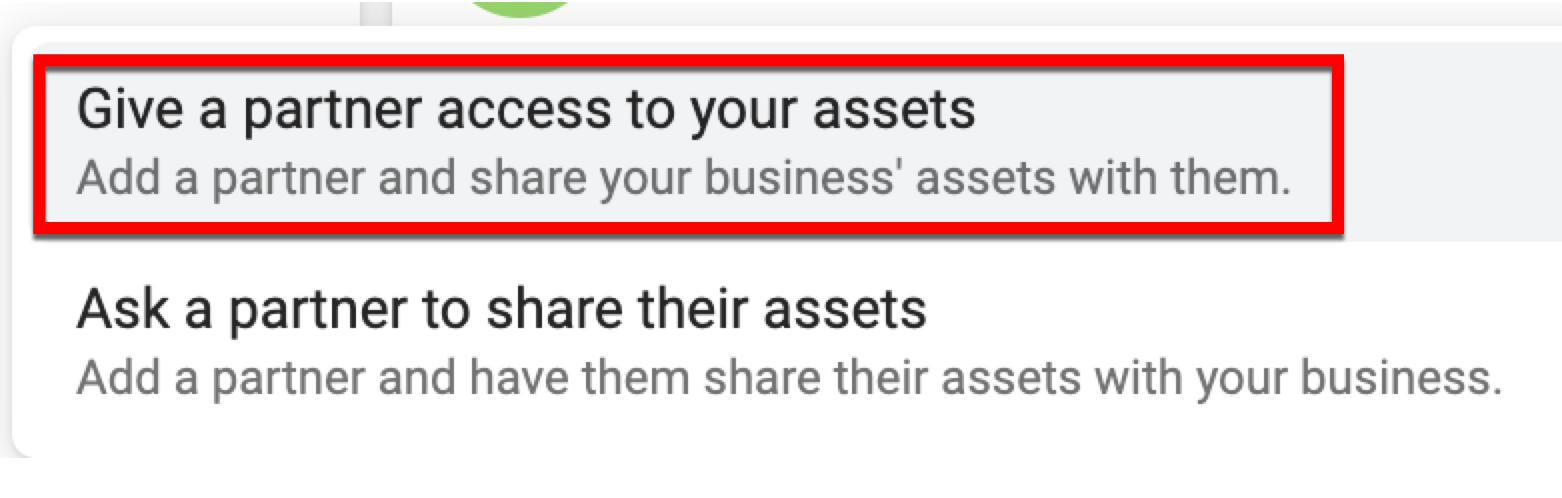
From the Add list, select "Give a partner access to your assets".
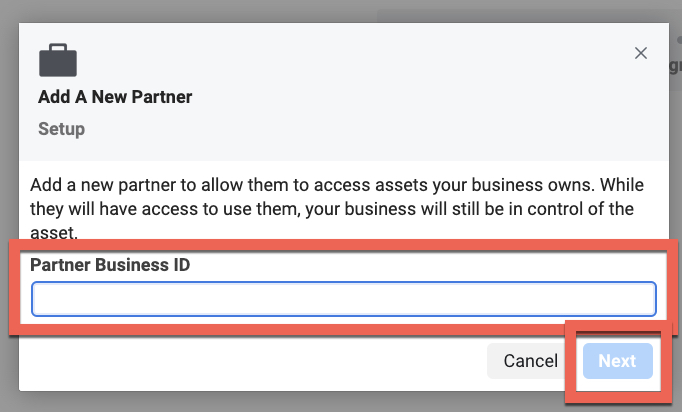
In the Add a New Partner dialog, enter "705664196188477" (LiveRamp's business ID) in the Partner Business ID field and then click Next.
Under Asset Types, select "Ad Accounts" and then select the check box for the ad accounts to which you want to add LiveRamp as a partner.
Tip
When adding LiveRamp as a partner, we suggest that you include all possible ad accounts that you'd like LiveRamp to deliver segments to, both now and in the future. If you do not include a particular ad account in the initial partner request and you later decide you want to deliver segments to that ad account, you will need to go back into Meta Business Manager and go through the process again to include this new ad account in the partner relationship.
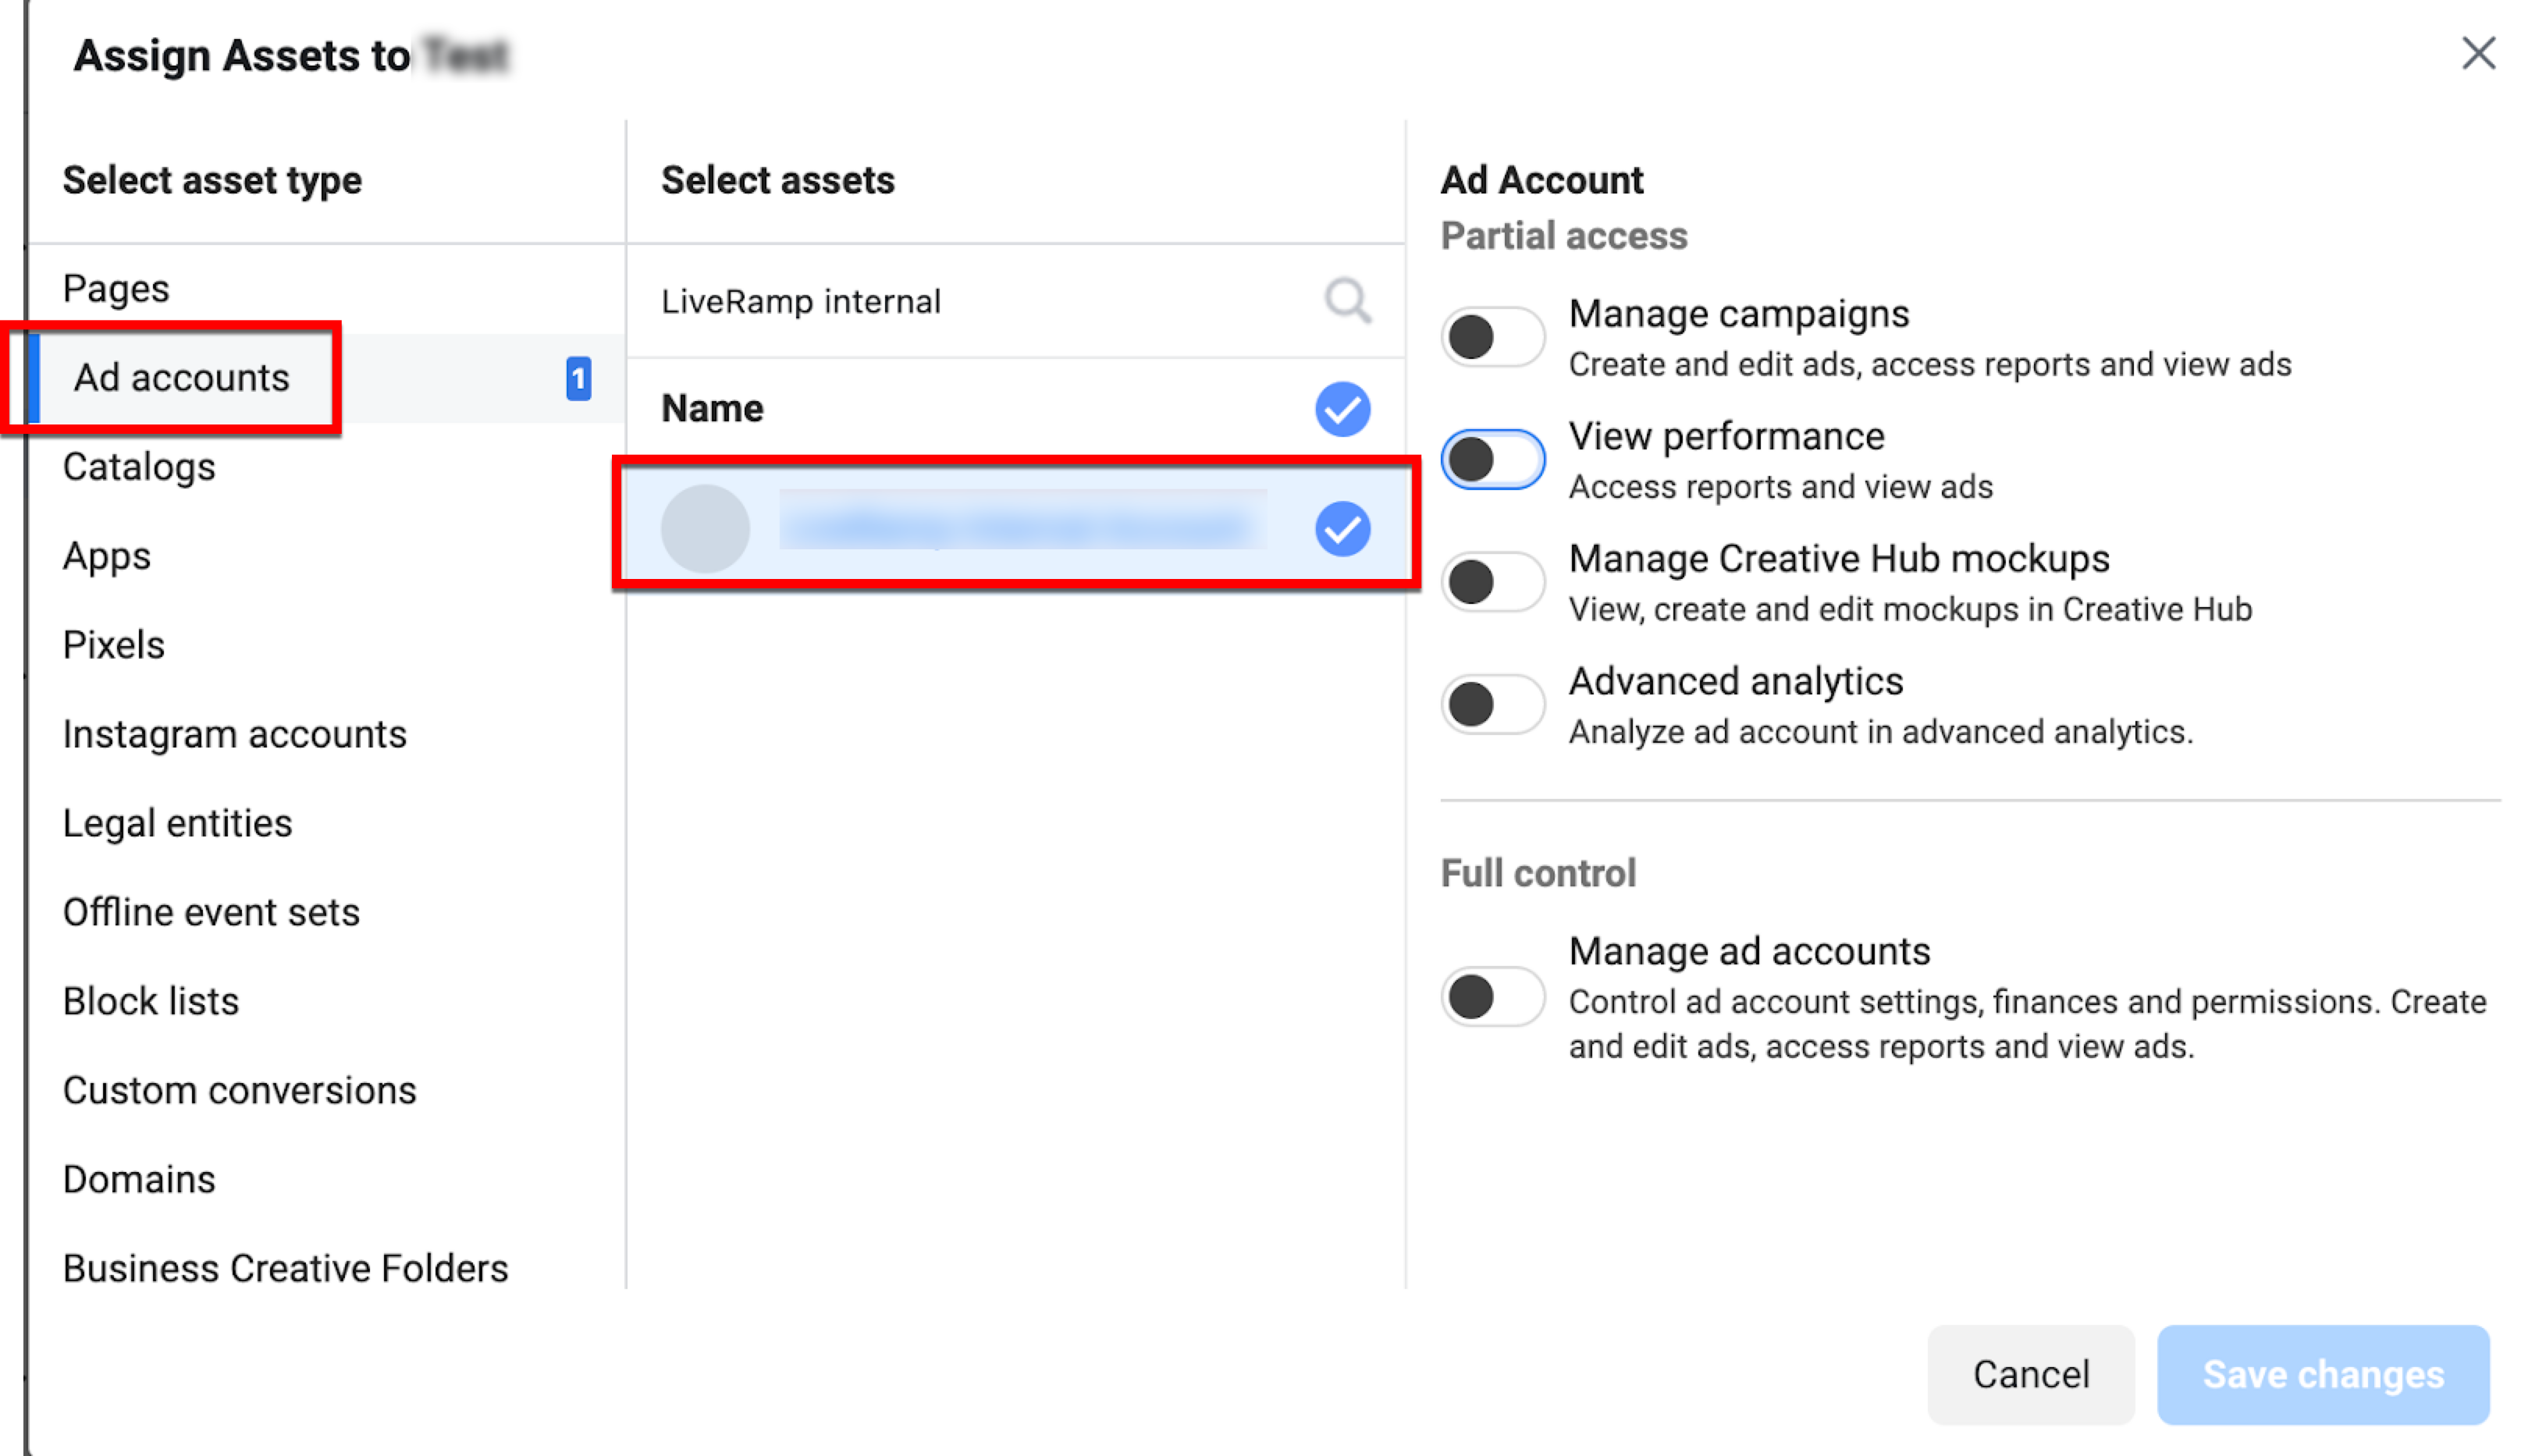
Slide the appropriate toggle and then click Save Changes:
If you only need to enable LiveRamp to automate your Data Marketplace reports and are not going to use LiveRamp’s Direct Integration with Facebook, slide the "View performance" toggle to the right (this toggle is automatically enabled if you enable the "Manage campaigns" toggle)
If you're distributing data through LiveRamp's Direct Integration, slide the "Manage campaigns" toggle to the right to enable LiveRamp to create Custom Audiences
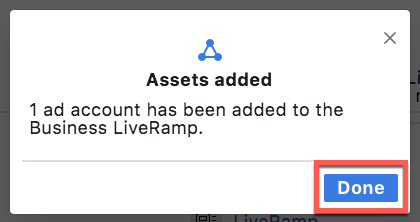
When the confirmation message displays, click Done.
Note
If you only need to enable LiveRamp to automate your Data Marketplace reports, you do not need to complete any additional steps.
If you're distributing data through LiveRamp's Direct Integration, complete the remaining steps.
An admin of the business manager that owns the ad account you are going to deliver into must accept Facebook's terms of service by going to "https://business.facebook.com/ads/manage/customaudiences/tos/?act=[accountID]" (where "[accountID]" is your Ad Account ID). For example, if your ad account ID is "123456789", the URL would be "`https://business.facebook.com/ads/manage/customaudiences/tos/?act=123456789".
Once you've performed these steps, you can then follow the steps in "Activate a New Destination Account" to activate the appropriate destination account:
To distribute first-party data through the Facebook Direct integration, activate a Facebook Direct destination account.
To distribute Data Marketplace data through the Facebook Data Marketplace integration, activate a Facebook Data Marketplace destination account.
Activate a New Destination Account for Advertiser Direct
Before you can distribute Data Marketplace segments to the desired Advertiser Direct destinations, you need to activate Data Marketplace destination accounts for those destinations.
Once you've activated the destination account, you can go to the Segment Distribution page for that destination account to distribute data to your seat at that destination.
Caution
To activate a destination account at a destination that requires OAuth authorization, you must have the appropriate permission level to create an OAuth connection for that destination. See "Managing OAuth Connections" for more information.
To distribute Data Marketplace data to Facebook, you must add LiveRamp as a partner in Meta before activating the destination account. See the instructions in "Add LiveRamp as a Partner" below.
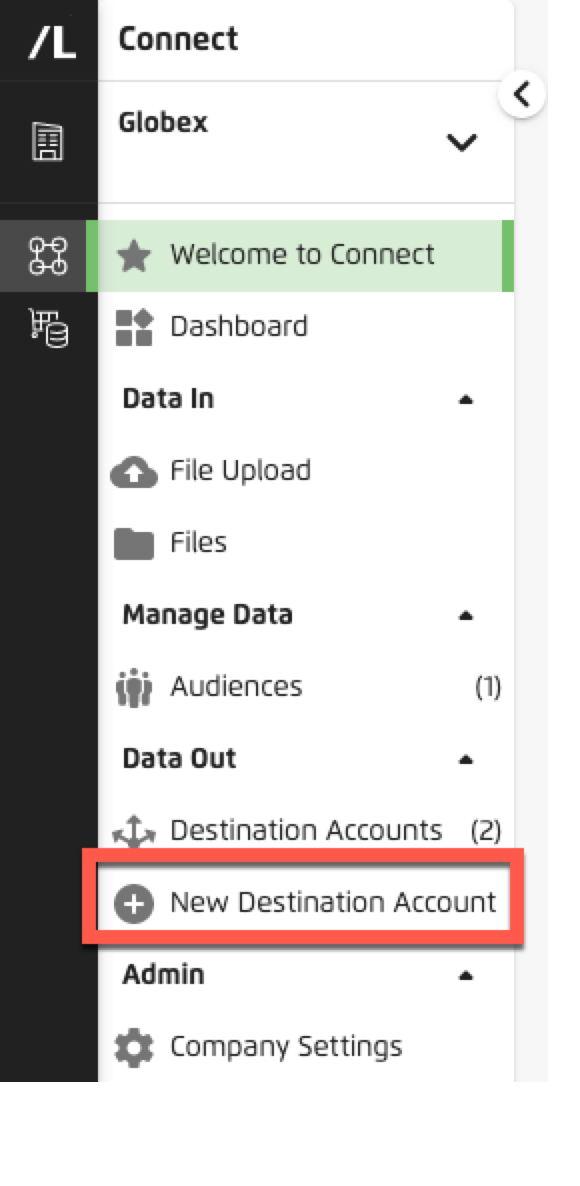
From the Quick Actions menu, select New Destination Account.
Use the following methods to locate your desired destination:
Note
The button appears when you hover over the tile.
Destinations that are unavailable to you (often because they were not included in your contract) will be “grayed out” and can’t be activated. You can contact your LiveRamp Customer Success Manager if you wish to have one of those tiles enabled.
From the Choose an Integration screen, click on the Data Marketplace integration.
Note
If the Data Marketplace destination integration tile for the desired destination is greyed out, either confirm with your Customer Success Manager that you have been enabled for Advertiser Direct or create a support case.
If desired, use one of the methods below to change the default end date:
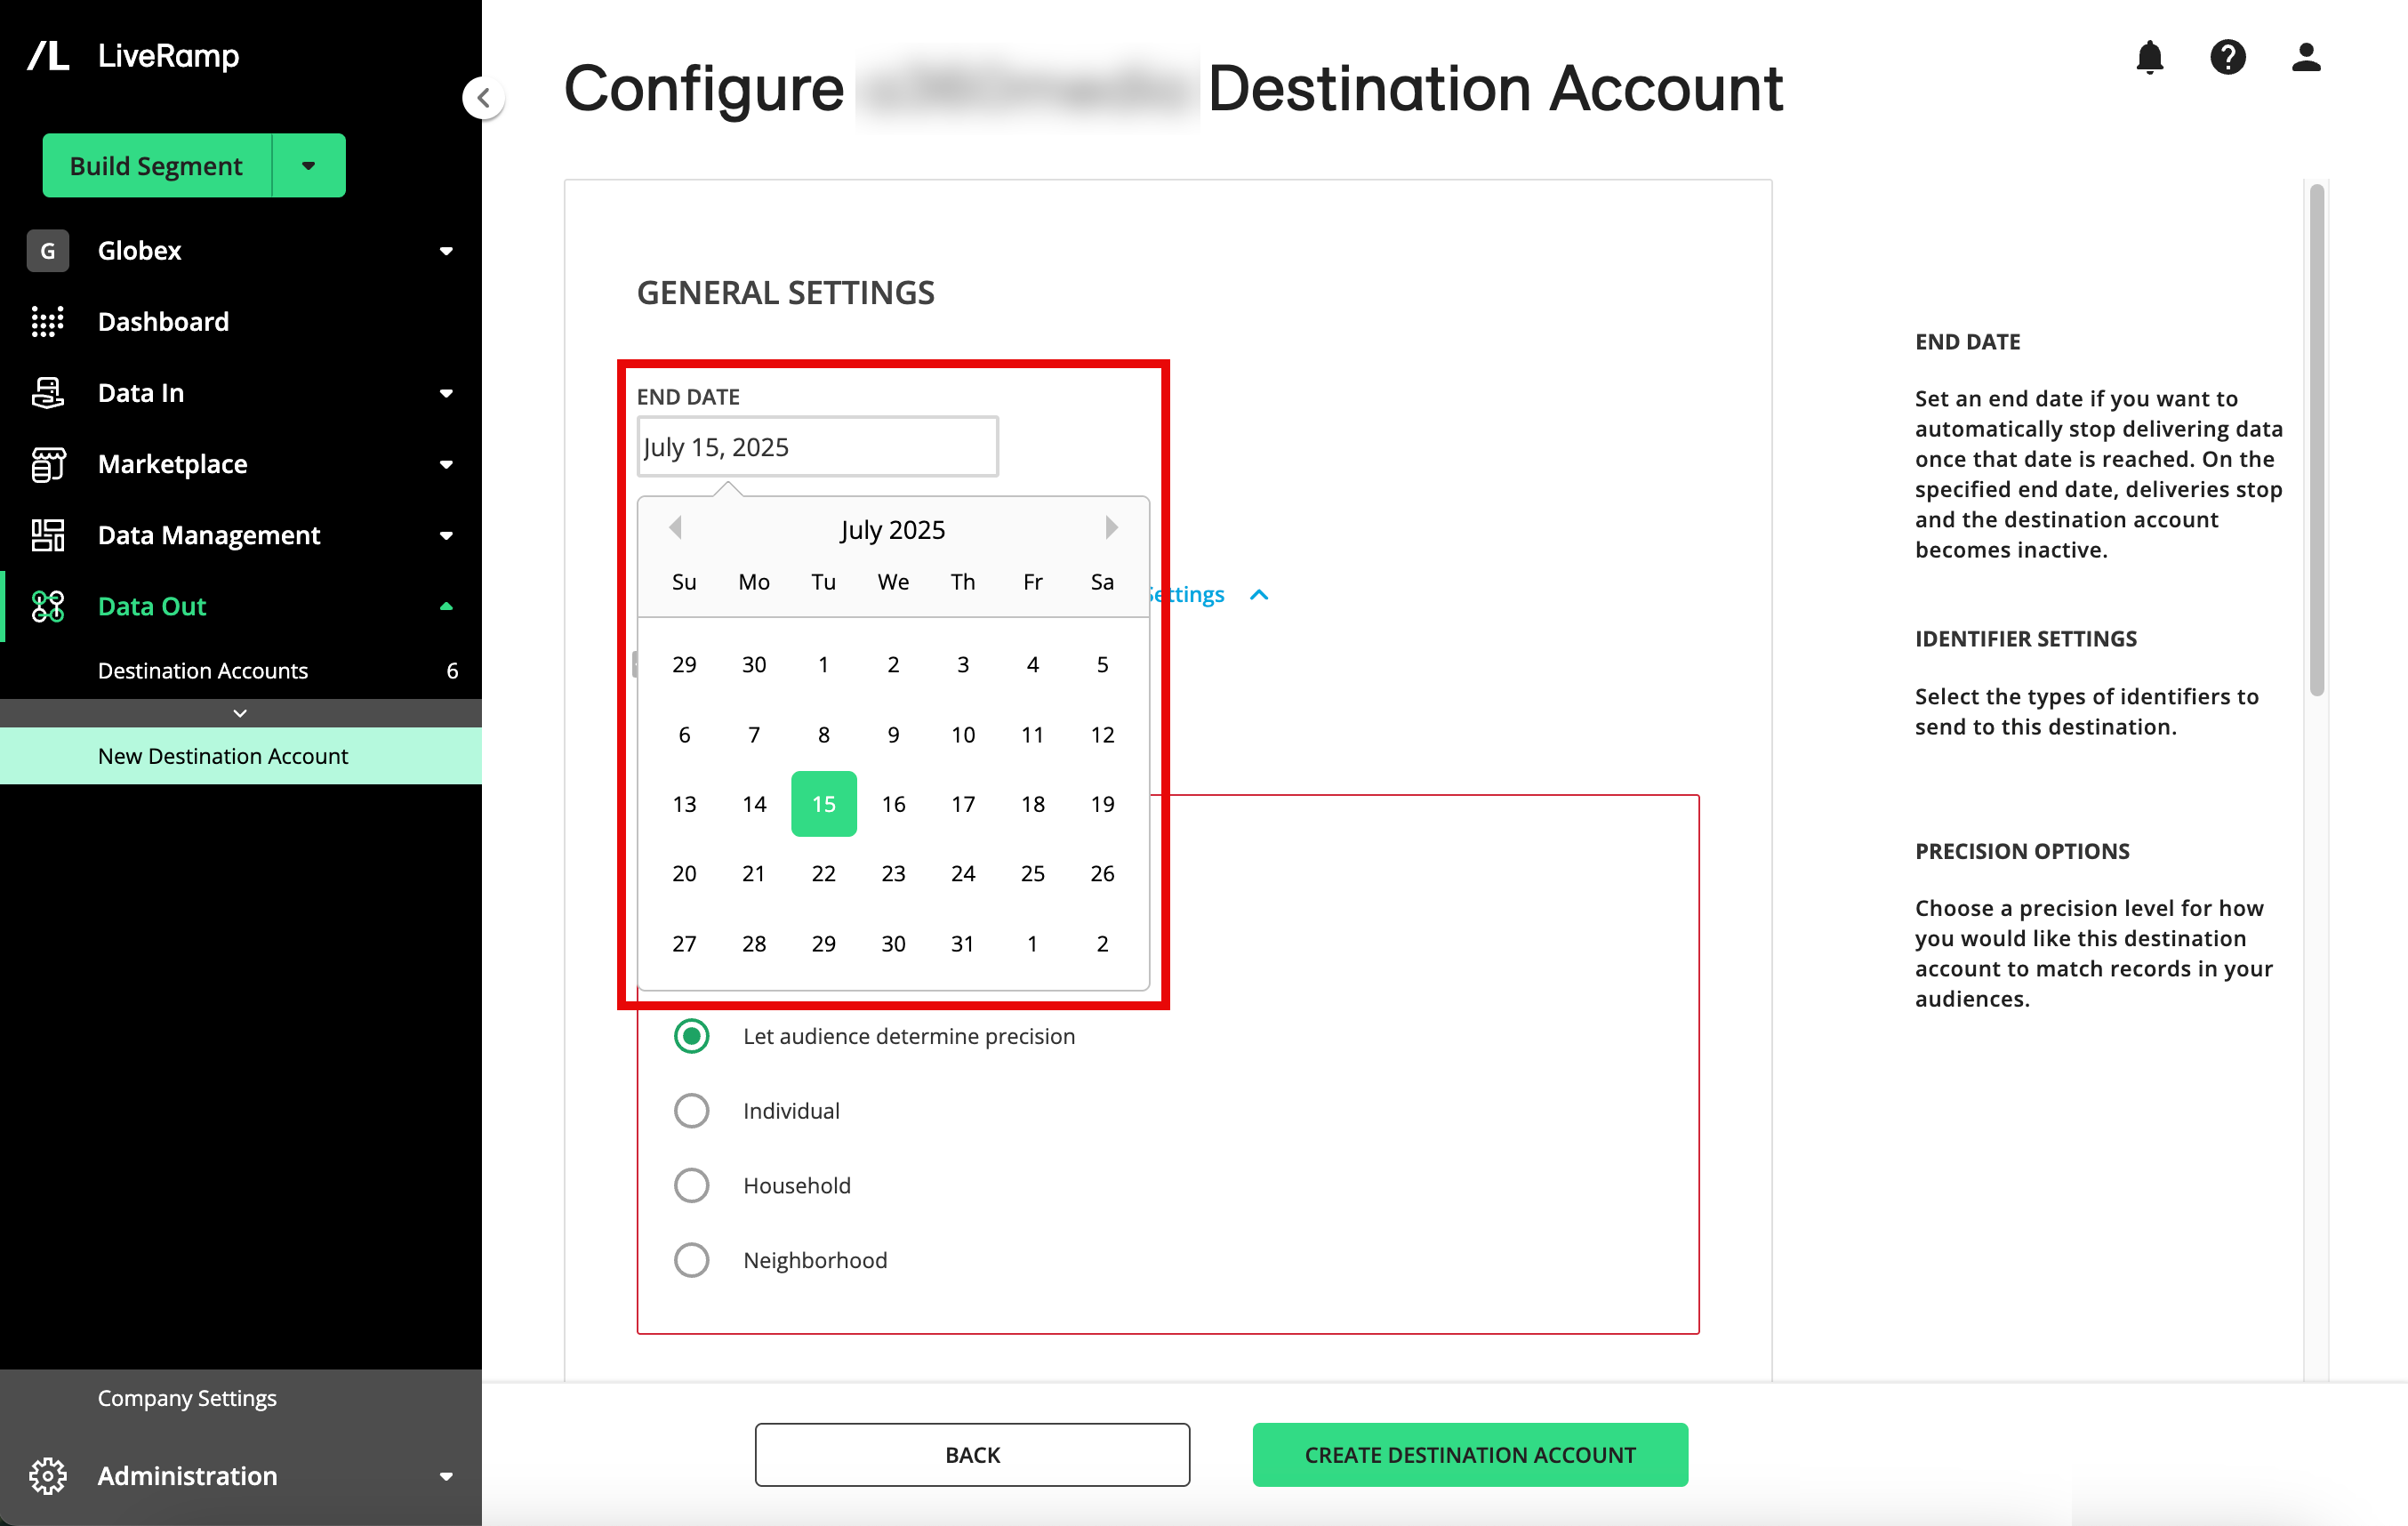
Click into the End Date field and select the desired end date from the dropdown calendar that appears.
Click the blue "X" in the End Date field to activate the destination account with no end date.
Note
By default, the end date is set to six months after the activation of the destination account, and the Account Status is set to “Active”.
Confirm or change the identifier settings. If a destination supports multiple identifier types (for example, a mobile ad platform that supports both Android and iOS devices), you can choose which identifiers you'd like to send data to. The default identifiers for that destination will be used unless you change the selections.
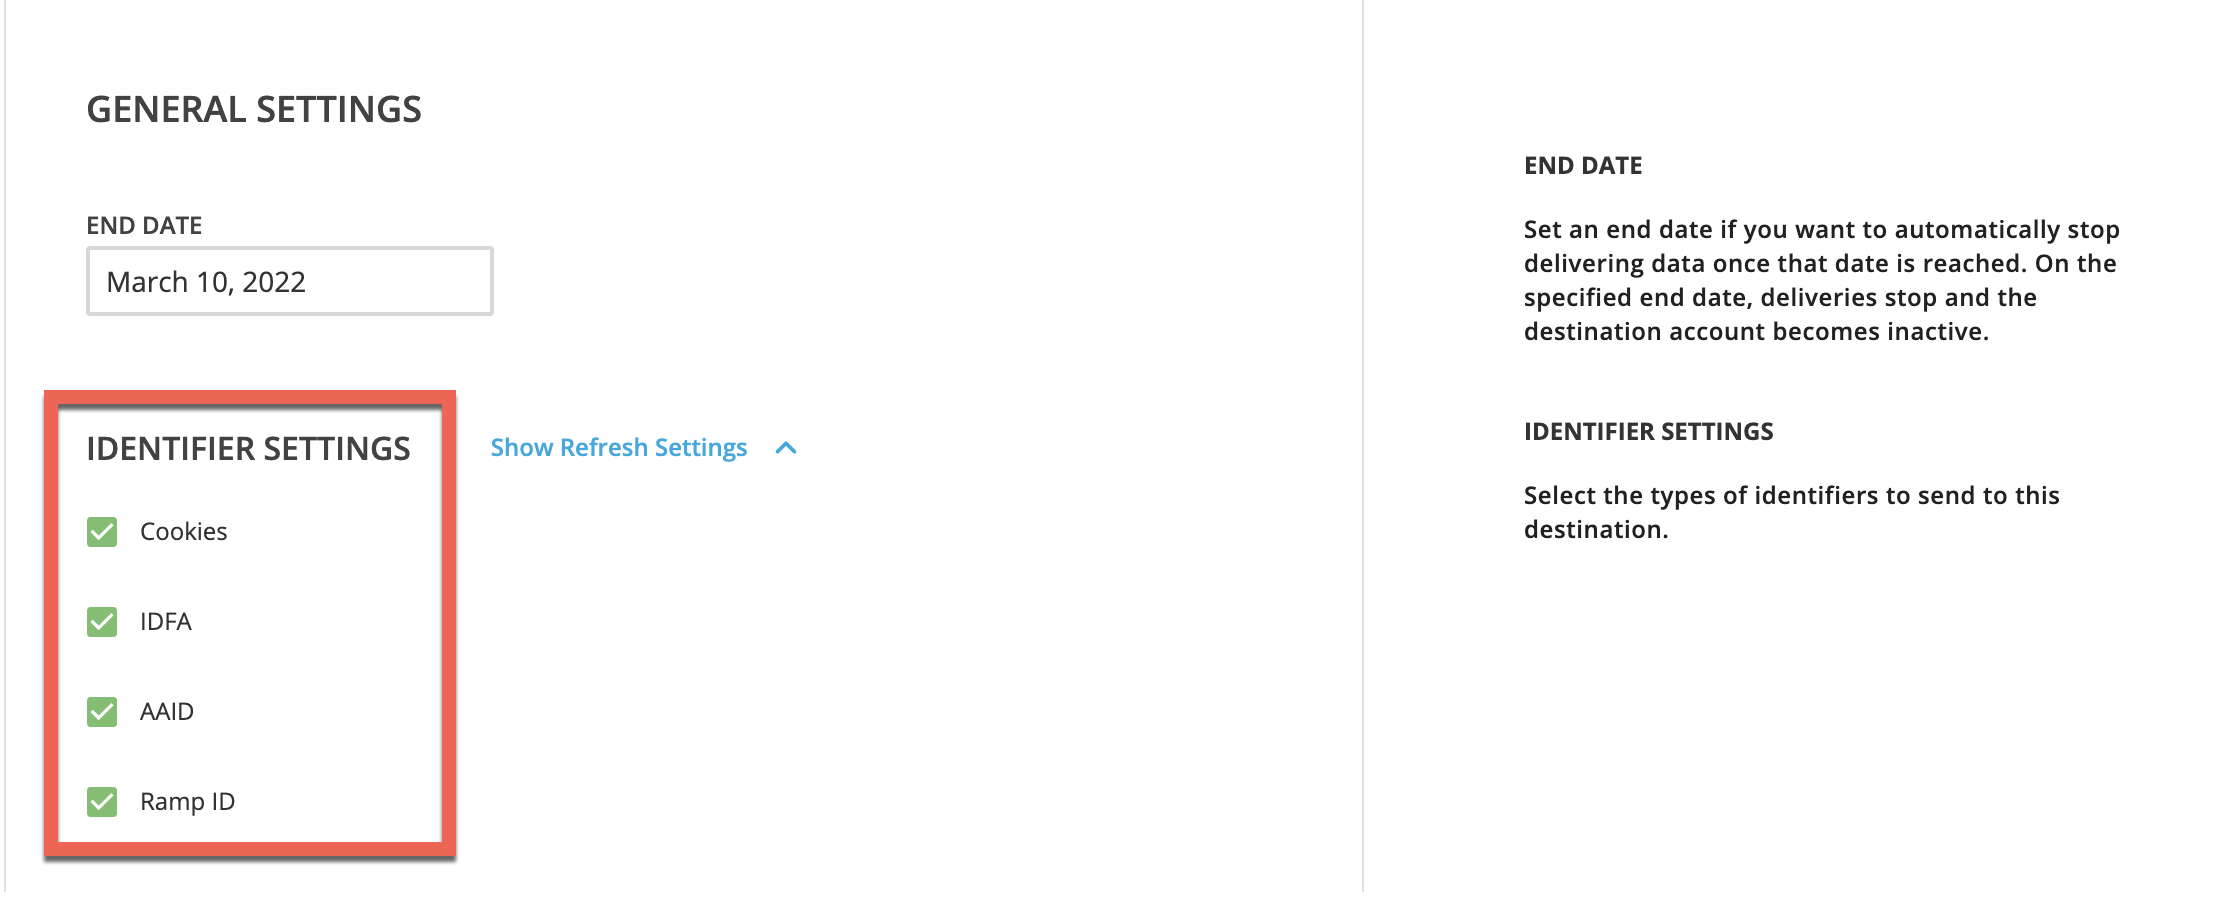
Tip
For those destinations that accept RampID as an identifier, we recommend that you keep RampID selected in order to maximize your reach and match rates.
If necessary, view or edit the refresh options. The default refresh options that are suitable for the majority of the workflows for that destination are enabled (see “How LiveRamp Refreshes Distributed Data” for more information). To view or change the default refresh options for the selected identifier types, click the “Show Refresh Settings” link text.
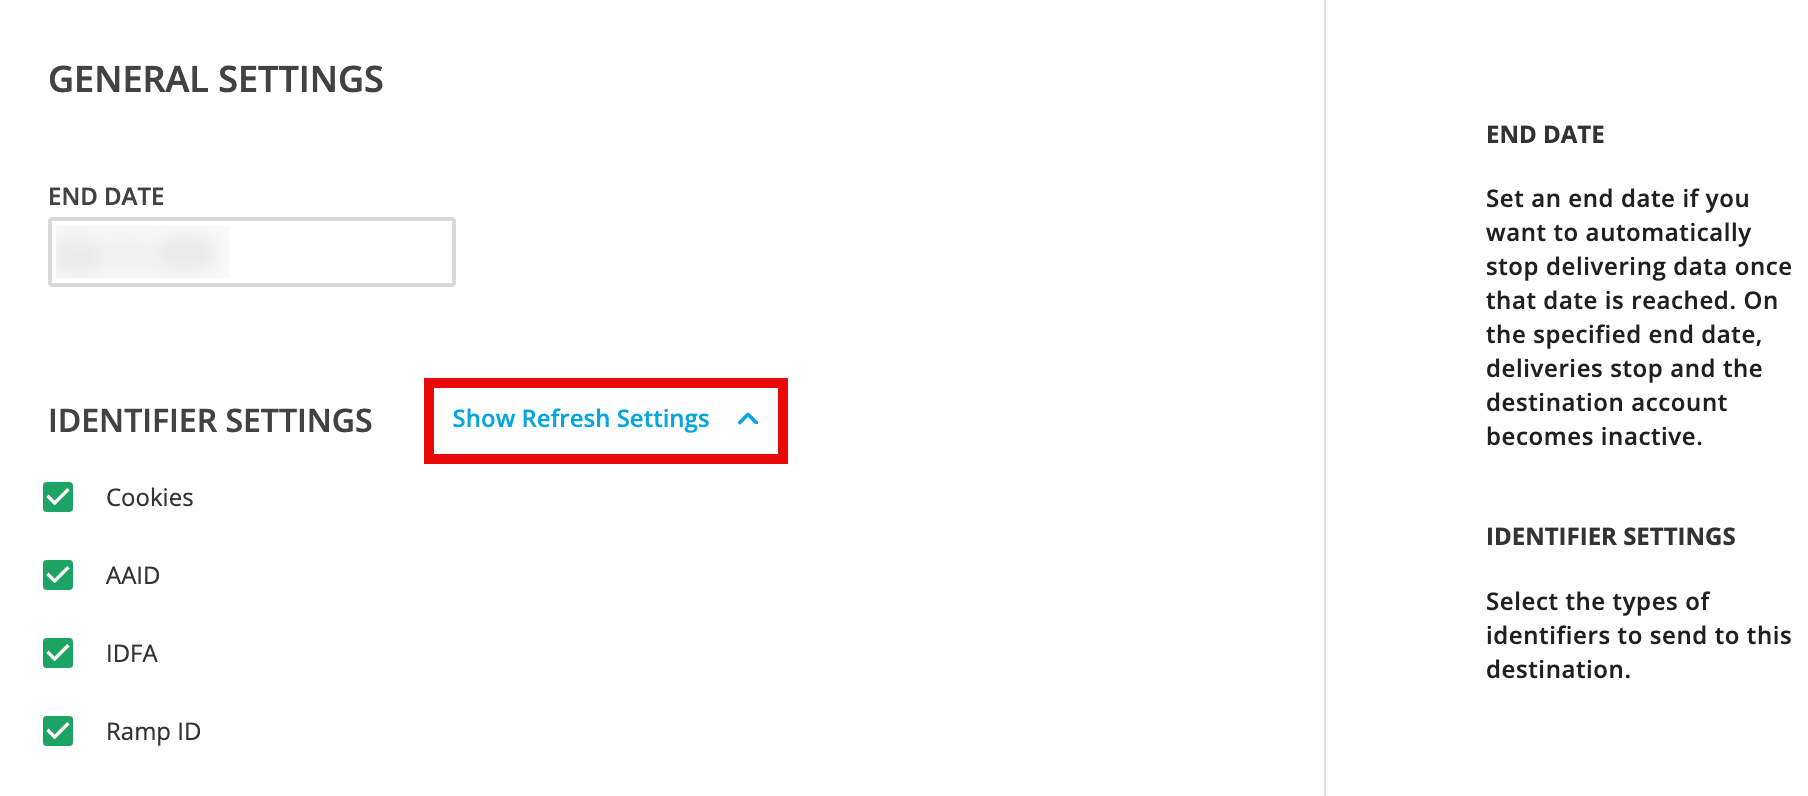
To change the options (for admin-level users only), select or deselect the appropriate check boxes.

Caution
The default options for each destination account should only be changed for custom or unique workflows, and only if you have a thorough knowledge of the impact of these settings. Changing the default options might result in your data not being refreshed appropriately.
If the destination requires a valid OAuth connection:
Tip
See "Destinations That Require Authorization Using OAuth" for a list of OAuth destinations.
Select one of your existing OAuth connections for that destination from the OAuth Connection dropdown list, or select Create New OAuth Connection to create a new connection for that destination and follow the authorization process at the destination's website.
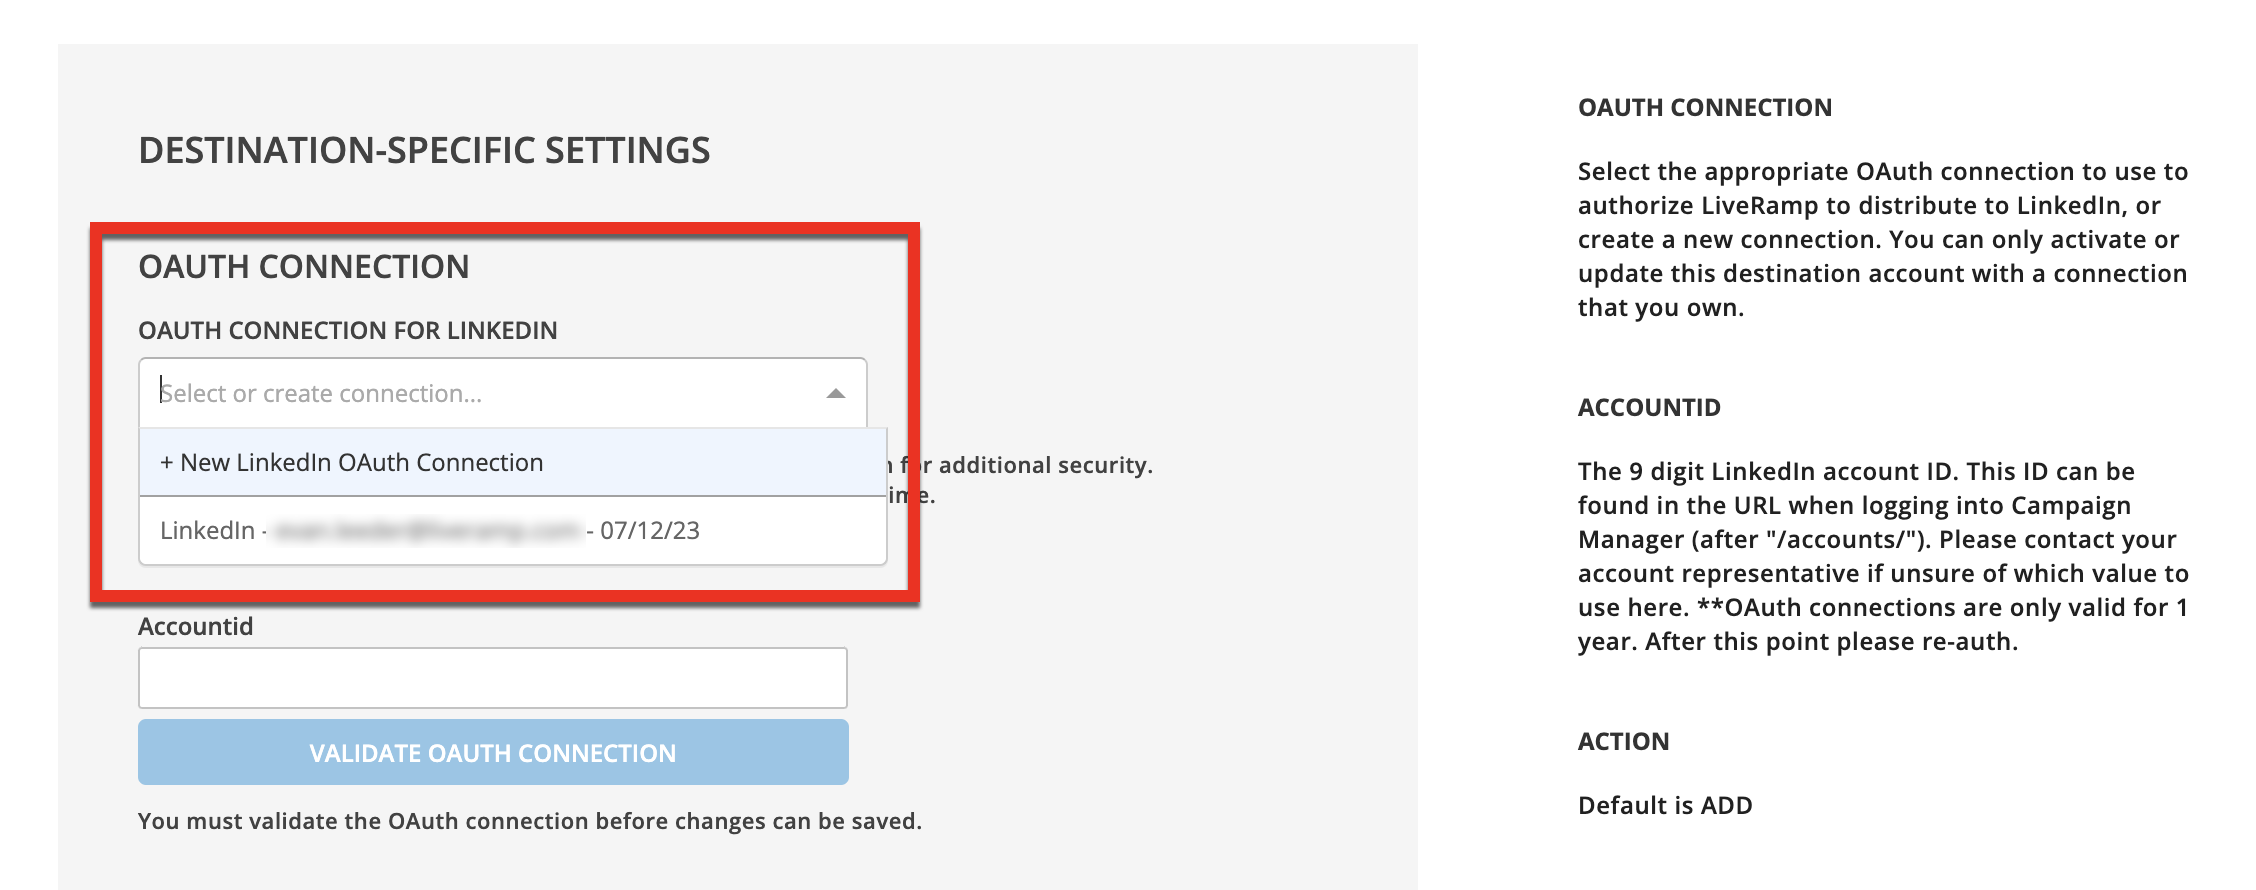
Enter the appropriate information in the other OAuth-related fields (Pinterest example shown - required fields vary by destination).
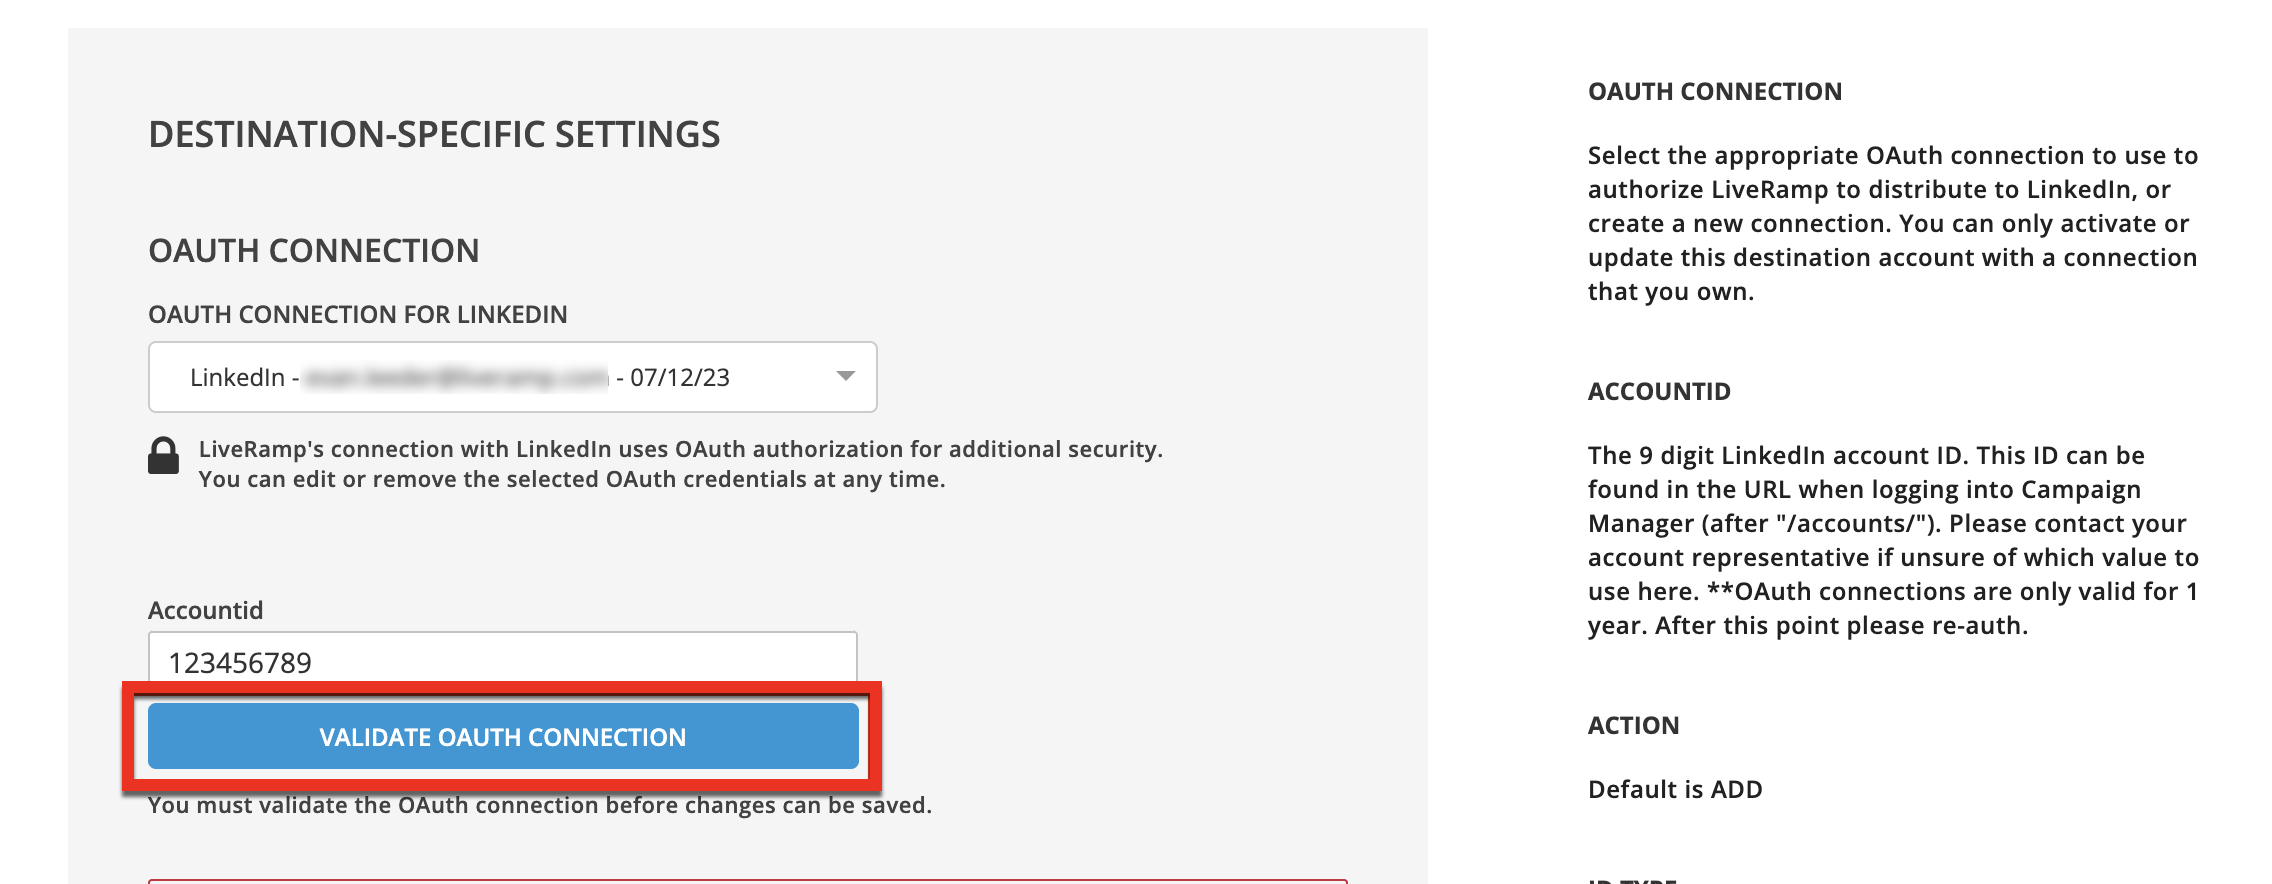
Click .
Note
See "Activate a Destination Account for OAuth Destinations" for a list of OAuth destinations and information on creating an OAuth connection for those destinations.
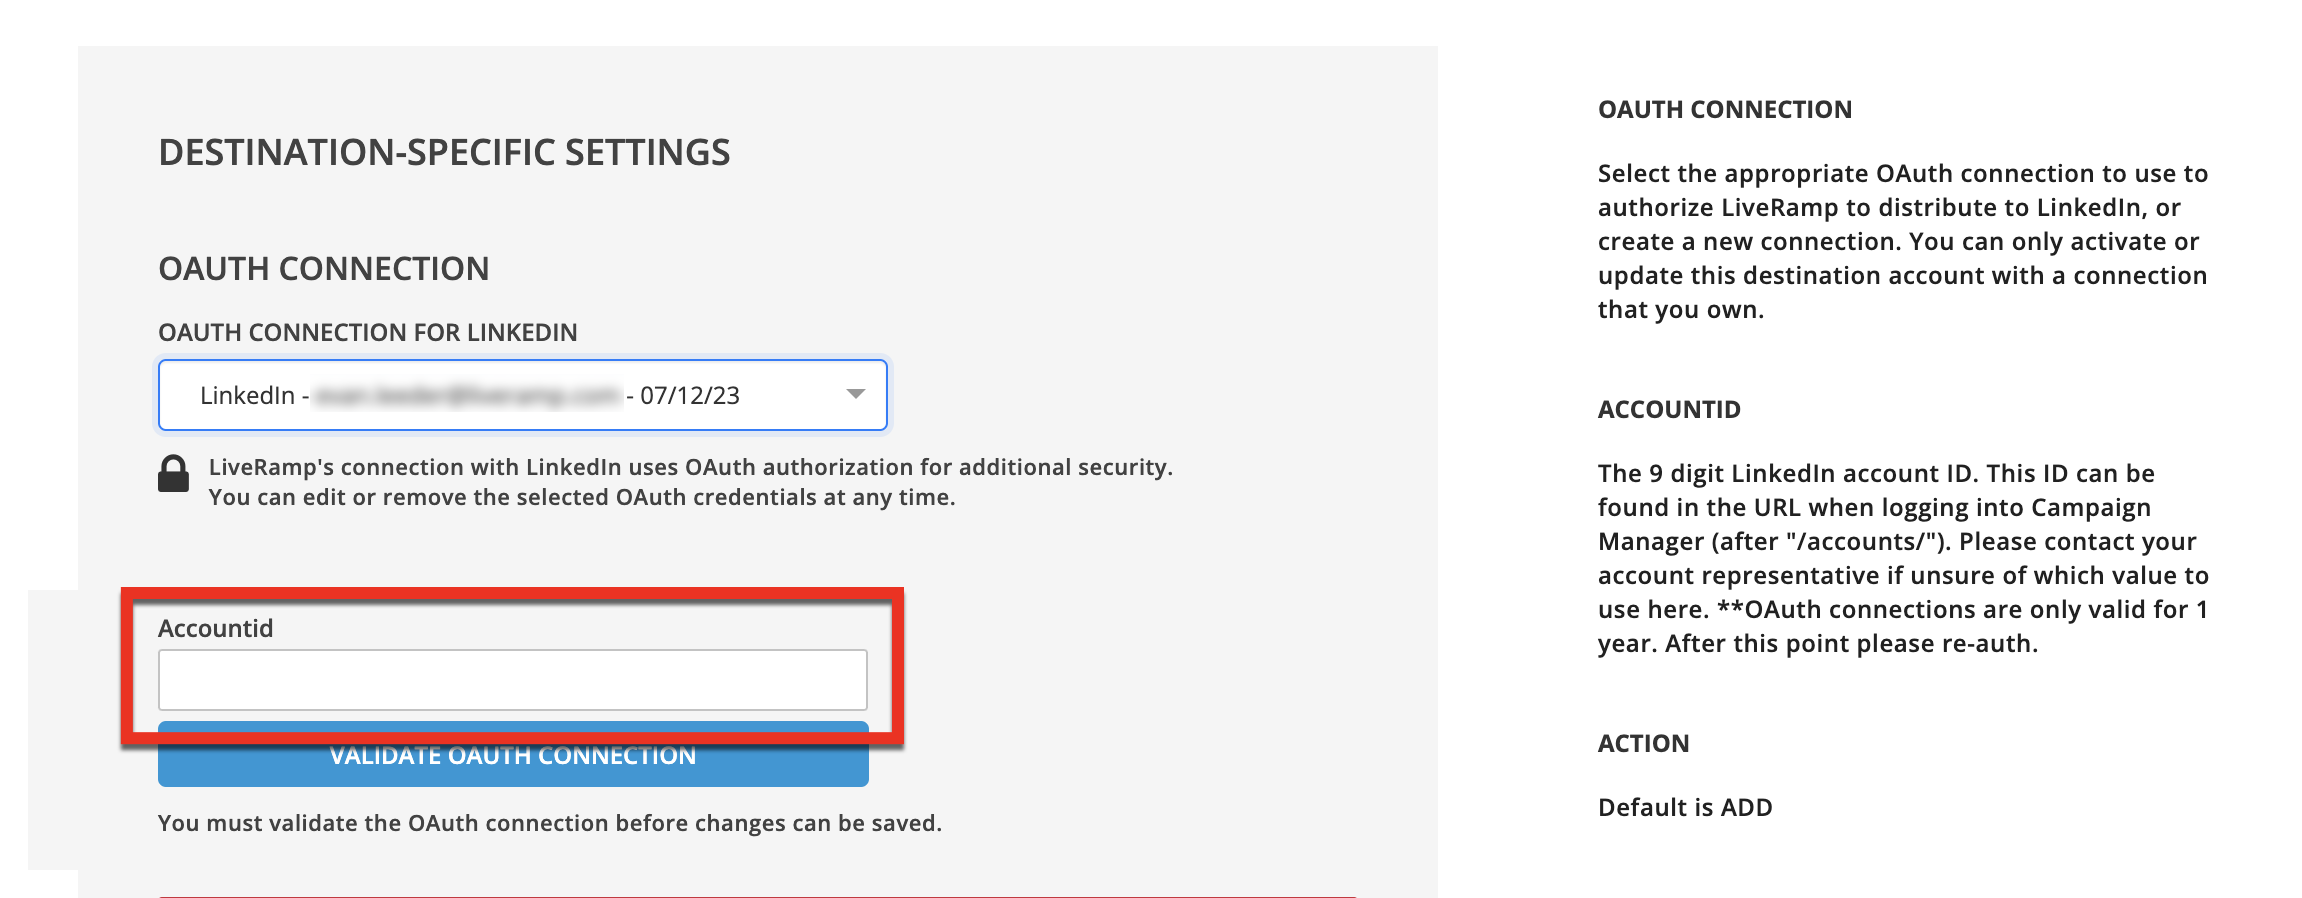
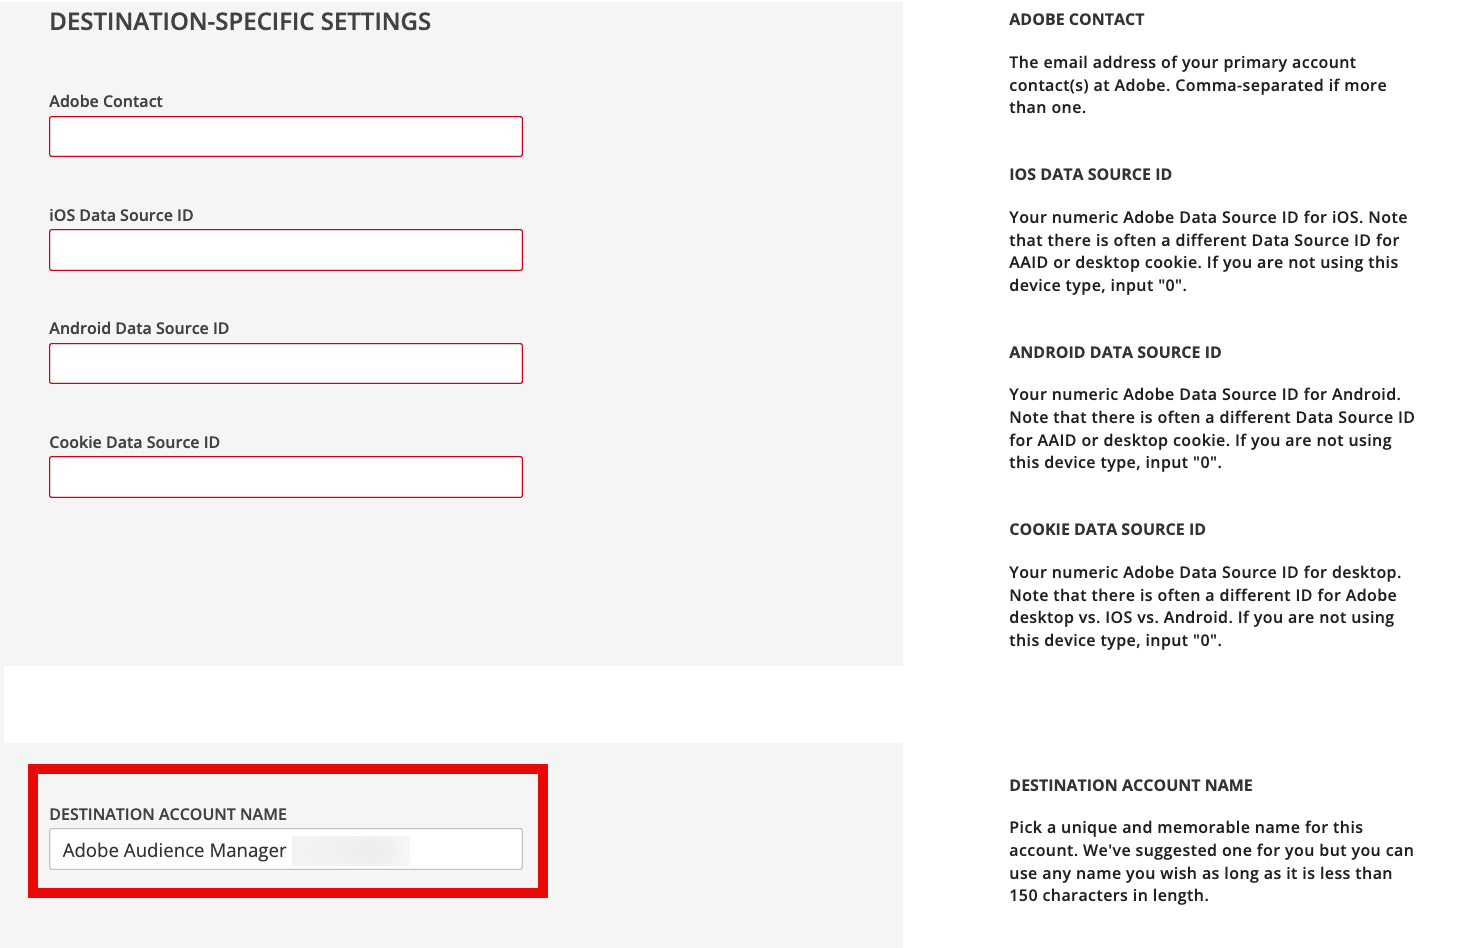
Enter the remaining requested destination account settings, following the guidelines given next to that field in the UI. Many destinations will also require you to enter your Account ID with that platform.
Accept or adjust the default destination account name (this will appear as the name of the destination account in Connect).
Once you fill out all the required fields (and after fixing any validation errors highlighted in red), click Create Destination Account.
Steps to Buy Data Marketplace Segments
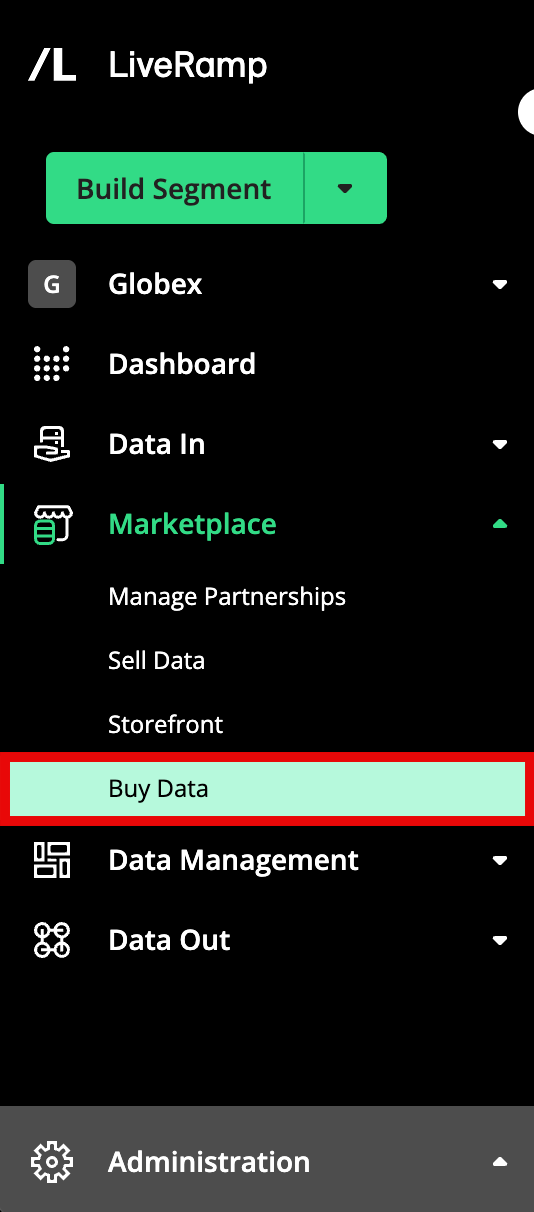
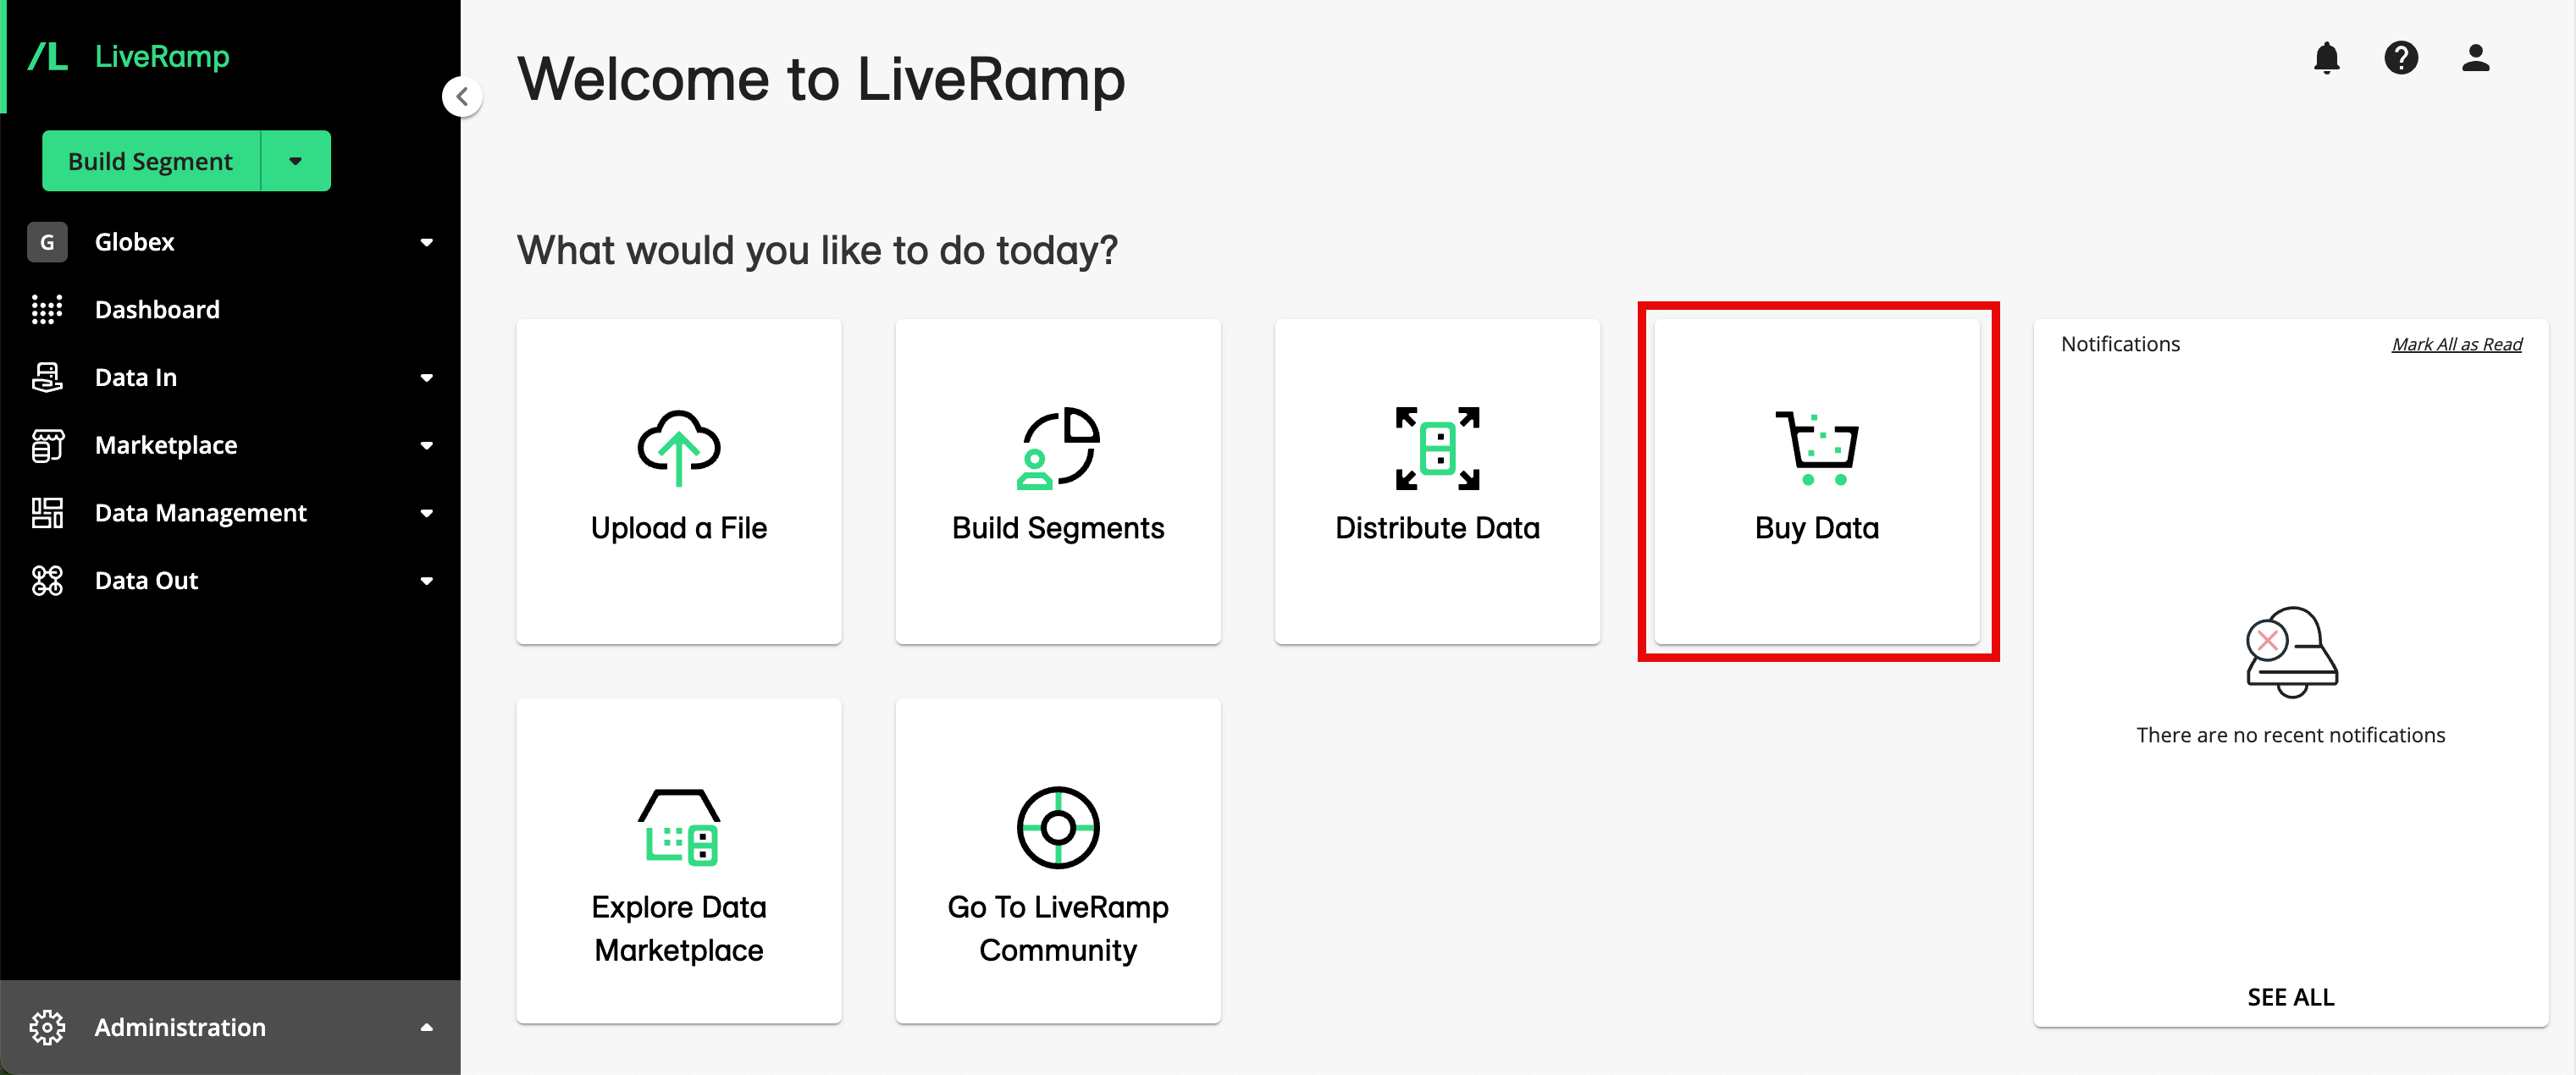
From the navigation menu, select Marketplace → Buy Data to navigate to the Data Marketplace Segments page, or click the Buy Data tile from the Welcome page.
Find the segments you want to buy:
Use the Search bar and the filters on the top of the page to narrow the list of segments by searching on keywords, phrases, or segment IDs, or to filter the list by a number of attributes (including data seller, use cases, or countries (see "Use the Search Bar" and "Use Filters" below for more information.
View more info and stats on individual segments (such as description, data source, and permitted use cases) by clicking the row for a particular segment.
View a data seller's profile in the LiveRamp Data Marketplace storefront.
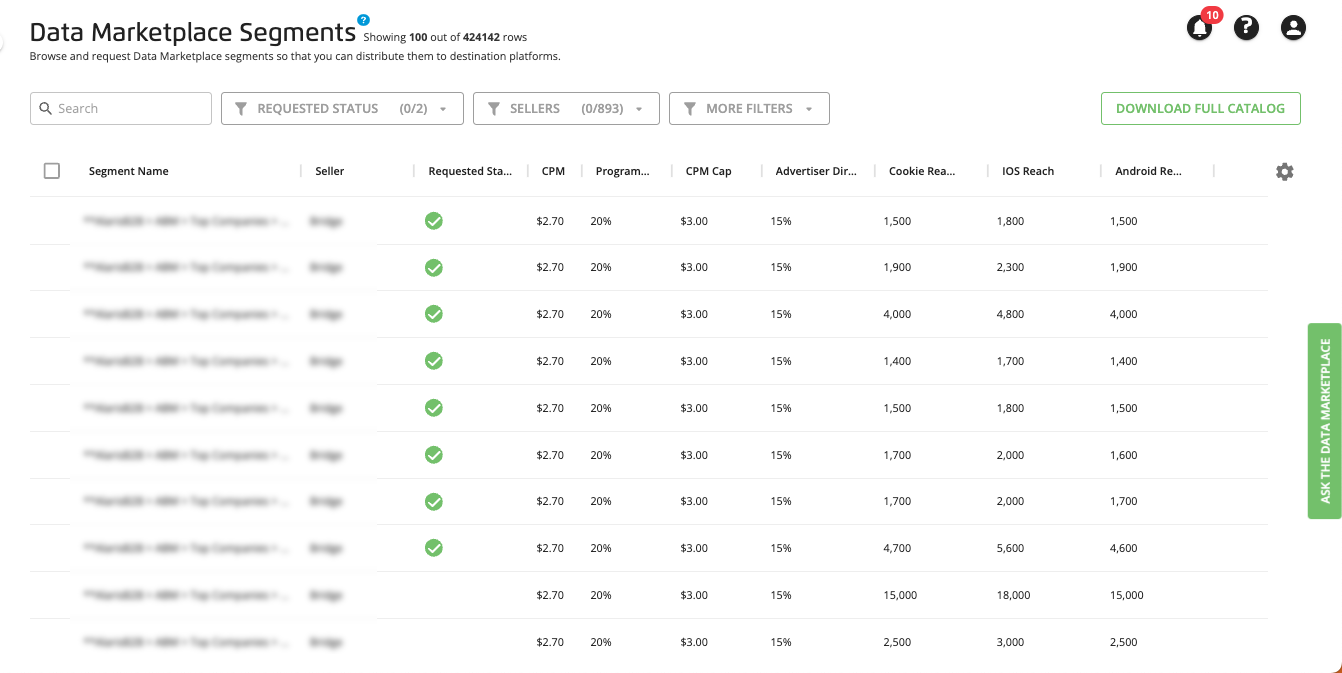
Review the information in the available columns displayed in the table (for information on changing the way the table is displayed, see "Changing the Table Display").
Tip
If a segment name is truncated because of the column width, you can view the full name by hovering over that segment name. To more easily view the entire segment name, you can increase the width of the Segment Name column. Click and drag the small vertical line at the right edge of that column heading to increase the column width.
See the sections below for more information.
Note
What's the price?
You are not charged to distribute Data Marketplace segments. You are only charged once you activate those segments at a destination platform.
If you are using multiple segments that are priced differently in the same audience or group at the destination platform (such as within one ad group or ad set, depending on the platform’s terminology), the price for the highest-priced segment that each consumer matches to will be applied to the impressions for that consumer (no matter what pricing model the platform uses). For example, if you are using segment A that is priced at 250% PoM and another segment B that is priced at 15% in the same audience or group, the 250% would apply toward the impressions for any consumers who were included in segment A.
The default currency is U.S. dollars (USD); if the price is given in a currency other than USD, an abbreviation for that currency will be listed, such as $1.25 CA$ for Canadian dollars.
Check the prices listed in the pricing columns to determine the price you'd pay to activate the segment at your desired destination platforms (for more information on the pricing models, see "Data Marketplace Pricing Options"):
CPM: The CPM for uses within our Programmatic Standard pricing model.
Programmatic % of Media: For uses subject to the Programmatic Hybrid pricing model (currently only segments distributing to The Trade Desk or Google RMN that have a Programmatic Standard CPM of less than $5), the percentage of gross media spend you will be charged for the segment.
CPM Cap: For uses subject to the Programmatic Hybrid pricing model (currently only distributions to The Trade Desk or Google RMN that have a Programmatic Standard CPM of less than $5), the CPM you will be charged for the segment if the percentage of gross media spend exceeds the CPM cap.
Advertiser Direct % of Media: For uses subject to the Advertiser Direct pricing model (distributions to Advertiser Direct destinations, such as Facebook, X, Pinterest, LinkedIn, Snapchat, and TikTok), the percentage of gross media spend you will be charged for the segment. For more information, see "Implementing LiveRamp's Advertiser Direct Solution".
Select the segments to buy by checking the check boxes next to the segment names.
Note
Any segments that have been previously bought (requested) will have a green check mark in the "Requested Status" column.
Click .
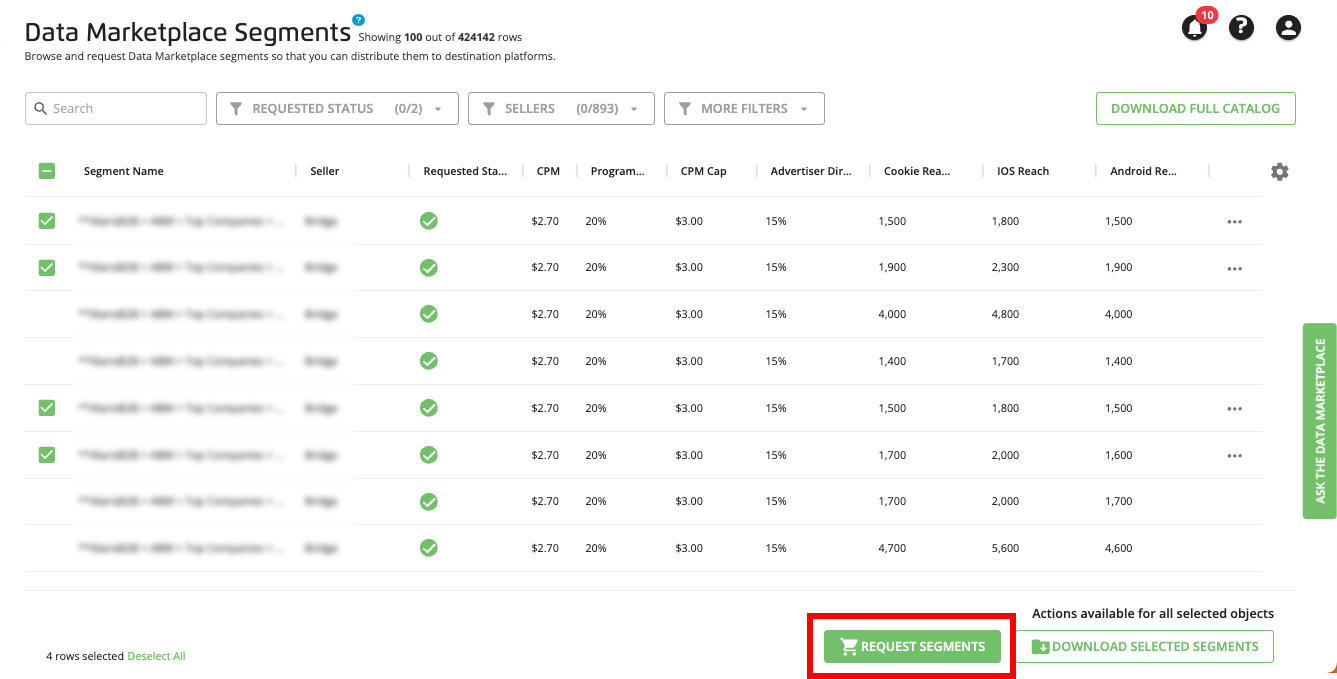
An order confirmation dialog appears. Click to go to the Destination Accounts page where you can distribute the segment data, or click to stay on the Data Marketplace Segments page.
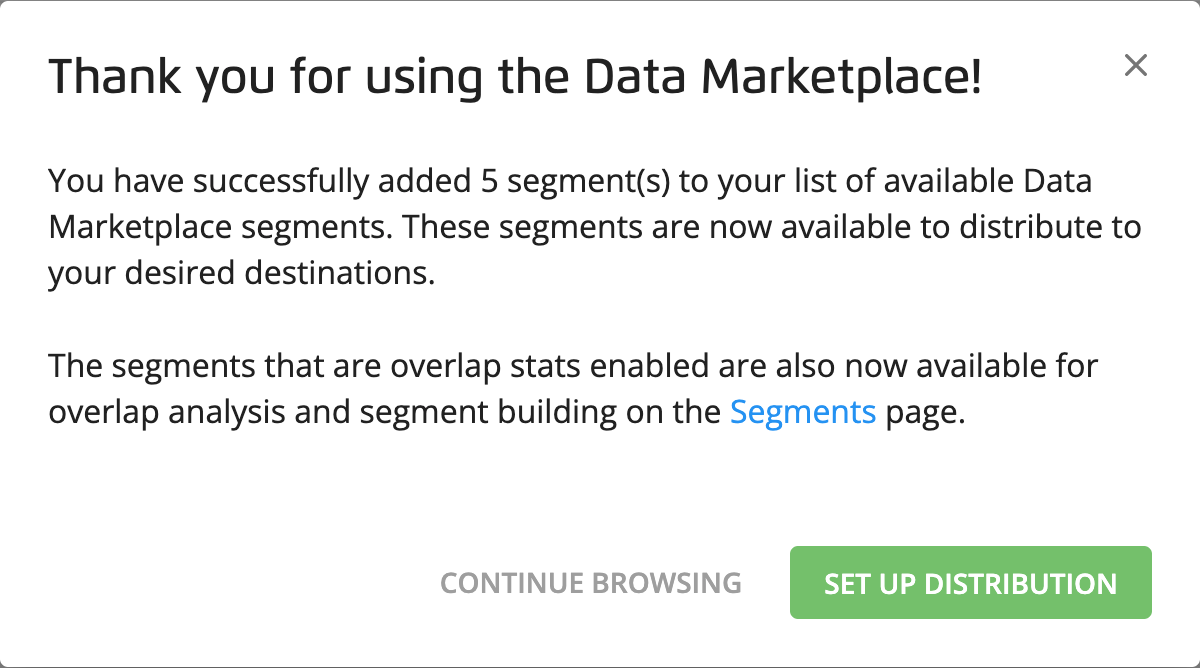
Your requested Data Marketplace segments appear on the Segment Distribution page for each of your activated Data Marketplace destination accounts. They also appear on each of your Audience Segments pages when you set the Data Types filter to "Data Marketplace".
Distribute Data
Once you've activated the appropriate destination accounts, follow the steps below to distribute data to those destinations:
Caution
Keep our recommended destination account limits in mind:
Maximum of 1,000 segments distributing in one destination account
Maximum of 500 segments added for distribution to a destination account per hour
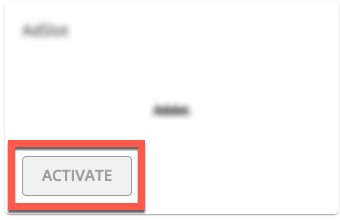
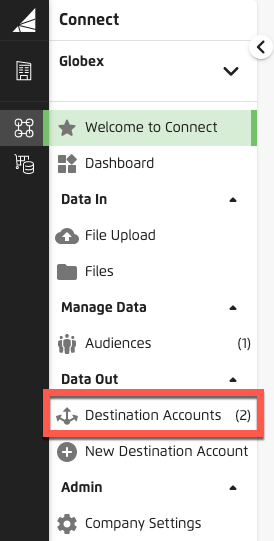
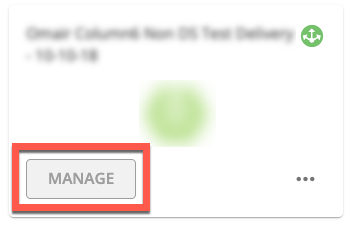
From the navigation menu, select Data Out → Destination Accounts to navigate to the Destination Accounts page and then click MANAGE on the desired destination account tile to navigate to the Segment Distribution page for that destination account.
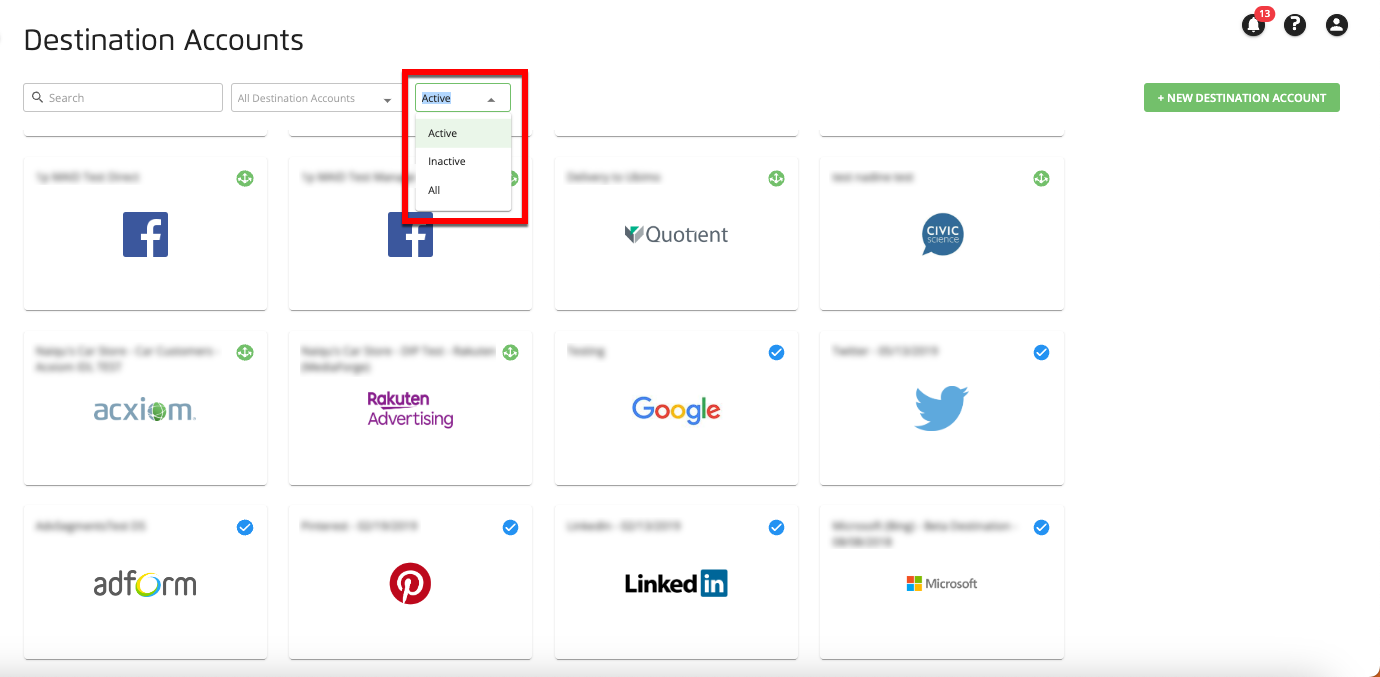
Note
By default, the list of destination accounts is initially filtered to show only active destination accounts. To access a destination account that is not active, adjust the filter setting.
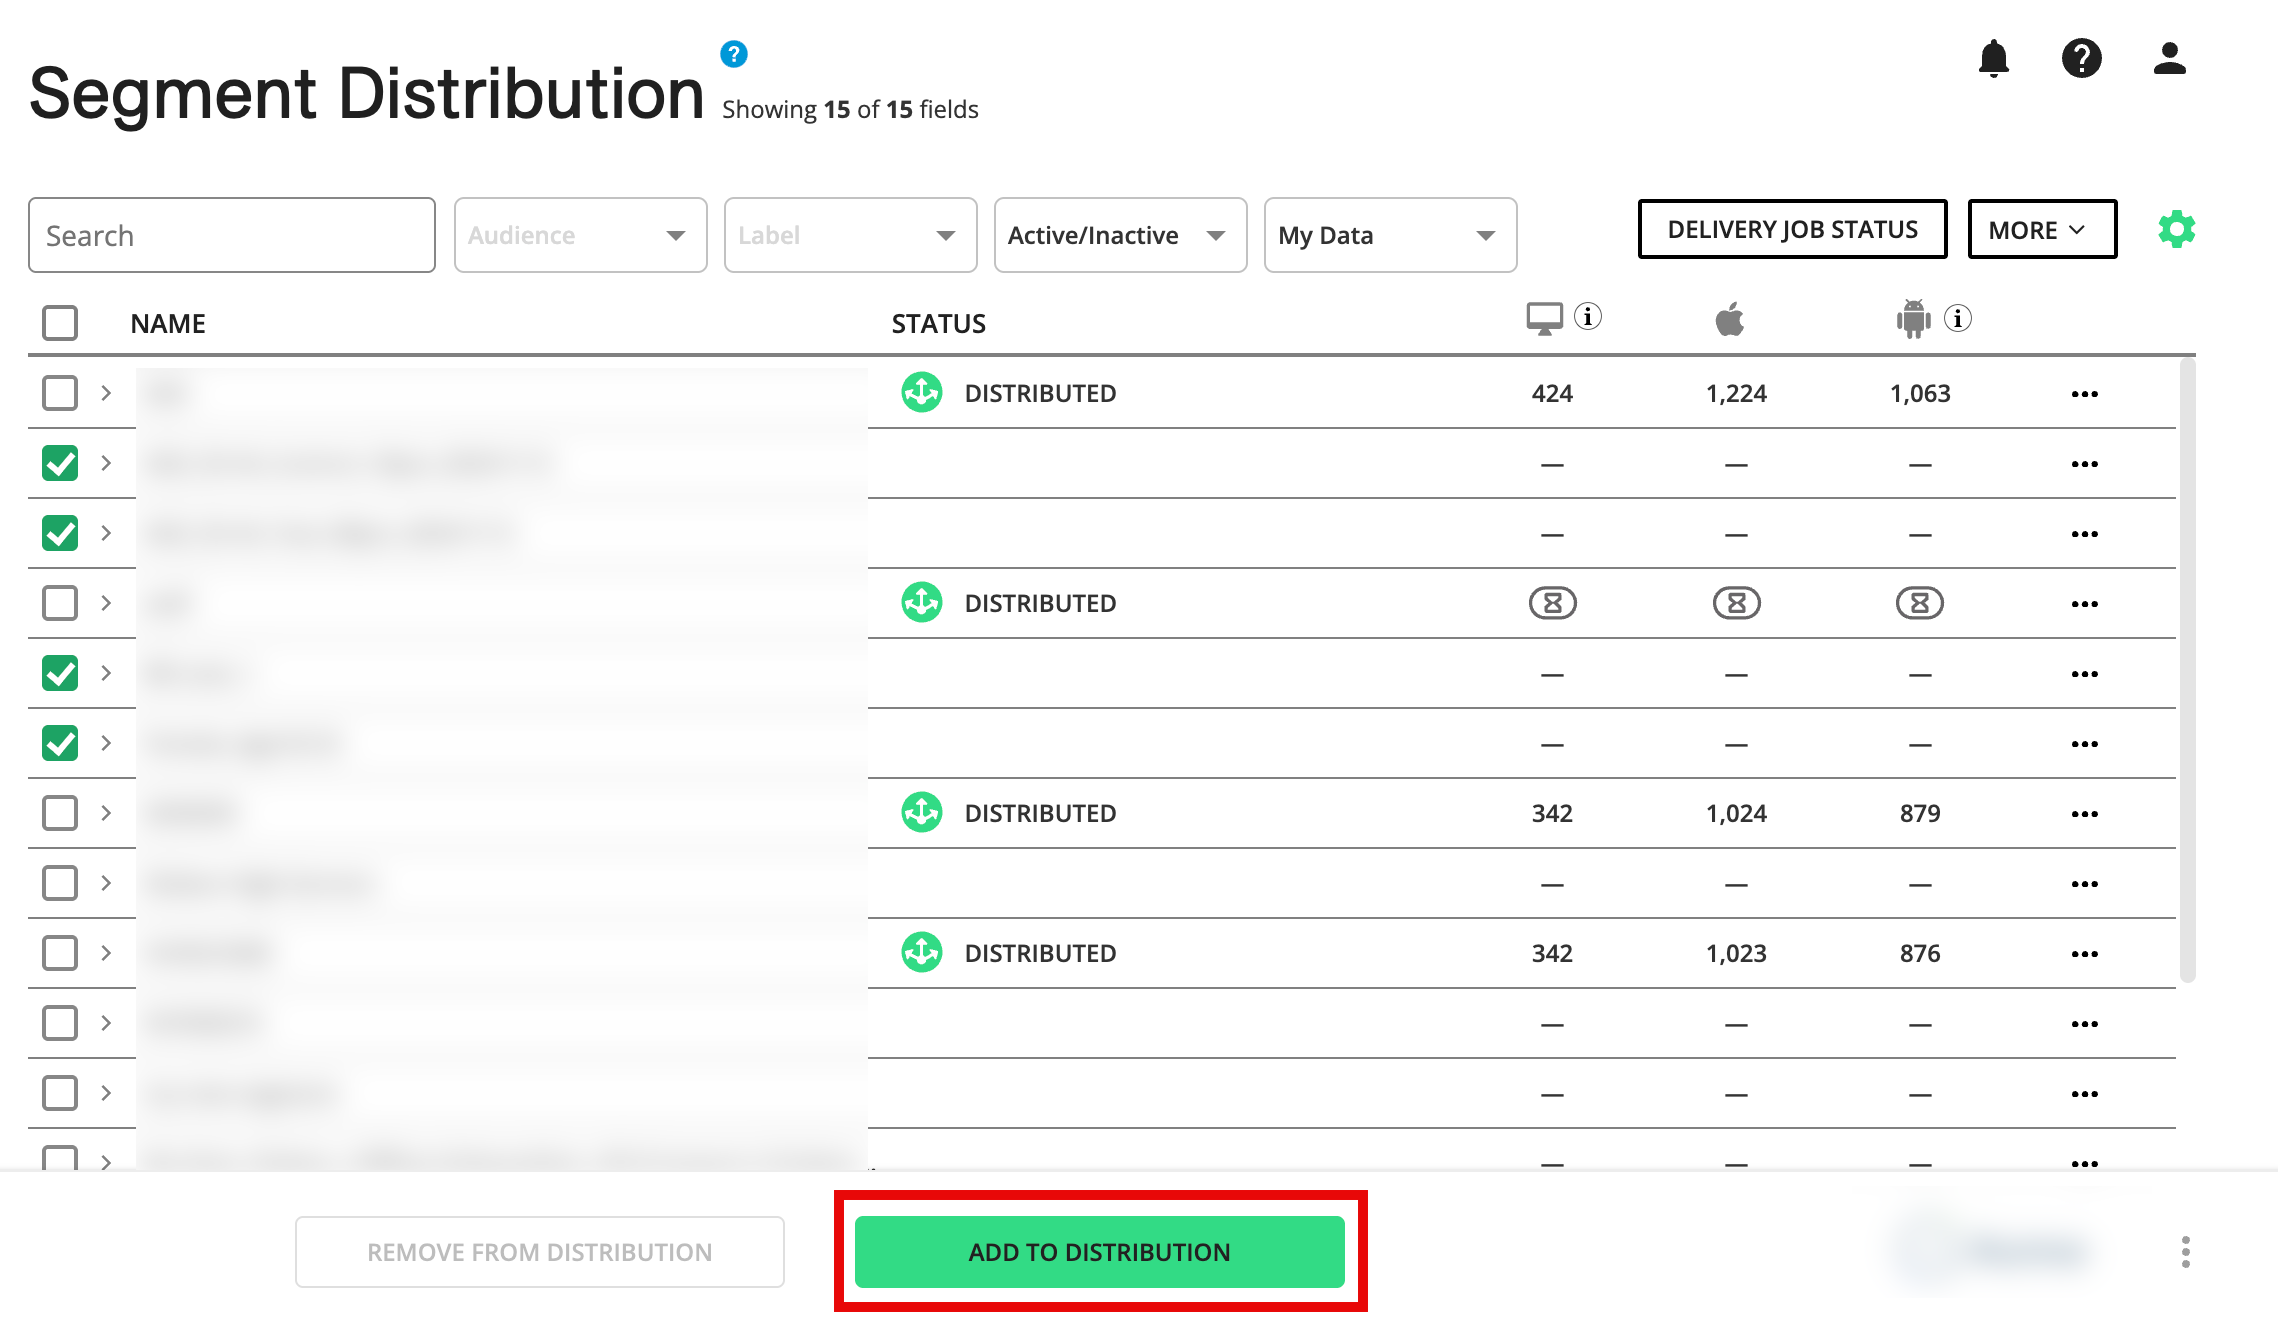
From the Segment Distribution page for that account, select the segments to distribute to this destination by checking the check boxes to the left of the segment name.
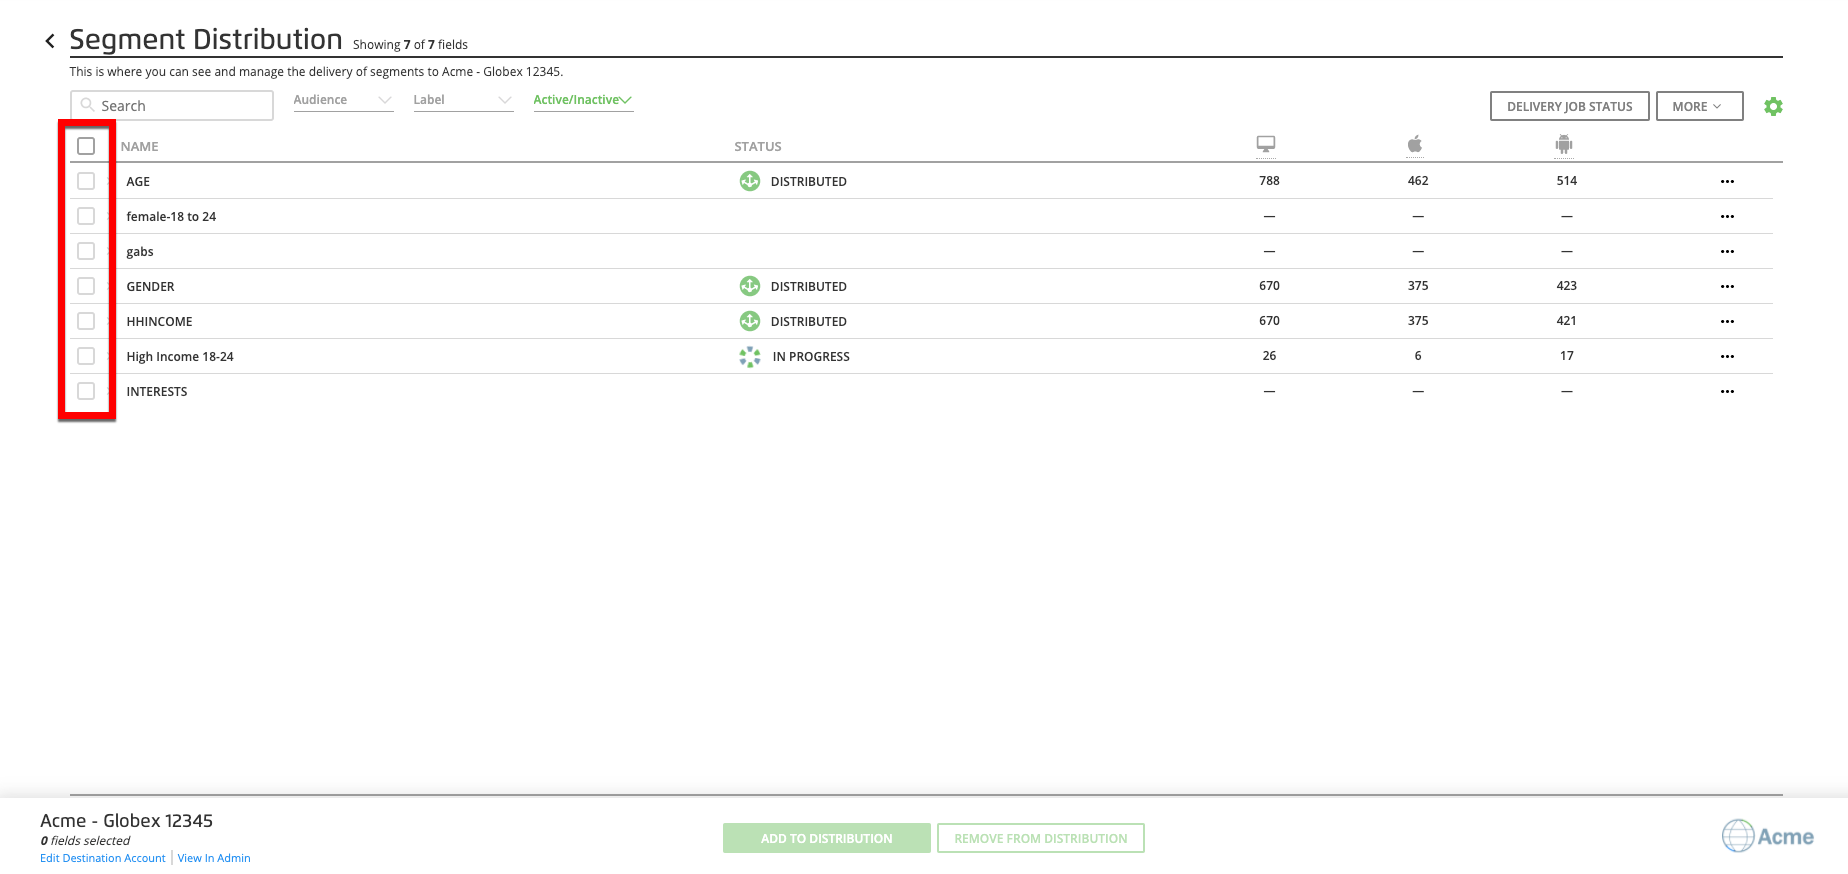
Note
For Data Marketplace destination accounts, this will be the Data Marketplace Segment Distribution page.
Several options can be used:
Distribute segments or fields: You can select an entire field to distribute—for example, if you want to distribute the AGE field for all different available ages. You can also choose to distribute an individual segment (field/value pair), such as AGE:42 by clicking the caret to the left of the field name and then checking the check box for the desired value.
Filter by audience: You can use the Audience dropdown list to filter the segment list by audience.
Filter with labels: For non-Data Marketplace destination accounts, you can use the Label dropdown list to filter the segments based on any labels that have been applied to them. Labels can be useful when you have a large number of segments that you want to distribute to multiple destinations.
Filter by inactive status: You can use the Active/Inactive dropdown list to view only segments that are not currently being distributed to this destination account ("inactive" segments).
Distribute Data Marketplace segments: To distribute Data Marketplace segments that LiveRamp will track usage and bill for, either select "Data Marketplace" from the dropdown list or enter the Data Marketplace segment IDs in the search field.
Tip
You can select and distribute up to 145 specific Data Marketplace segments at one time by pasting a comma-delimited string of Data Marketplace segment IDs, enclosed by brackets (for example, "[id1,id2,id3,...]").
Note
To add segments that have been uploaded to a particular audience, and all the segments that will be uploaded later to that audience, create a case in the LiveRamp Community portal to make that request.
Click Add To Distribution to start the distribution of your selected segments.
See "How LiveRamp Refreshes Distributed Data" for more information on how your distributed data can be refreshed.
Note
If you want to be able to resend all active segments for a particular destination account on your own, LiveRamp can enable this ability for you. Create a support case in the LiveRamp Community portal to have this enabled. See "Resend Active Segments" for more information.
See "How LiveRamp Refreshes Distributed Data" for more information on how your distributed data can be refreshed.
If you want to be able to resend all active segments for a particular destination account on your own, LiveRamp can enable this ability for you. Create a support case in the LiveRamp Community portal to have this enabled. See "Resend Active Segments" for more information.
Report Usage for Data Marketplace Distributions to Advertiser Direct Destinations
LiveRamp's Advertiser Direct solution (FKA "Consumer Social") allows brands and agencies to use third-party audiences across a wide variety of verticals from the LiveRamp Data Marketplace for optimization on Facebook, X, Pinterest, LinkedIn, Snapchat, and TikTok.
All advertisers (and agencies acting on behalf of advertisers) are required to report their usage of all LiveRamp Data Marketplace data distributed to the Advertiser Direct social media platforms on a monthly basis.
Note
If you are using multiple segments that are priced differently in the same audience or group at the destination platform (such as within one ad group or ad set, depending on the platform’s terminology), the price for the highest-priced segment that each consumer matches to will be applied to the impressions for that consumer (no matter what pricing model the platform uses). For example, if you are using segment A that is priced at 250% PoM and another segment B that is priced at 15% in the same audience or group, the 250% would apply toward the impressions for any consumers who were included in segment A.
All Facebook usage reporting is performed automatically. To implement automated usage reporting for Facebook Data Marketplace data, you must add LiveRamp as a partner in your Facebook Ad Account with the “View Performance” role. Follow the steps in “Add LiveRamp as a Partner”. You do not need to perform any additional usage reporting actions for Facebook or X.
Overall Steps to Report Usage
For those platforms where automated reporting is not used, follow the appropriate platform-specific instructions below to create a usage report.
Follow the instructions in the "Send the Usage Reporting File to LiveRamp" section of this article to send the usage report to LiveRamp.
You will need to include a mapping between the segment info (segment name and ID) and the platform-specific campaign IDs and ad set IDs for each segment used (as described below). If there are multiple people on your team who distribute Data Marketplace segments to these platforms, make sure that you have a system to keep track of the segment name and ID for each segment used, and the campaign IDs and ad set IDs that Data Marketplace data has been used for.
Warning
Due date: The usage report for a given month’s usage is due by the 10th of the following month.
Platform-Specific Usage Reporting Instructions
Follow the steps in the appropriate section below to create a platform-specific usage report, and then follow the instructions in the "Send the Usage Reporting File to LiveRamp" section of this article to send the usage report to LiveRamp.
Facebook Data Marketplace usage reports are pulled automatically via API. When you added LiveRamp as a partner in your Facebook Ad Account with the "View Performance" role before activating the Facebook Data Marketplace destination account, you enabled automated usage reporting for Facebook.
To report monthly usage for Pinterest Data Marketplace distributions:
From a web browser, navigate to Pinterest and enter your login information.
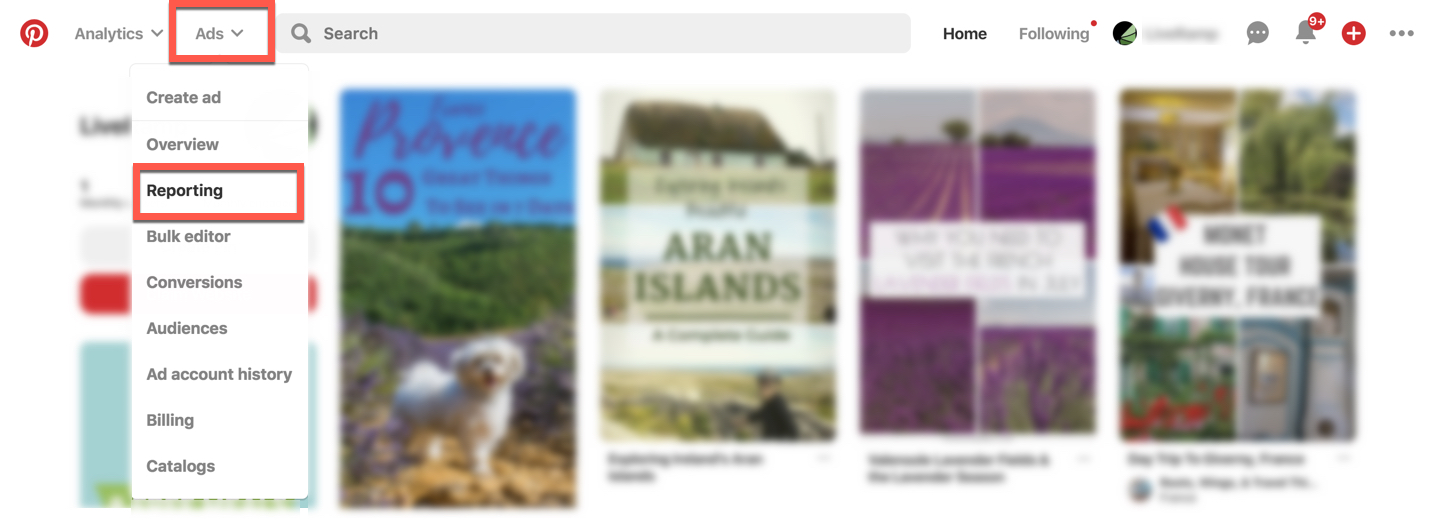
From the Ads Manager Welcome page, select the Ads tab and then select “Reporting”.
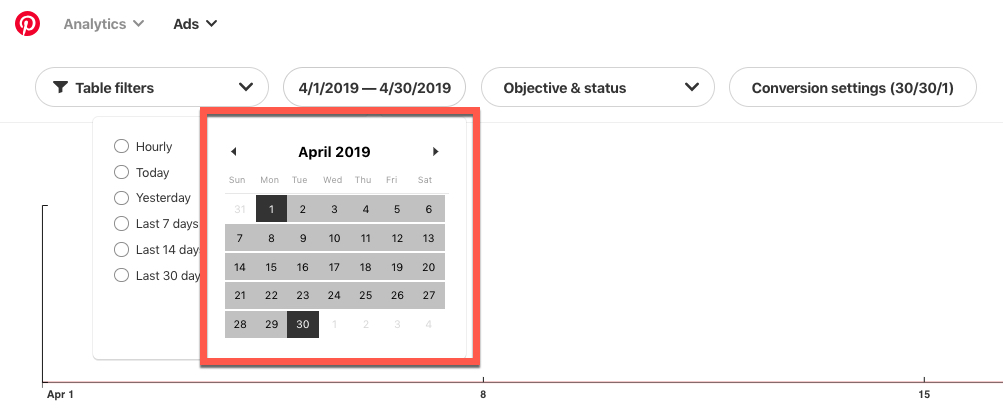
Click the date range button.
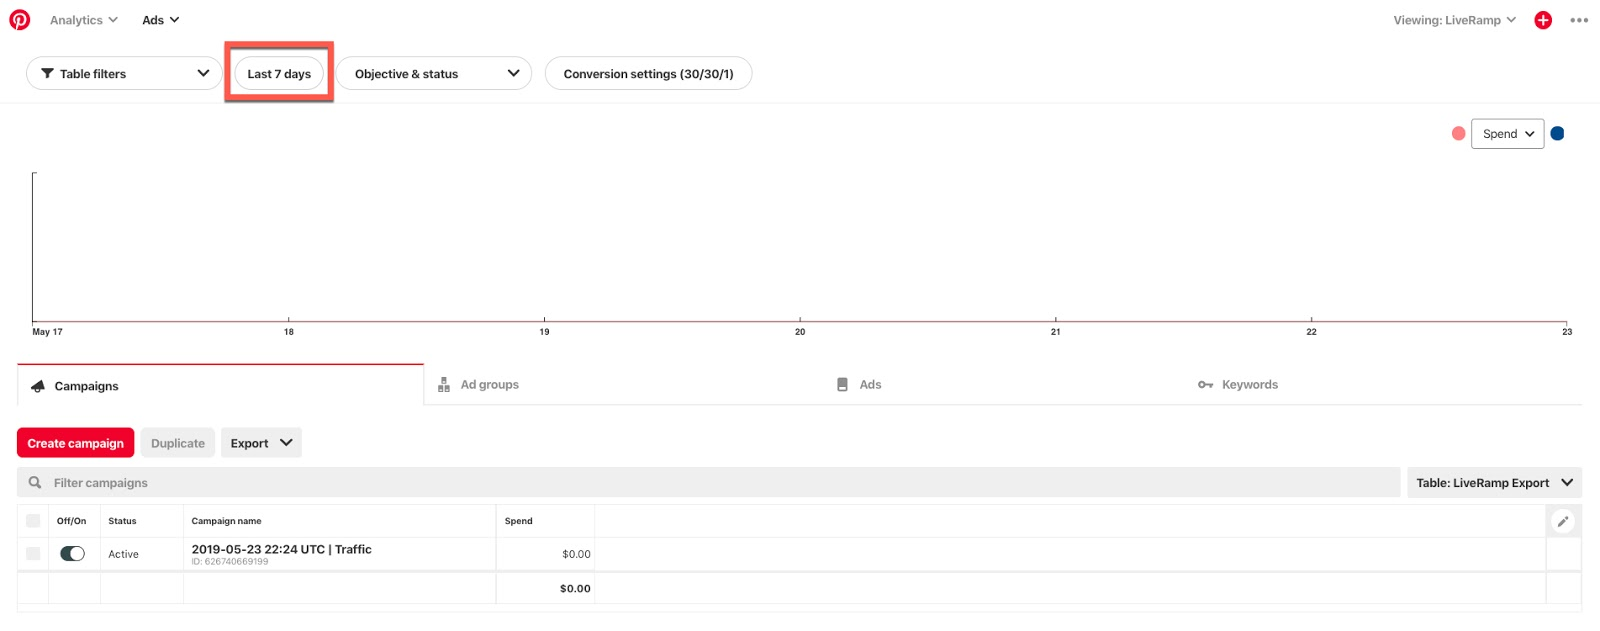
From date picker, select the first and last day of the previous month.
Select the Ad Groups tab.
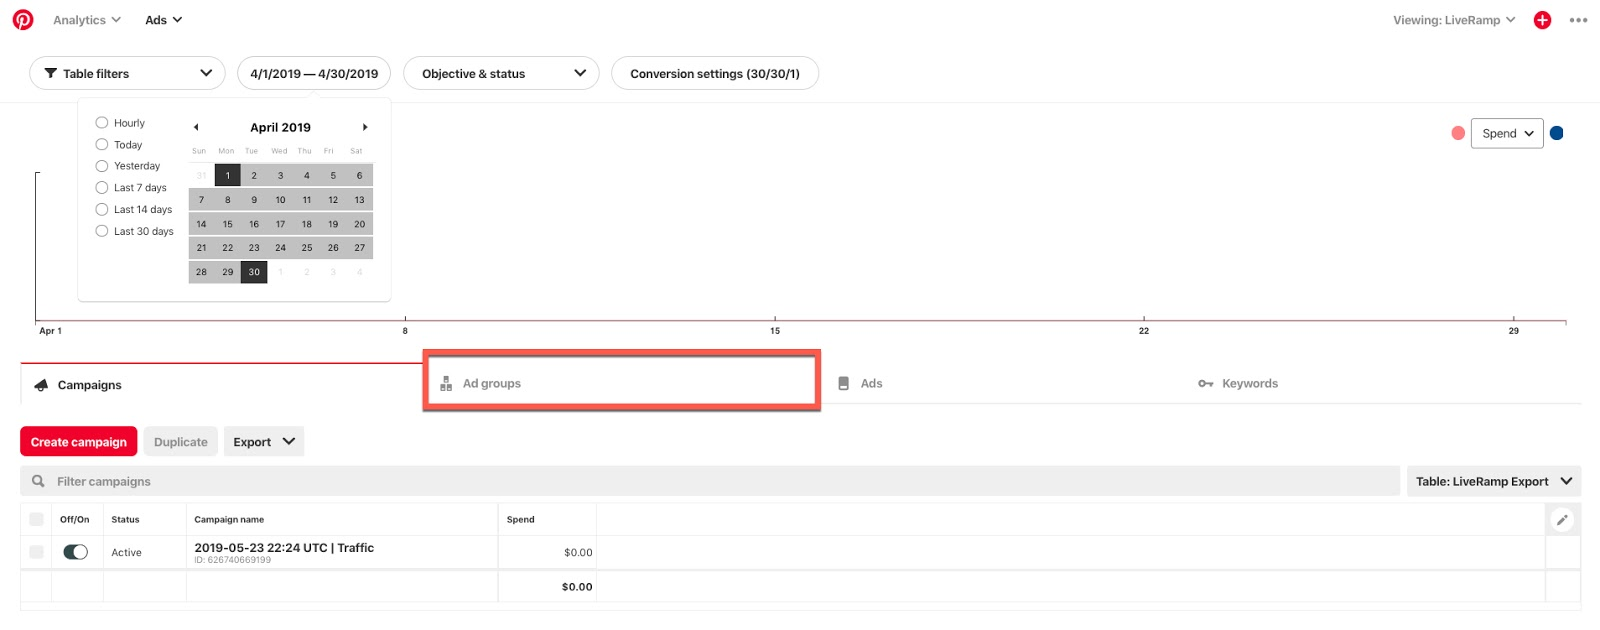
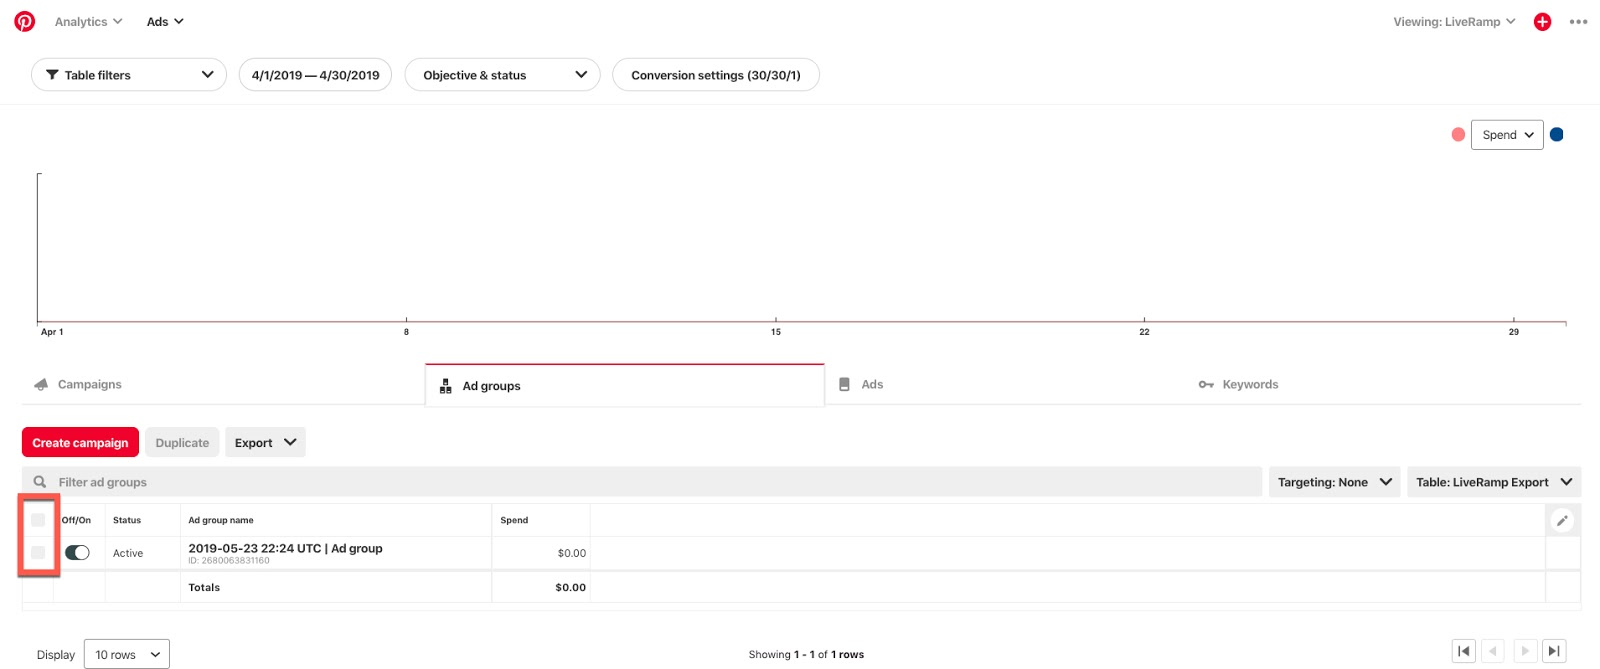
Check the check boxes for the Ad Groups that used LiveRamp-distributed audiences.
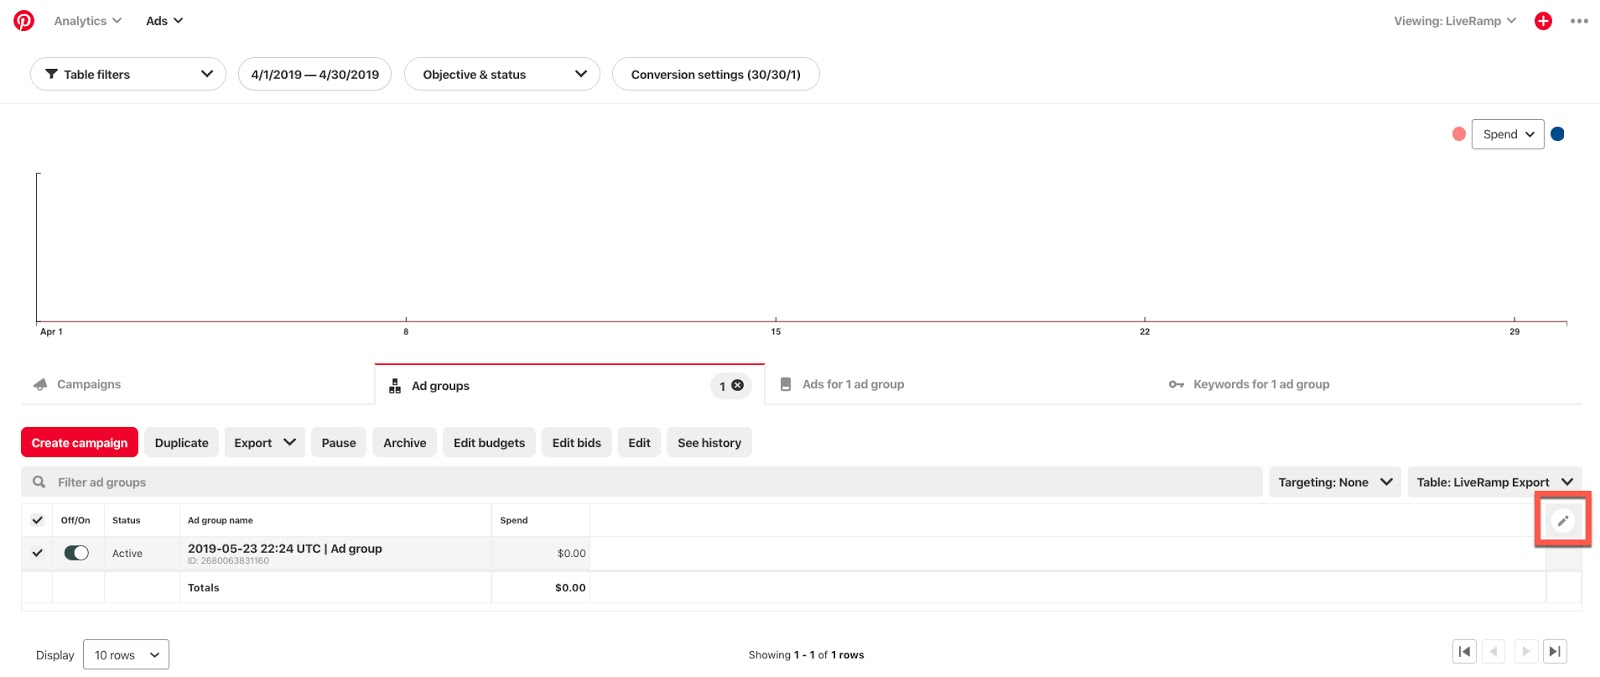
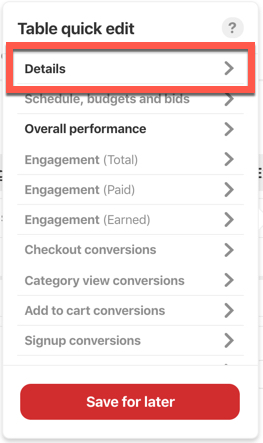
Click the pencil icon. The Table quick edit dialog appears.
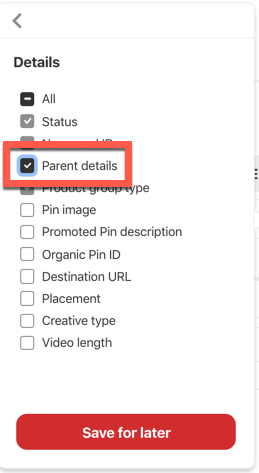
Select the Details tab.
Check the Parent details check box.
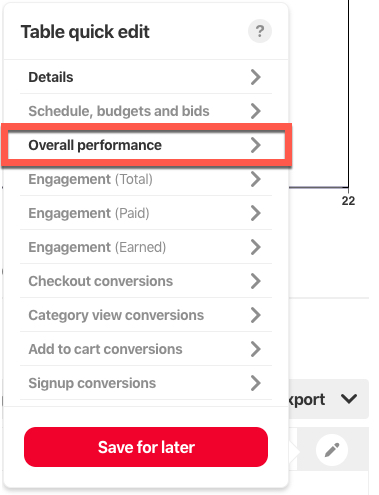
Select the Overall Performance tab.
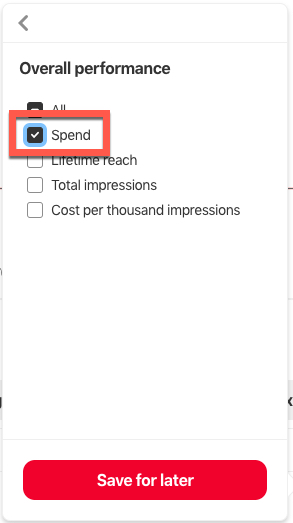
Make sure that only the Spend check box is checked.
Tip
Want to save this layout? Click Save for later if you want to save the custom table for later use or make it your default table.
Select the Export tab and then select “Report: Current Table View”.

After the file has been downloaded, modify the file name to ensure that all usage reporting is properly attributed (Pinterest exports the file with a file name in the following format by default: “metrics-[start date]_to_[end date].csv”):
For Advertisers: Change “metrics” to “Pinterest-[Country Code]-[Advertiser Name]” (for example, “Pinterest-[Country Code]-[Advertiser Name]-2019_04_01_to_2019_04_30.csv”)
For Agencies reporting on behalf of an Advertiser: Change “metrics” to “Pinterest-[Country Code]-[Agency Name-Advertiser Name]” (for example, “Pinterest-[Country Code]-[Agency Name-Advertiser Name]-2019_04_01_to_2019_04_30.csv”)
Note
Use the two-digit country code for your country or region (for example, "UK" for the United Kingdom or "US" for the United States).
Follow the instructions in the "Send the Usage Reporting File to LiveRamp" section of this article to send the usage report to LiveRamp.
X Data Marketplace usage reporting is handled automatically. You do not need to create a usage report in the X UI or send a separate usage reporting file to LiveRamp.
To report monthly usage for LinkedIn Data Marketplace distributions:
From a web browser, navigate to LinkedIn and enter your login information.
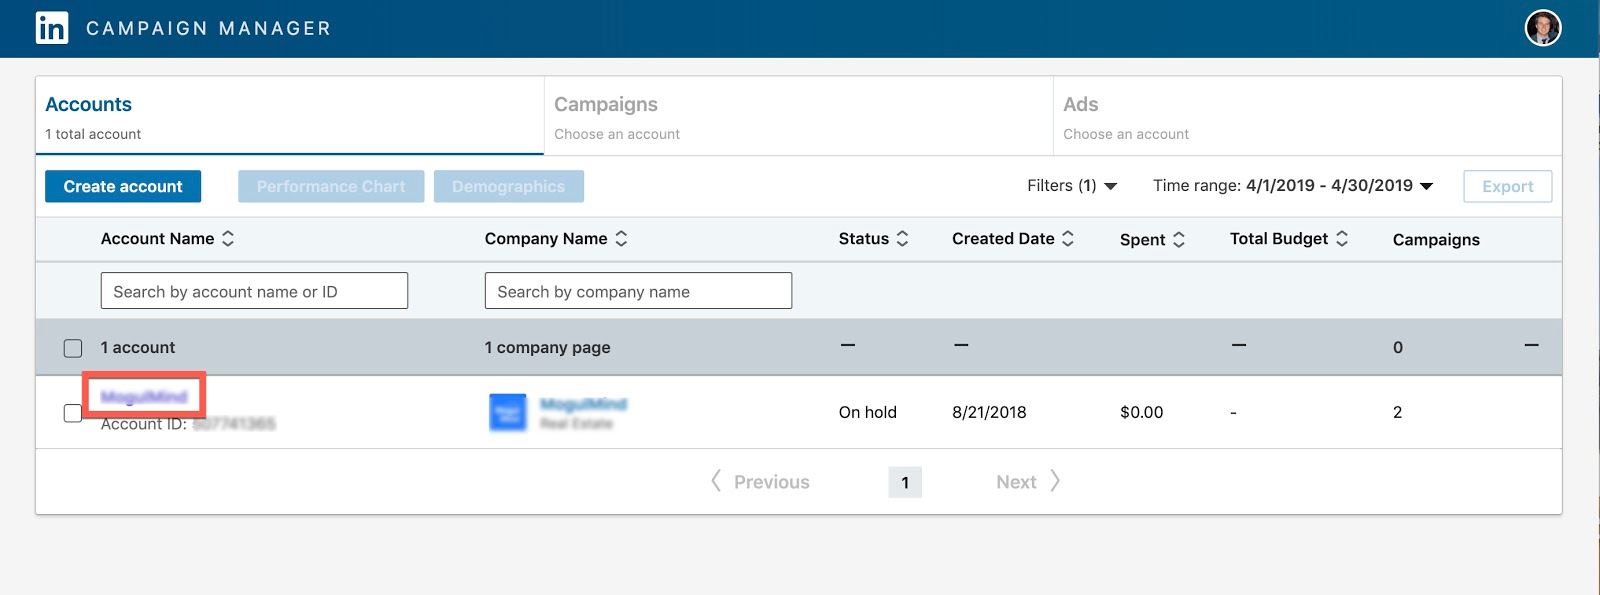
Navigate to Campaign Manager.
Click into the appropriate ad account.
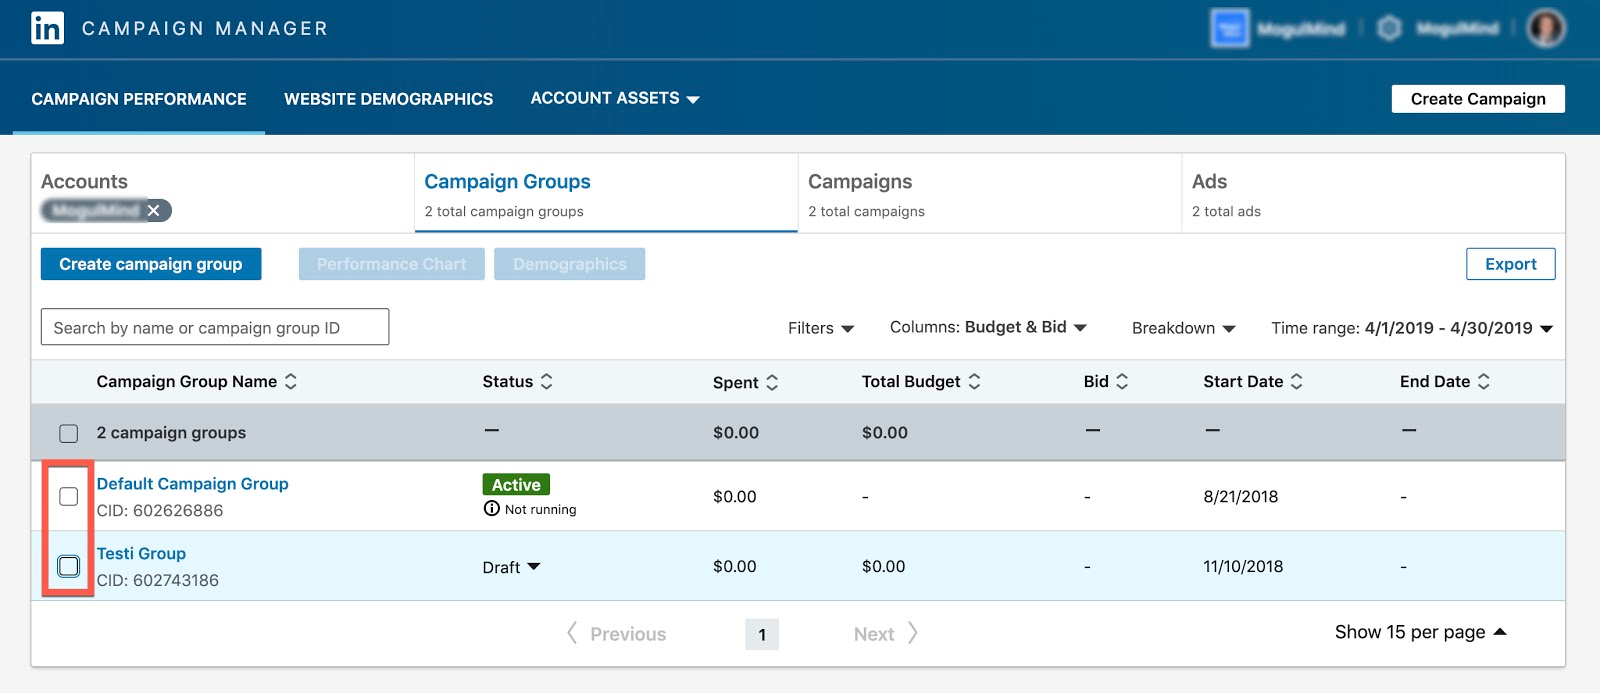
Check the check boxes for all Campaign Groups that are leveraging LiveRamp-distributed segments.
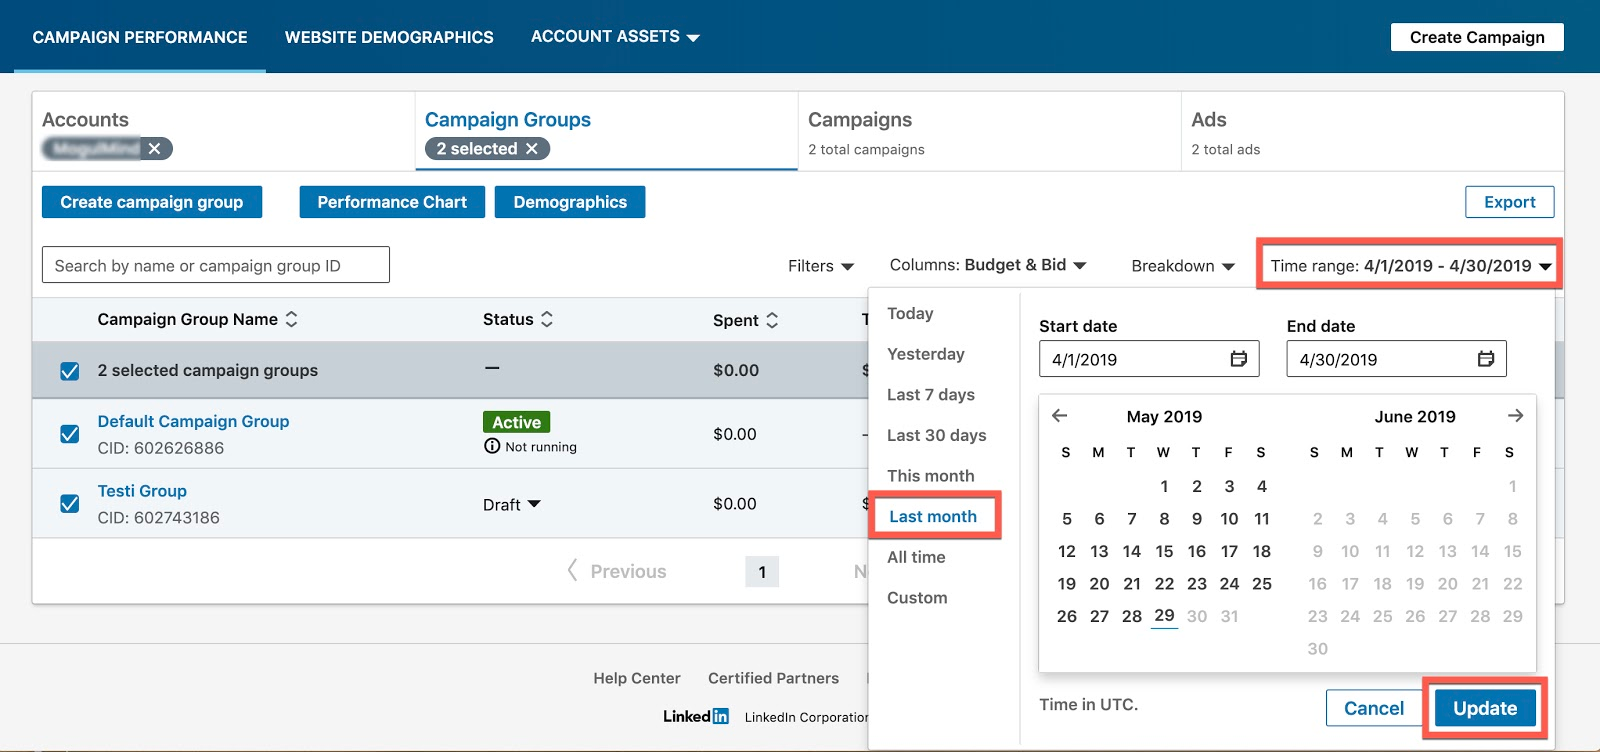
Click the Time range drop down, click Last month, and then click Update to select the previous month.
Click Export.
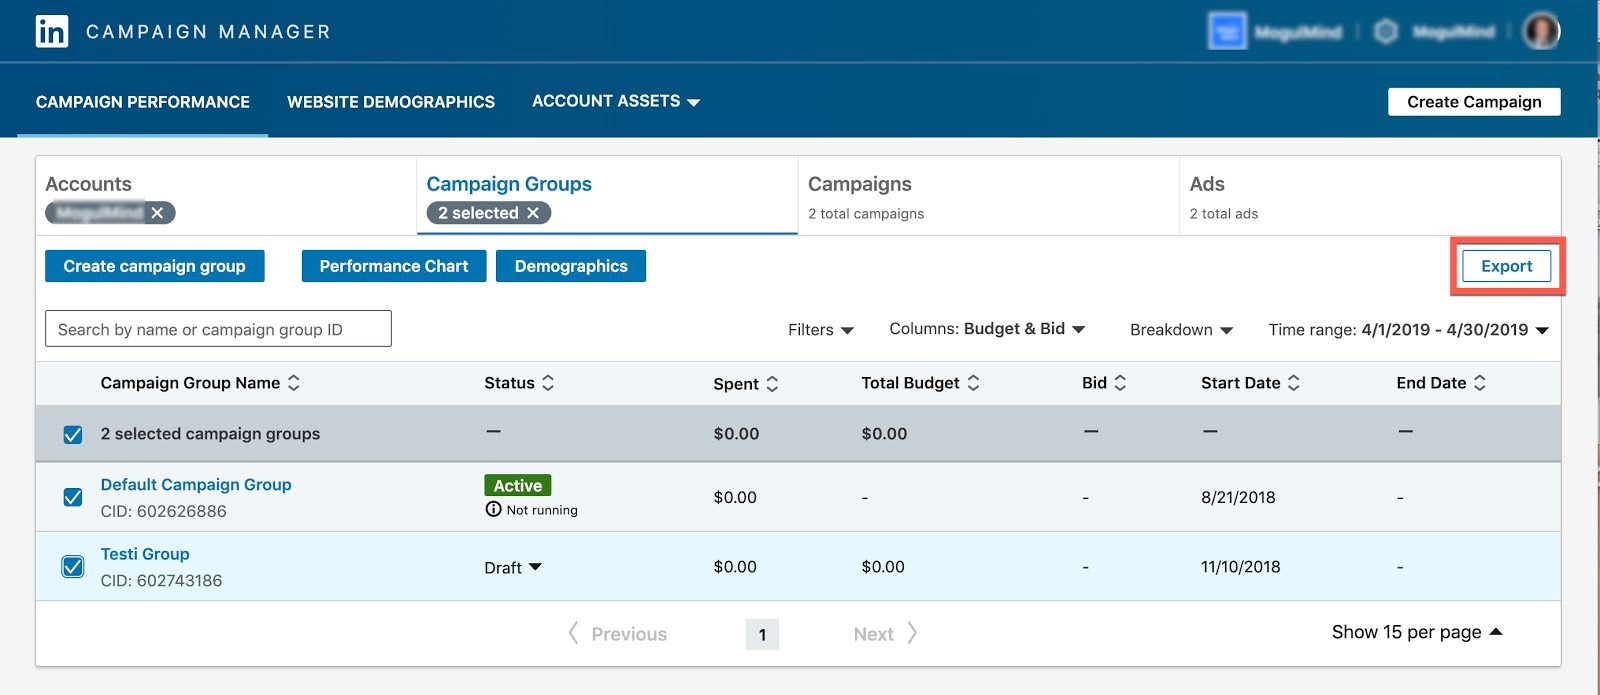
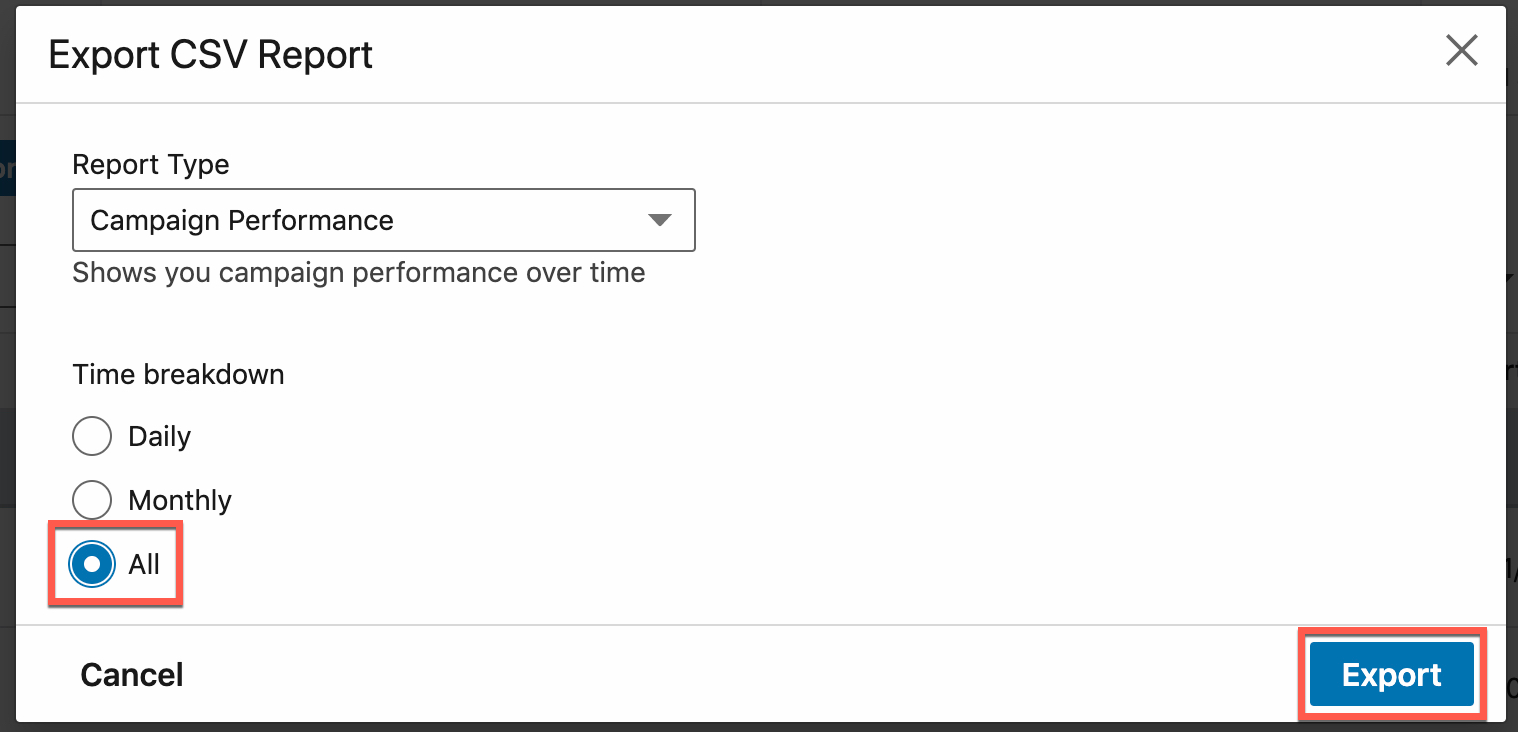
From the Report Type dropdown list, select "Campaign Performance."
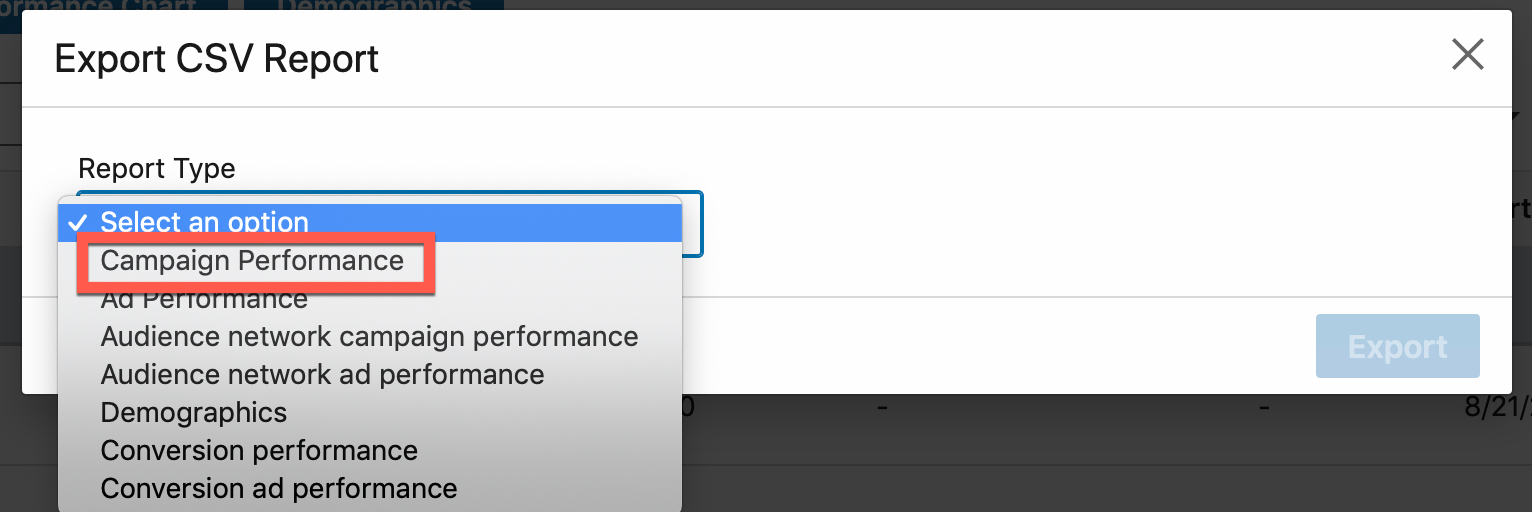
Under “Time breakdown”, select “All” and then click Export.
After the file has been downloaded, modify the file name to ensure that all usage reporting is properly attributed (LinkedIn exports the file with a file name in the following format by default: “campaign_[campaign # placeholder]_campaign_performance_report.csv”):
For Advertisers: Change the file name to “LinkedIn-[Country Code]-[Advertiser Name]-[date range]” (for example, “LinkedIn-[Country Code]-[Advertiser Name]-04_01_2019_to_04_30_2019.csv”)
For Agencies reporting on behalf of an Advertiser: Change the file name to “LinkedIn-[Country Code]-[Agency Name-Advertiser Name]-[date range]” (for example, “LinkedIn-[Country Code]-[Agency Name-Advertiser Name]-04_01_2019_to_04_30_2019.csv”)
Note
Use the two-digit country code for your country or region (for example, "UK" for the United Kingdom or "US" for the United States).
Follow the instructions in the "Send the Usage Reporting File to LiveRamp" section of this article to send the usage report to LiveRamp.
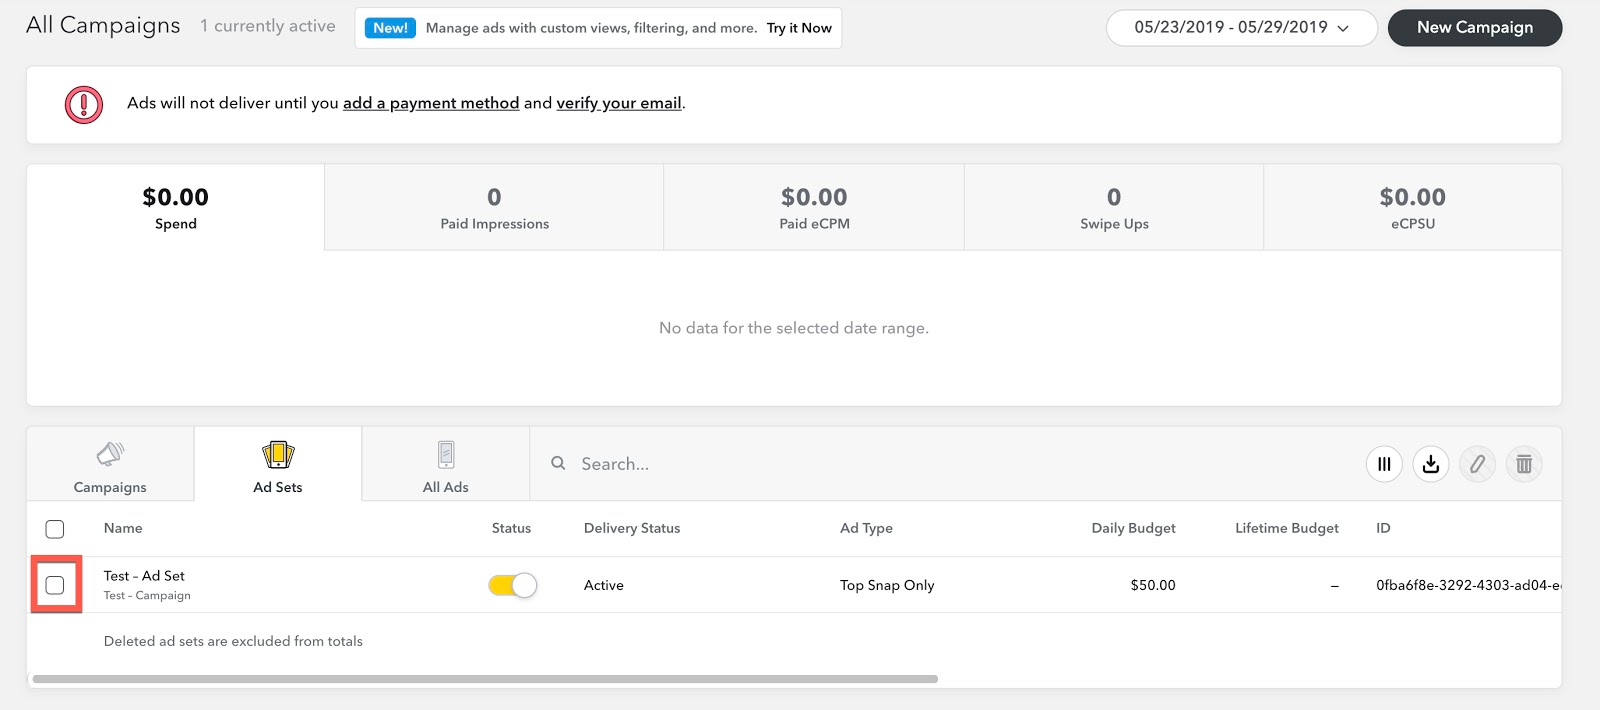
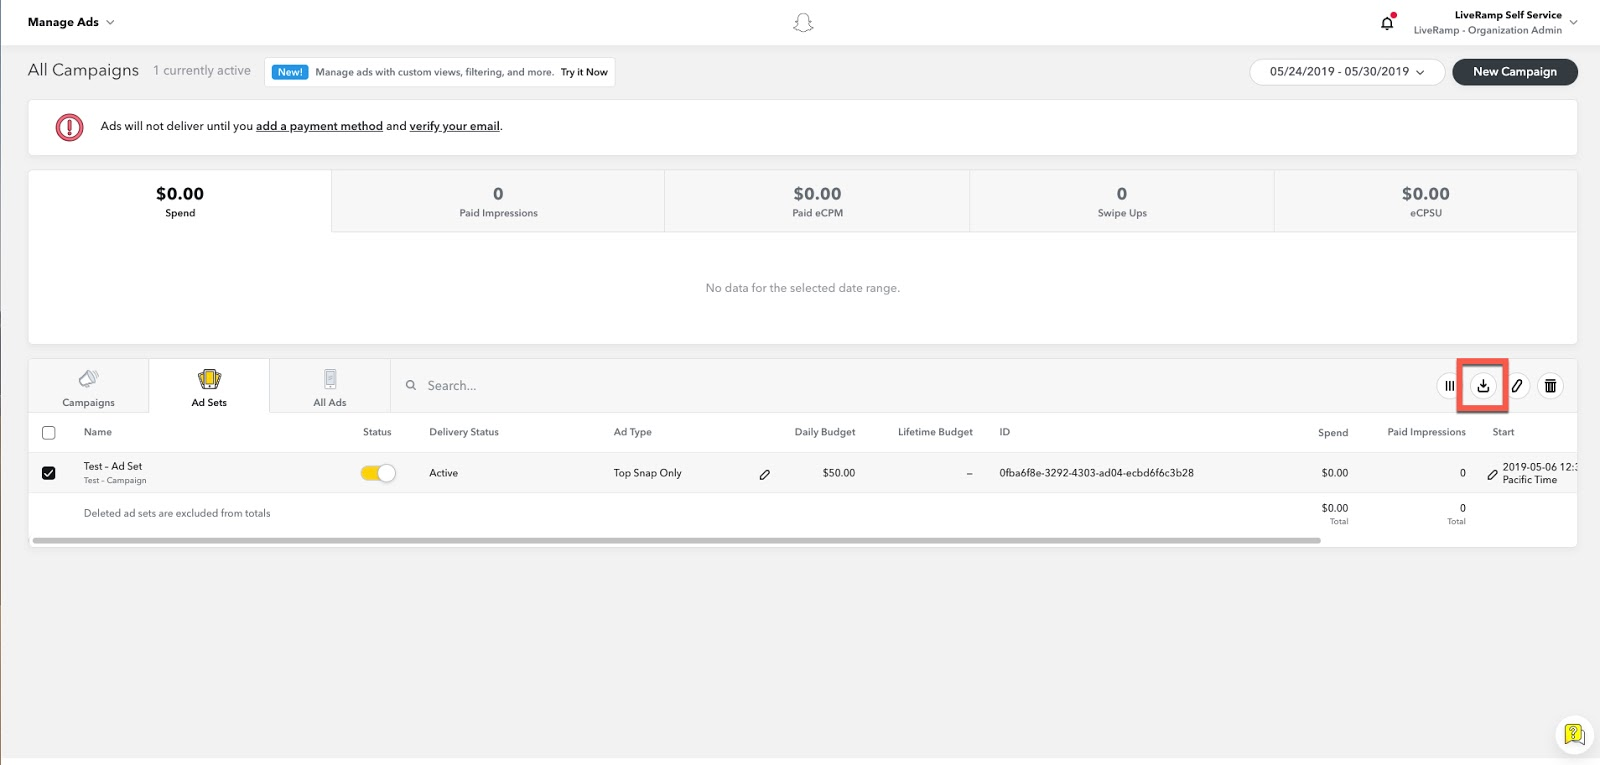
To report monthly usage for Snap Data Marketplace distributions:
From a web browser, navigate to Snap and enter your login information.
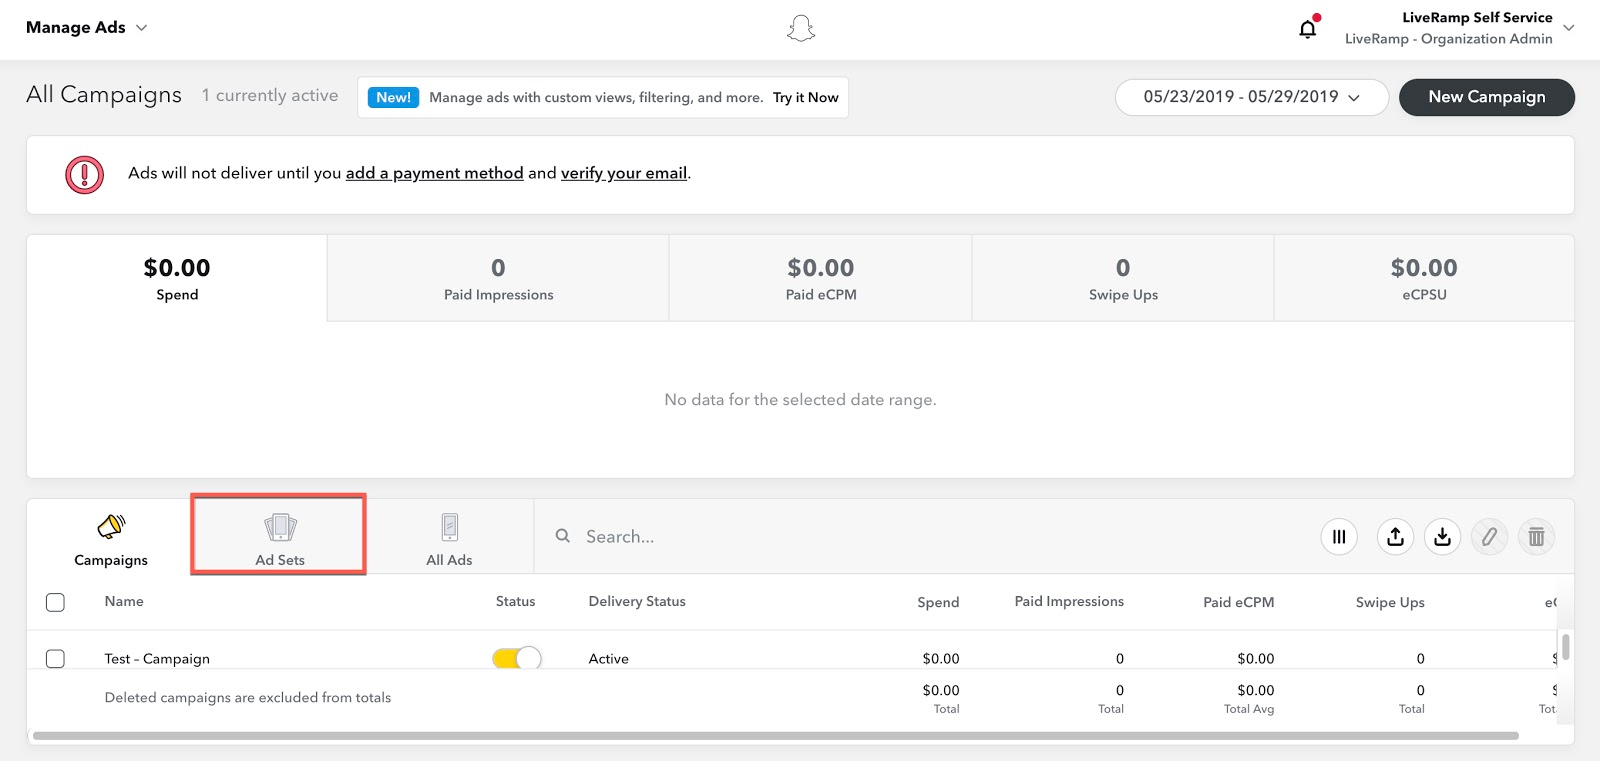
Select the Ad Sets tab.
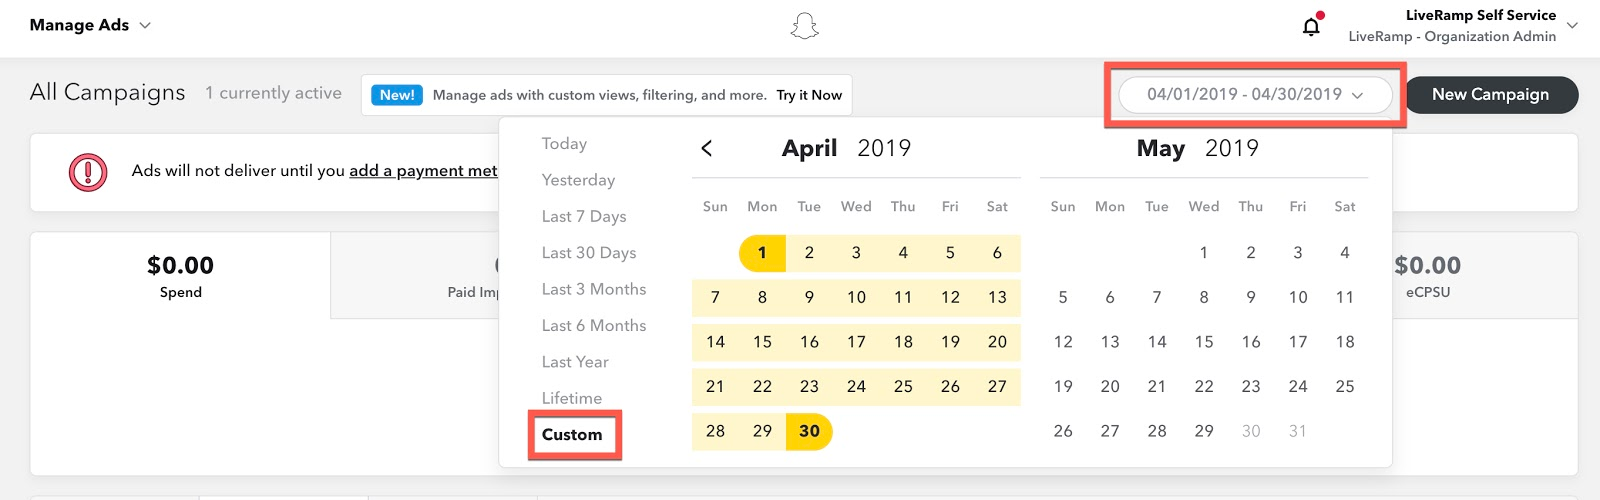
Click the calendar drop down, click Custom, and then select the prior month.
Check the check boxes for all Ad Sets that are leveraging LiveRamp-distributed segments.
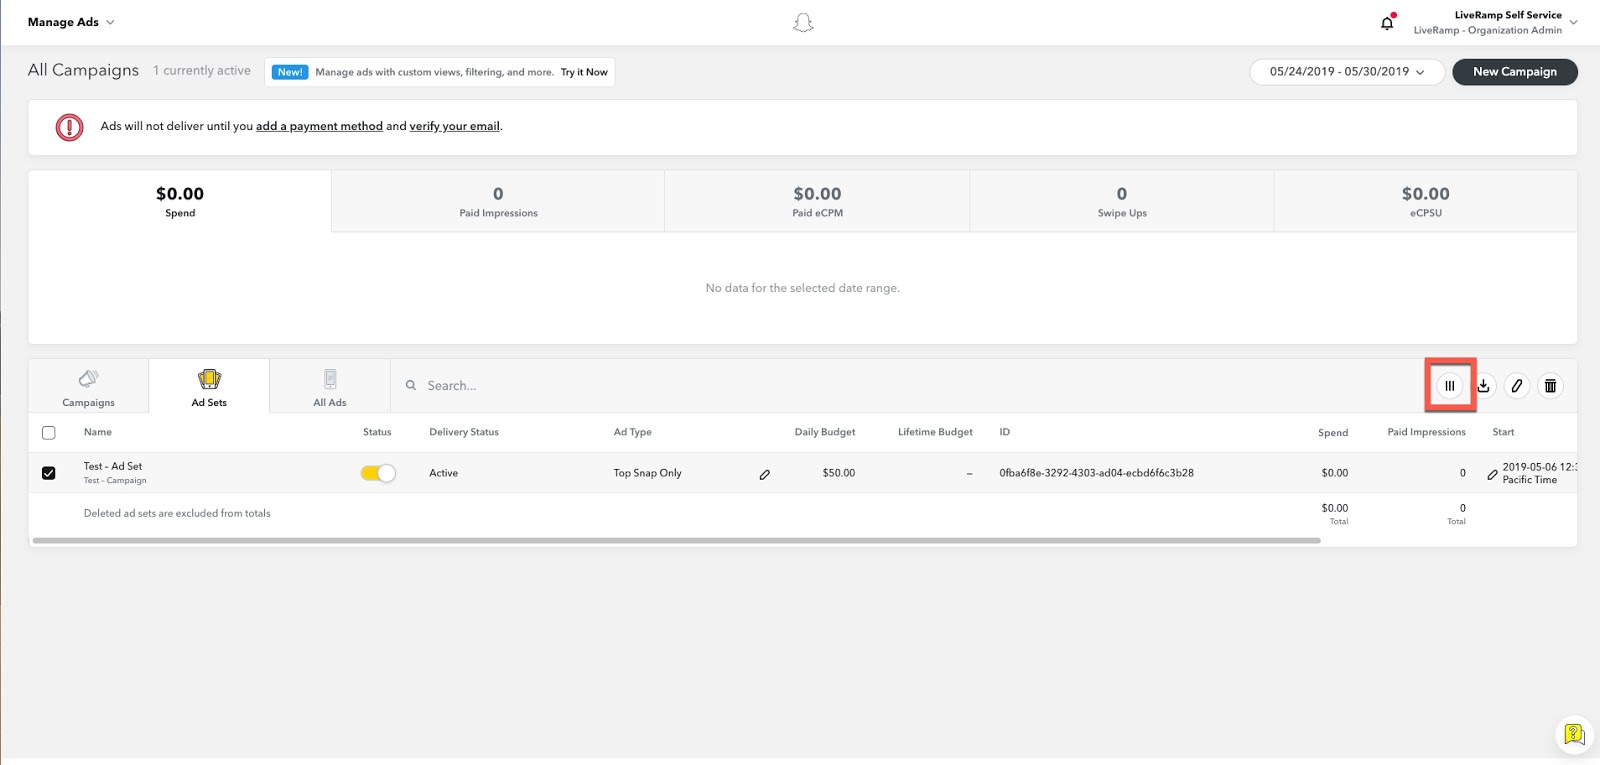
Click the three vertical lines on the right side to open the Customize Columns dialog window.
In the Details section, check the check boxes for "ID”, “End”, and “Start”.
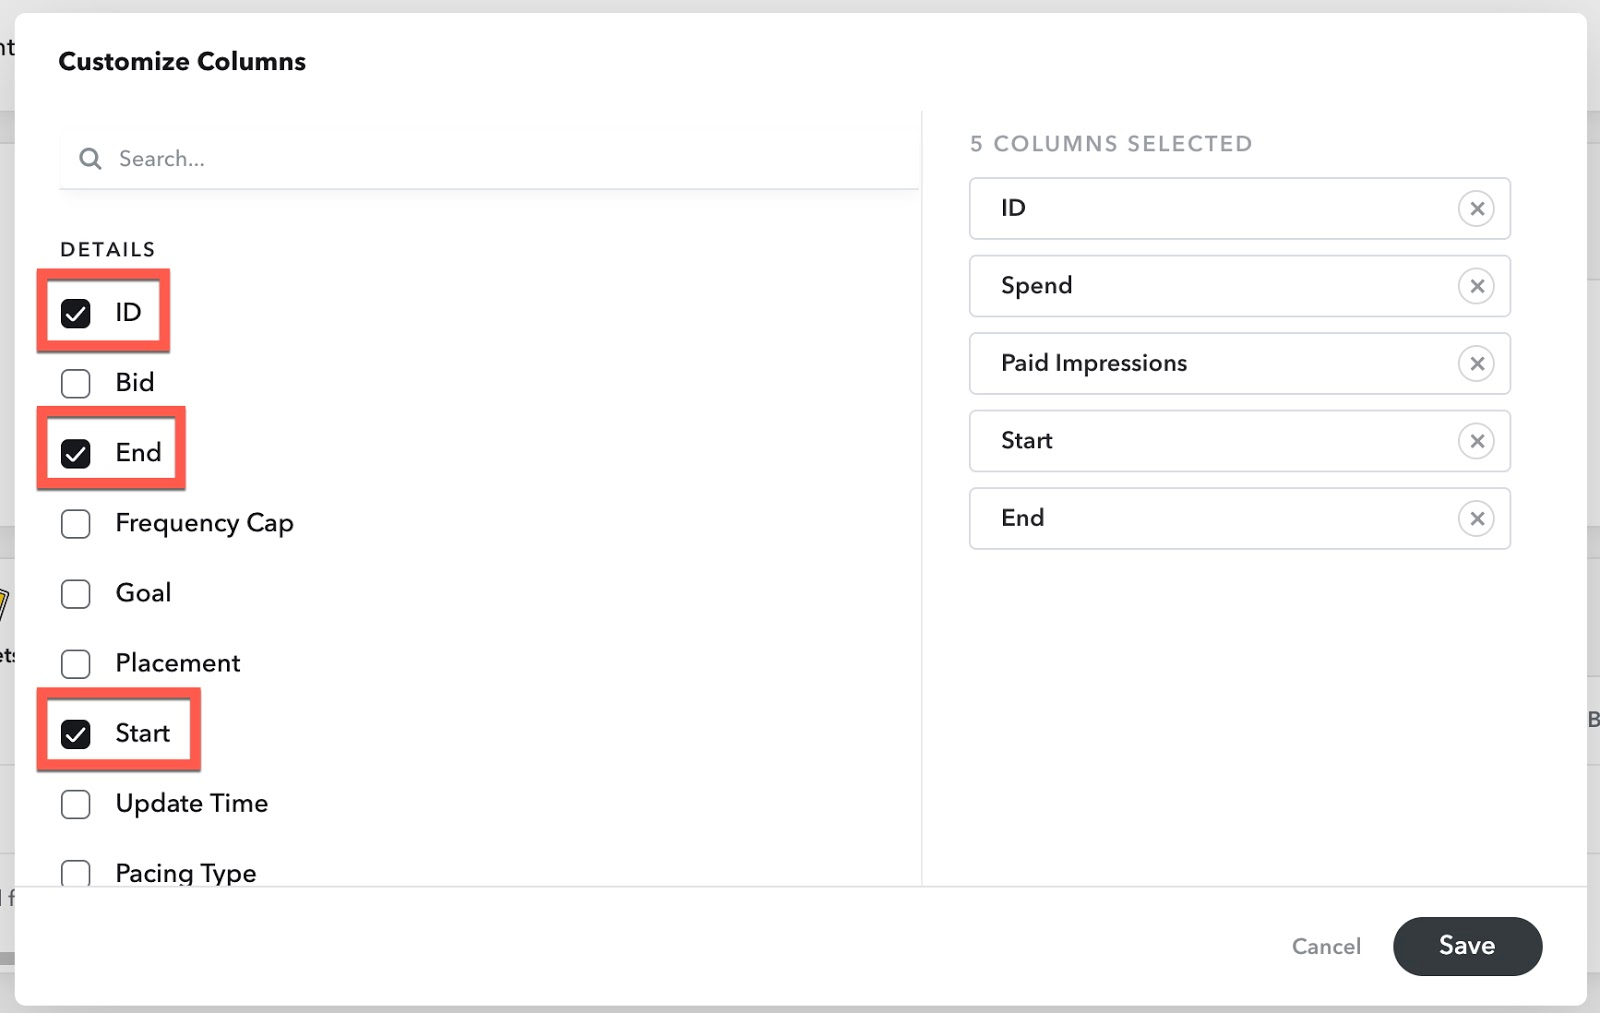
Scroll down to the Delivery category and check the check box for “Paid Impressions."

Scroll down to the Spend category and check the check box for “Spend”.
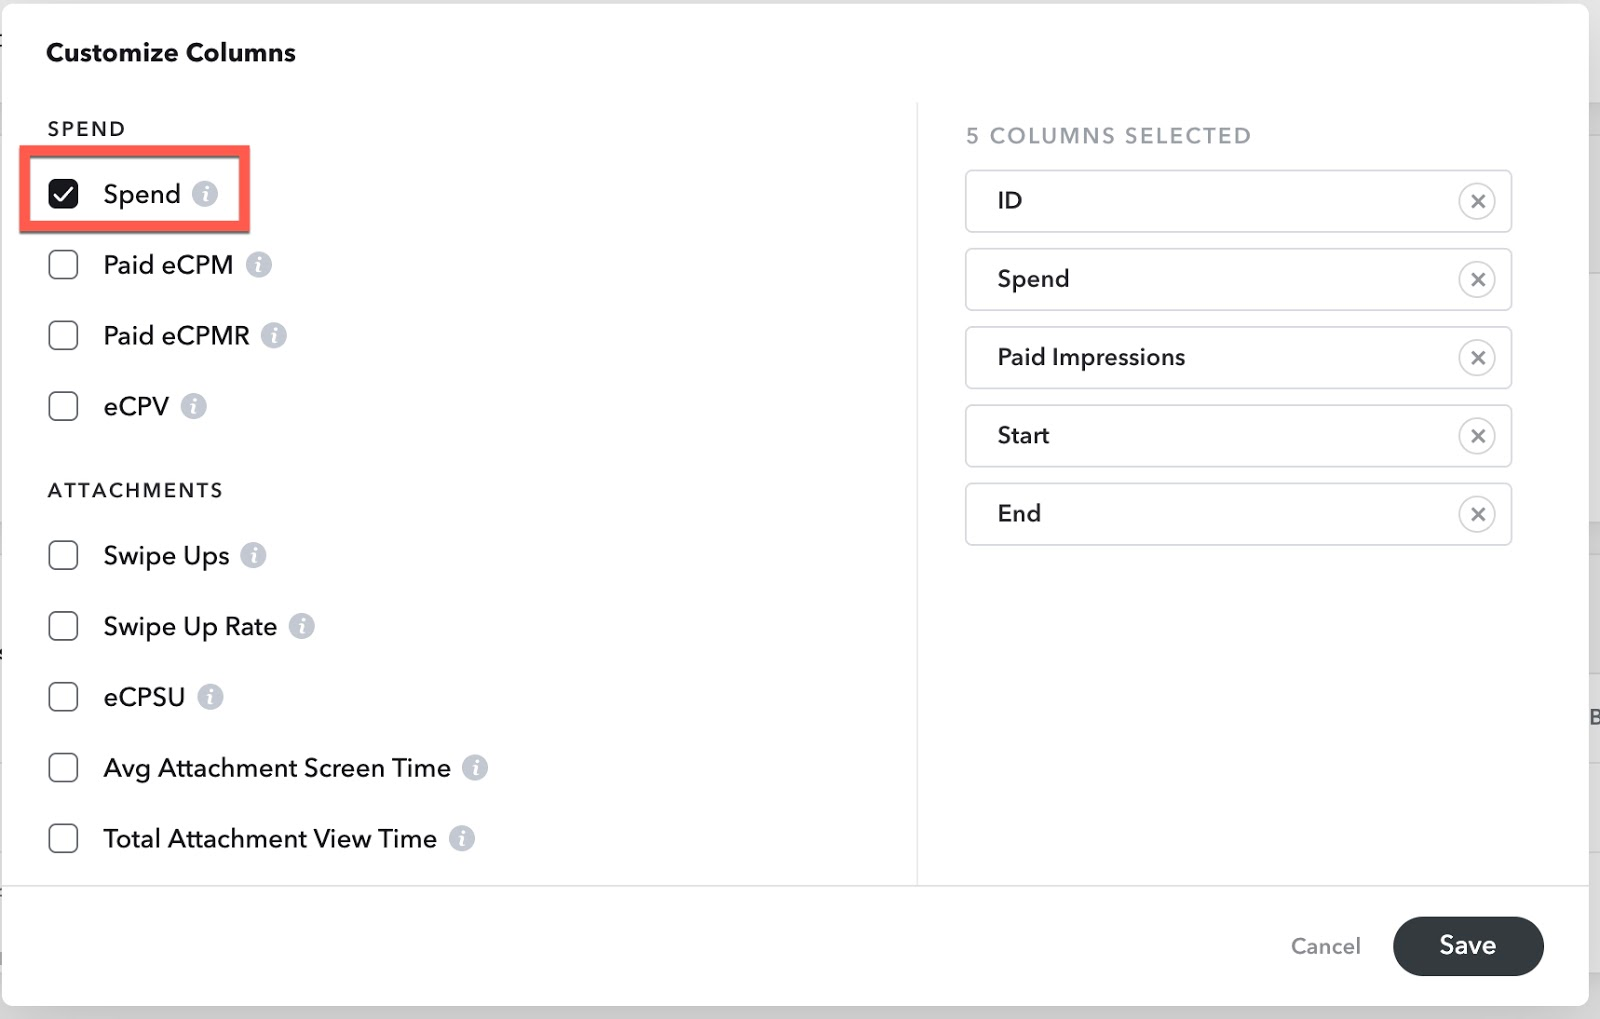
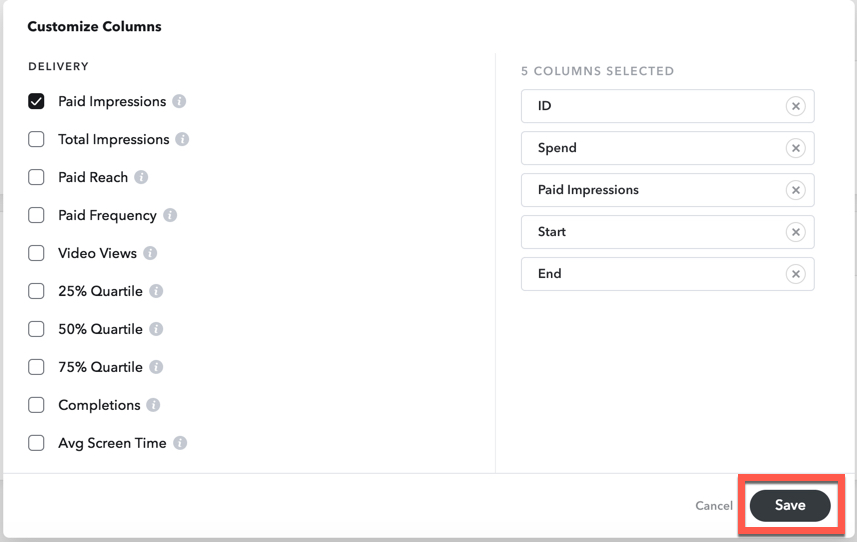
Reorder the columns as shown below.
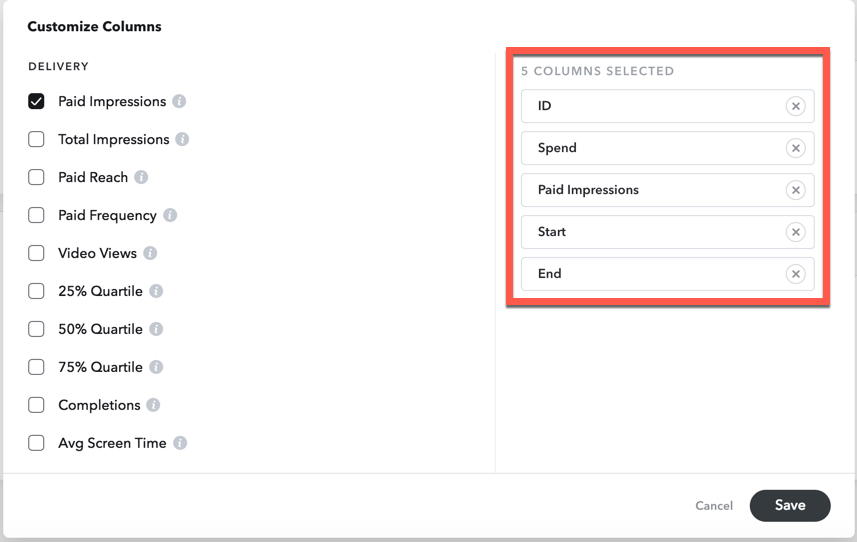
Click Save.
Click the download button to open the Export Configuration dialog window.
Under “INTERVAL BREAKDOWN”, select “Breakdown by month” and then click Export.
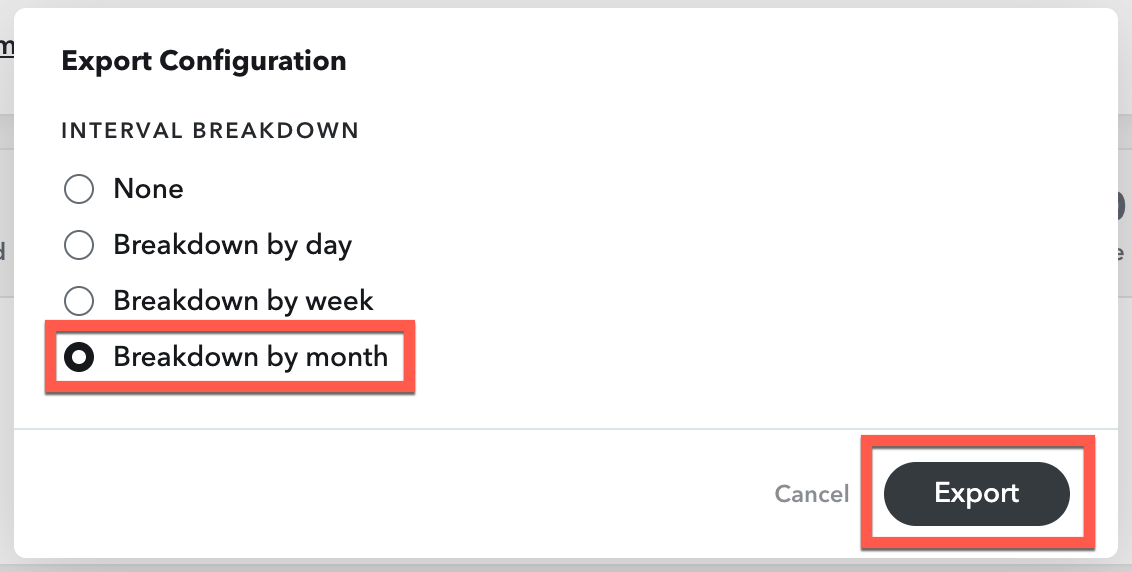
Follow the instructions in the "Send the Usage Reporting File to LiveRamp" section of this article to send the usage report to LiveRamp.
To report monthly usage for TikTok Data Marketplace distributions:
From TikTok Ads Manager, select the Campaign tab and then select the appropriate time frame and the campaigns that were live and/or registered any impressions during this time frame. Click and select the Export Ads report.
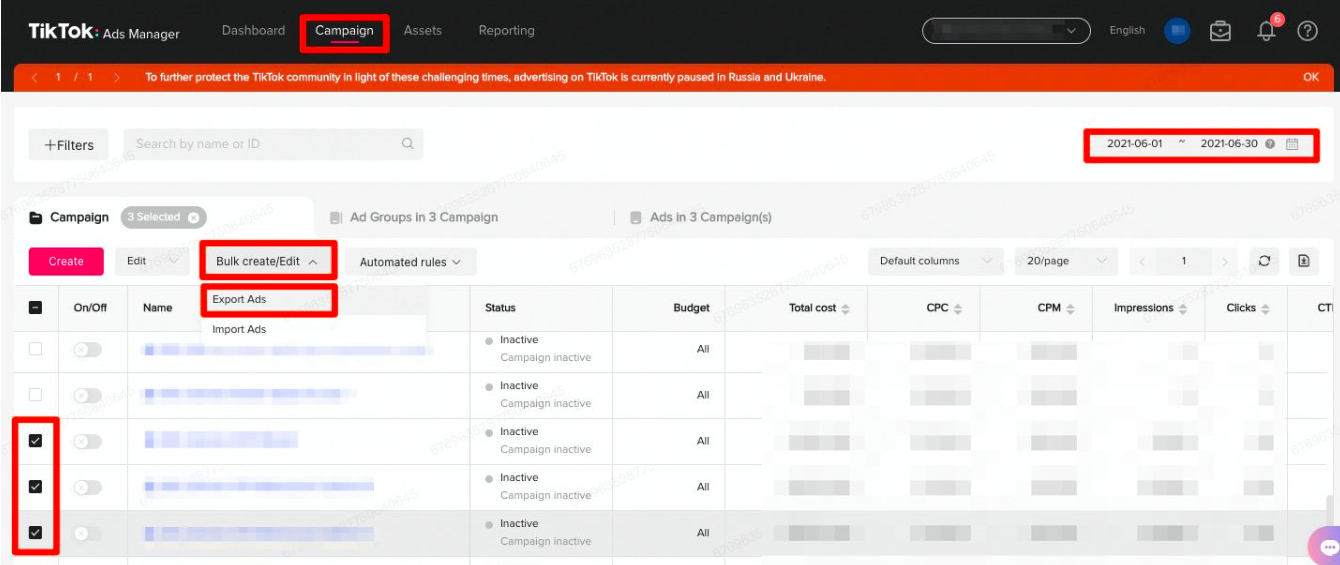
A report with details on various audiences used across these campaigns downloads.
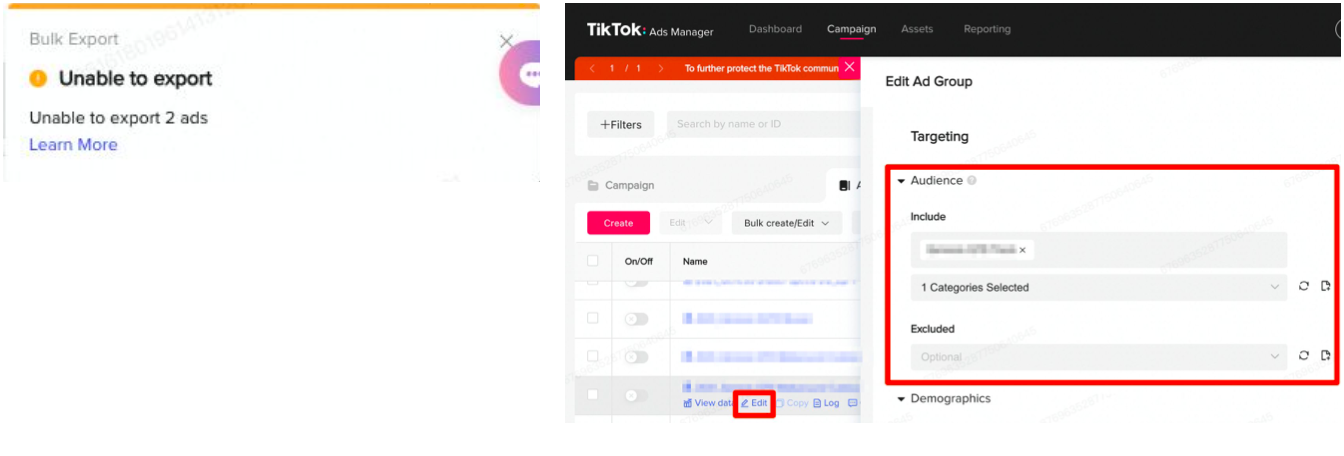
Note
If the bulk export function fails, locate the individual ad group and select Edit. You can locate the audience name from the Edit Ad Group pane one ad group at a time. Skip to step 3 below.
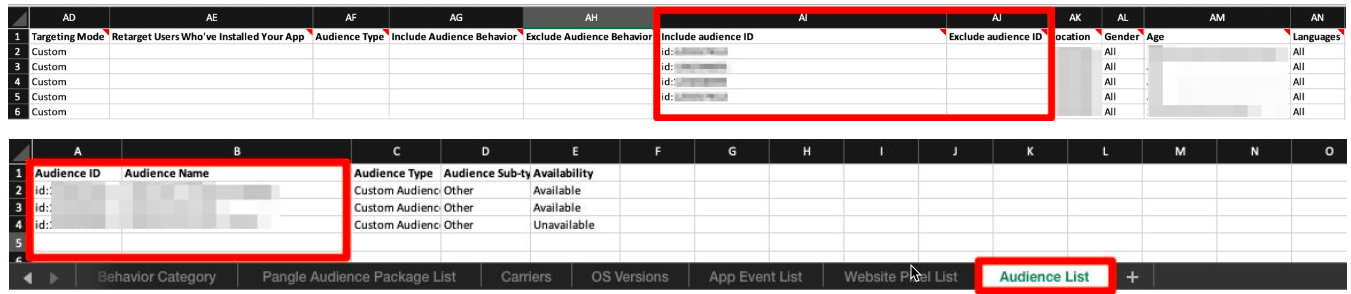
Open the downloaded Excel report and look at columns "Include Audience ID'/'Exclude Audience ID". If there is data, those ad groups used audiences. Select the Audience List tab in the Excel report to confirm if these segments are the third-party audiences/Lookalike audiences from your data seller and note the Audience IDs and Names for inclusion in the billing report.
From the Campaign tab, select Ad Groups. Based on the info from the previous steps, identify which ad groups used third-party audiences/lookalike audiences. Select those ad groups and export the table by clicking the download icon in the top right.
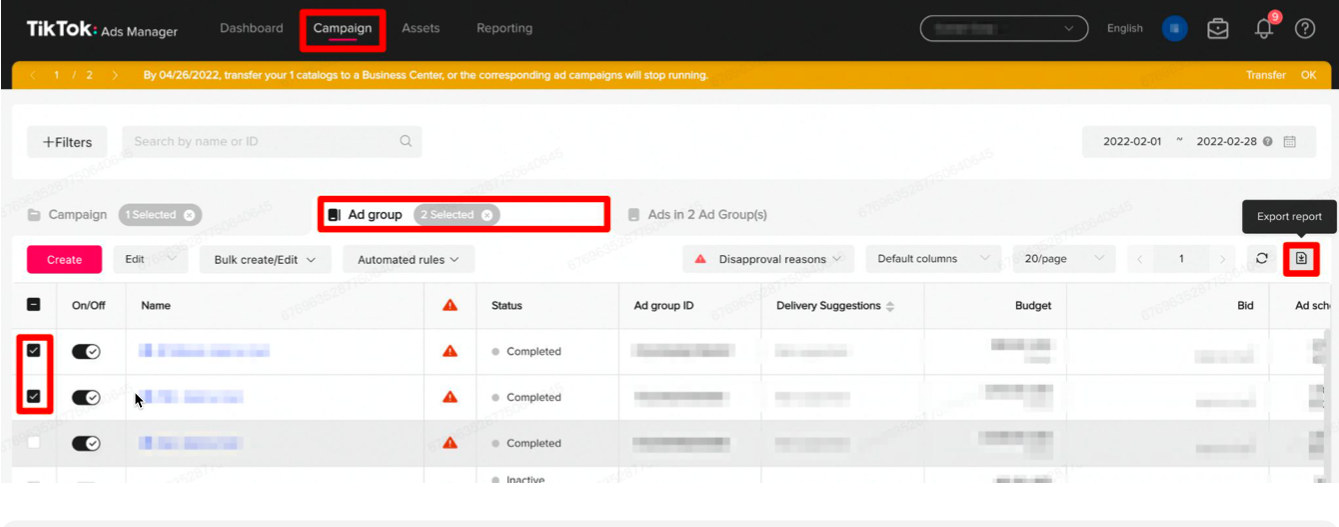
Use the downloaded report from the previous step and make sure the following columns are included:
Advertiser name
Campaign name
Ad account ID
Audience ID
Audience name
Impressions
Total spend
LiveRamp segment name
LiveRamp segment ID
If you're a Customer Profiles customer who's used Data Marketplace data to filter your first-party data before distributing to Google Customer Match (GCM), you are required to provide our Data Marketplace billing team with a usage report on a monthly basis.
Note
These types of distributions are part of our Advertiser Direct program and require the appropriate agreement that includes GCM. Data used in this way is billed at the Advertiser Direct percentage of your media spend.
The usage report for a given month’s usage is due by the 10th of the following month.
To pull a usage report from GCM:
Note
Screenshots shown were current at the time of publication.
Log in to your Google Ads account.
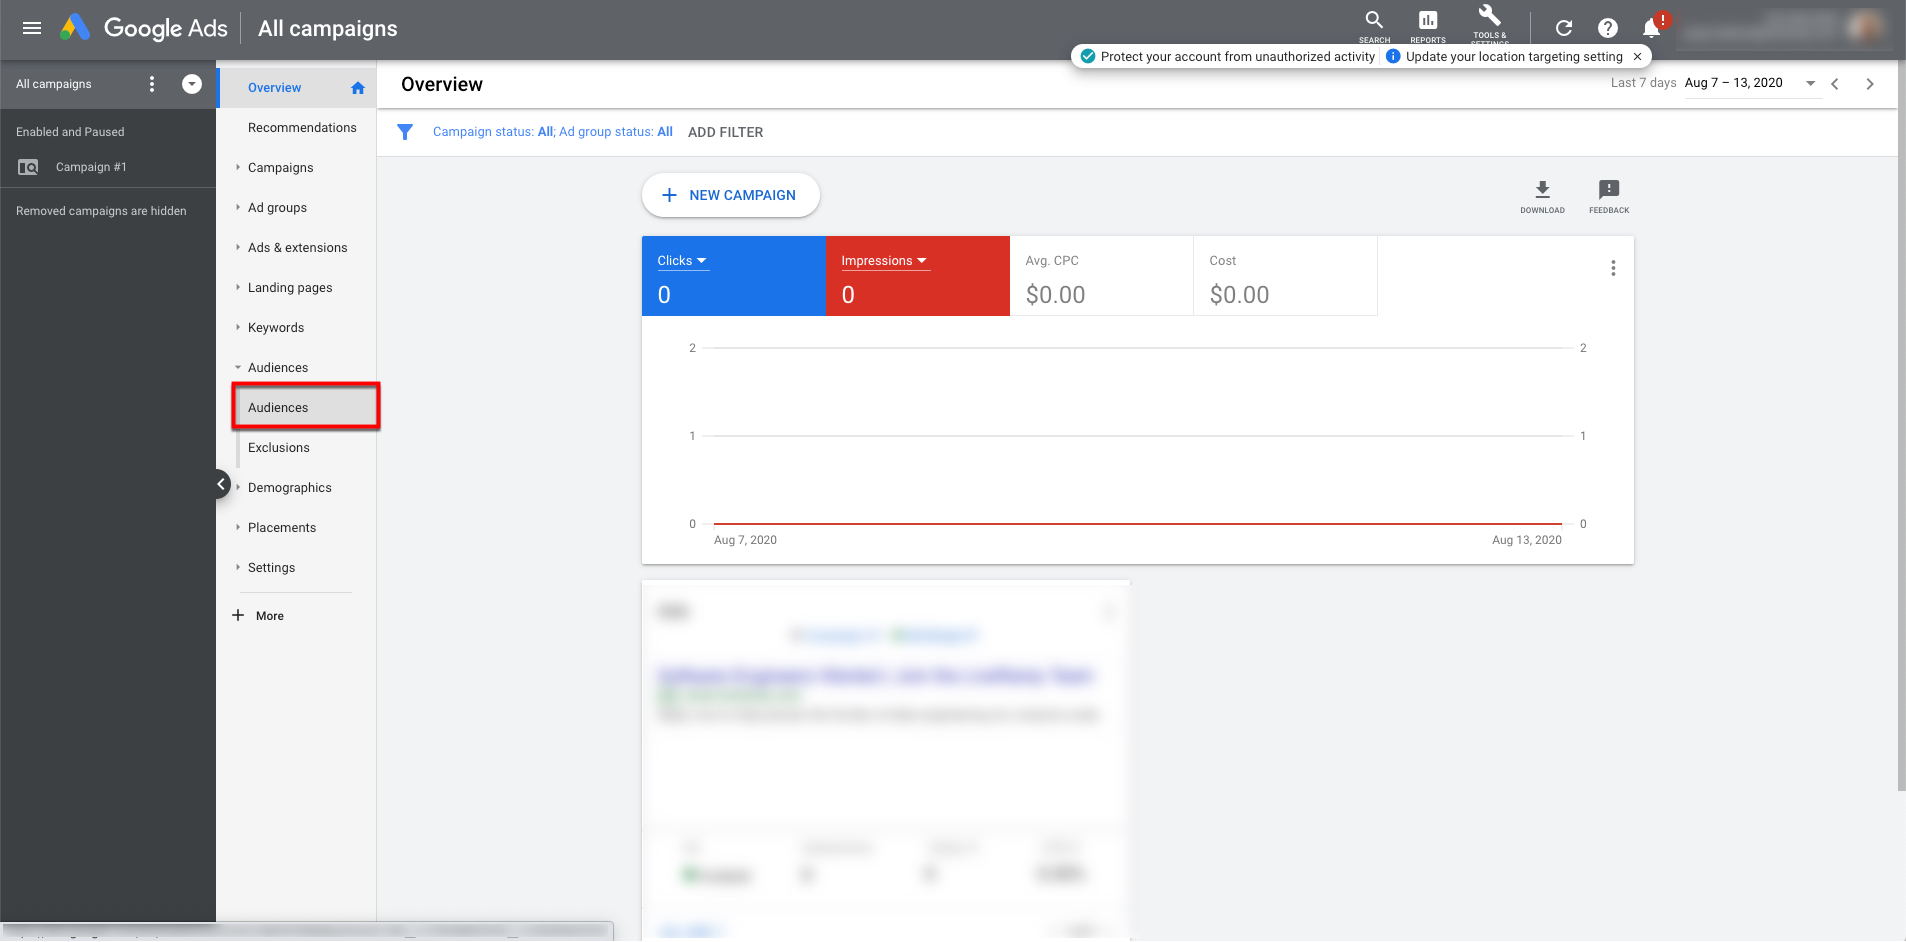
From the gray left navigation bar, select “Audiences”.
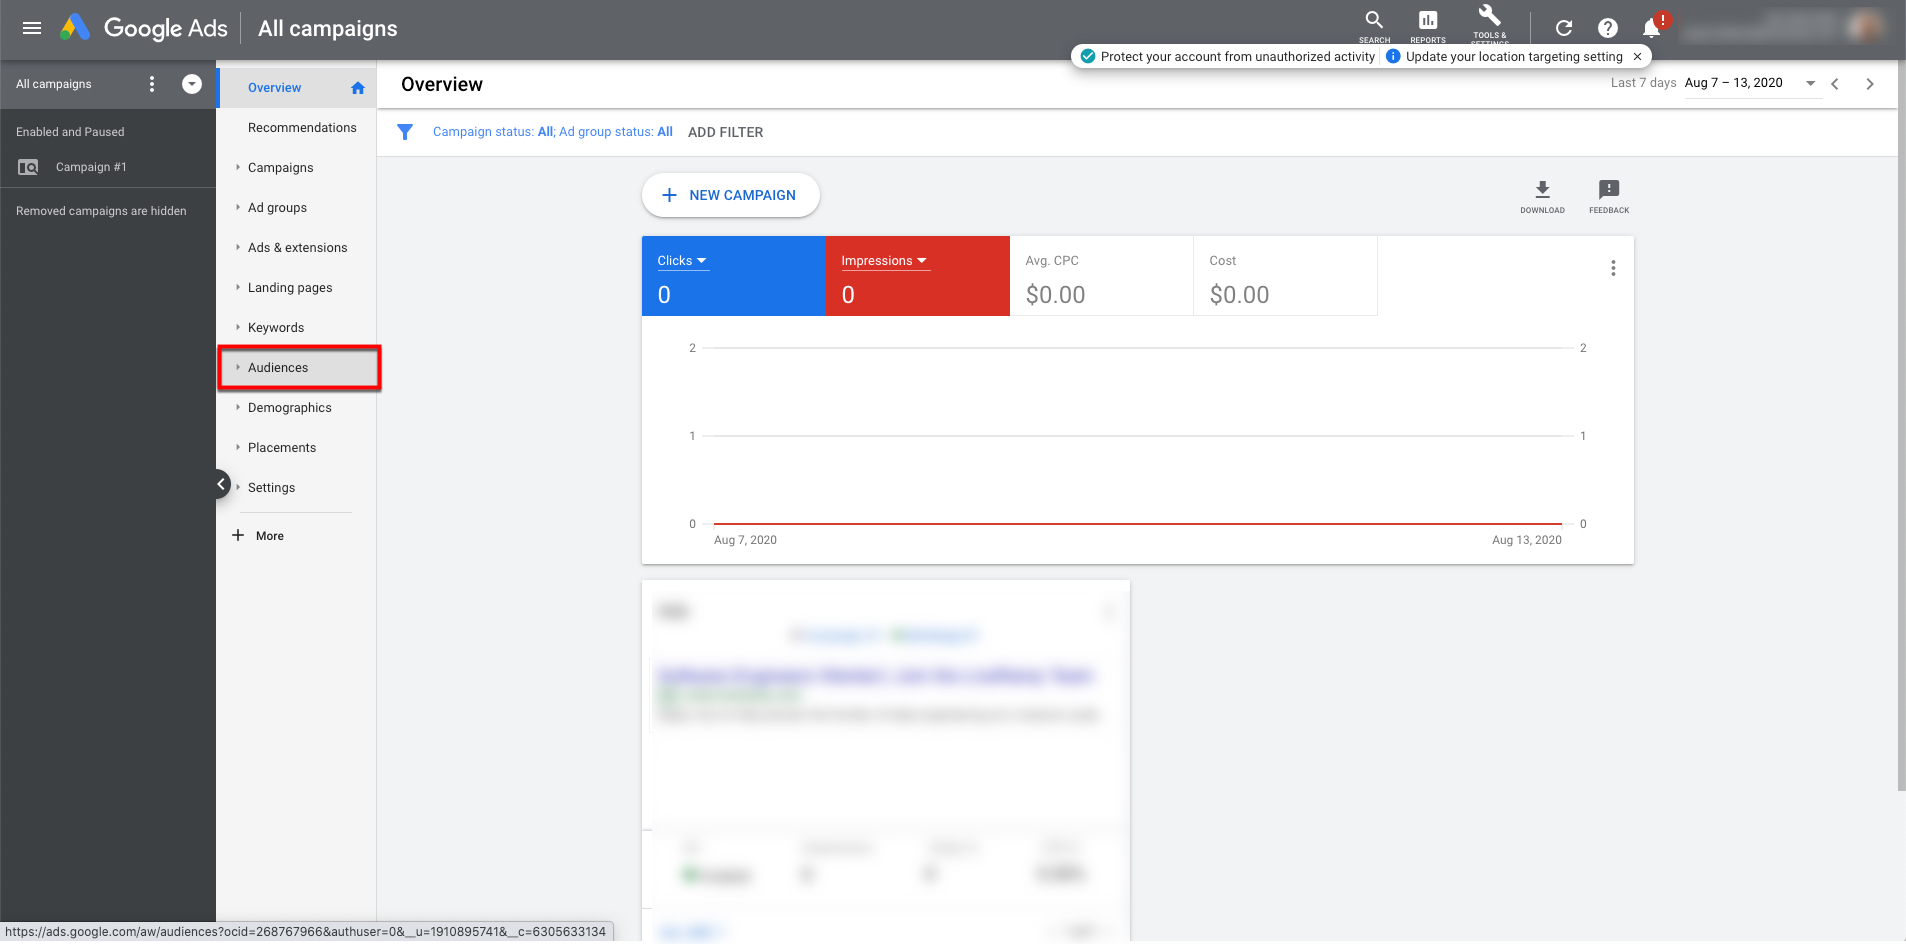
From the menu options that appear below, select “Audiences”.
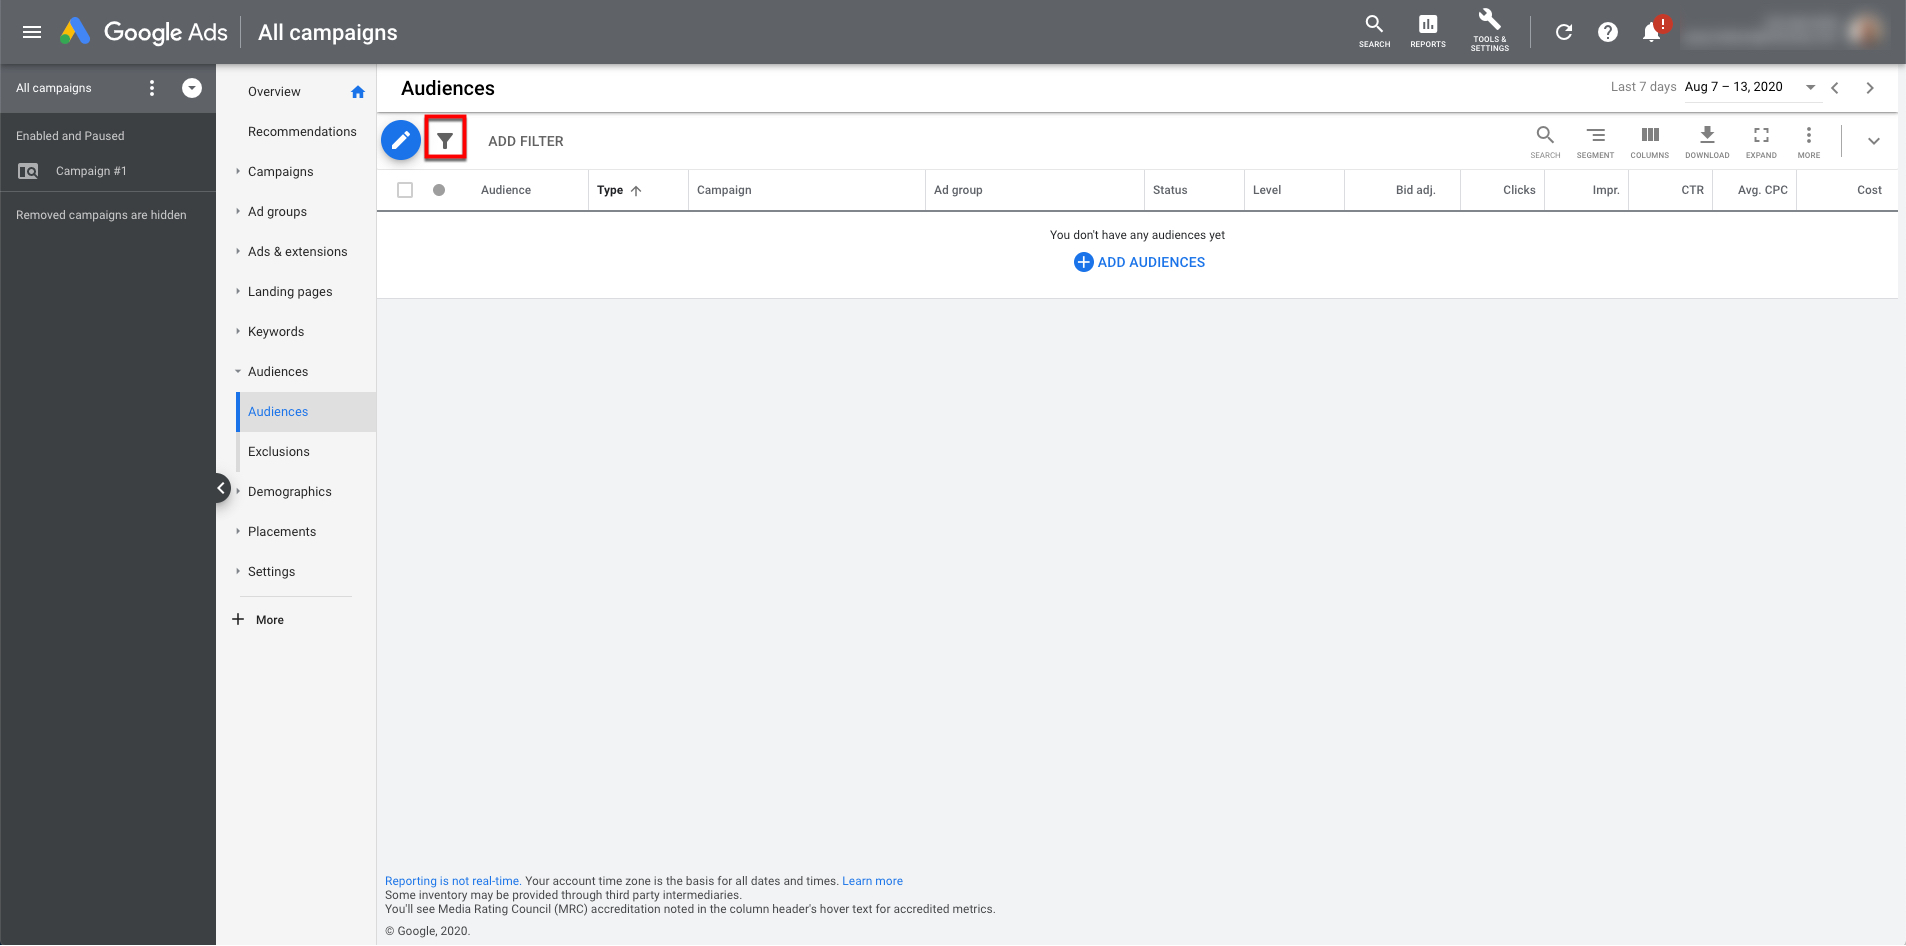
Filter Type by “Customer List”.
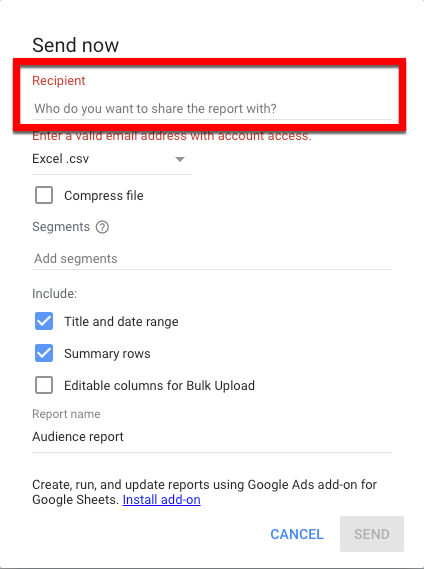
Click “Download” and then select “Email now”.
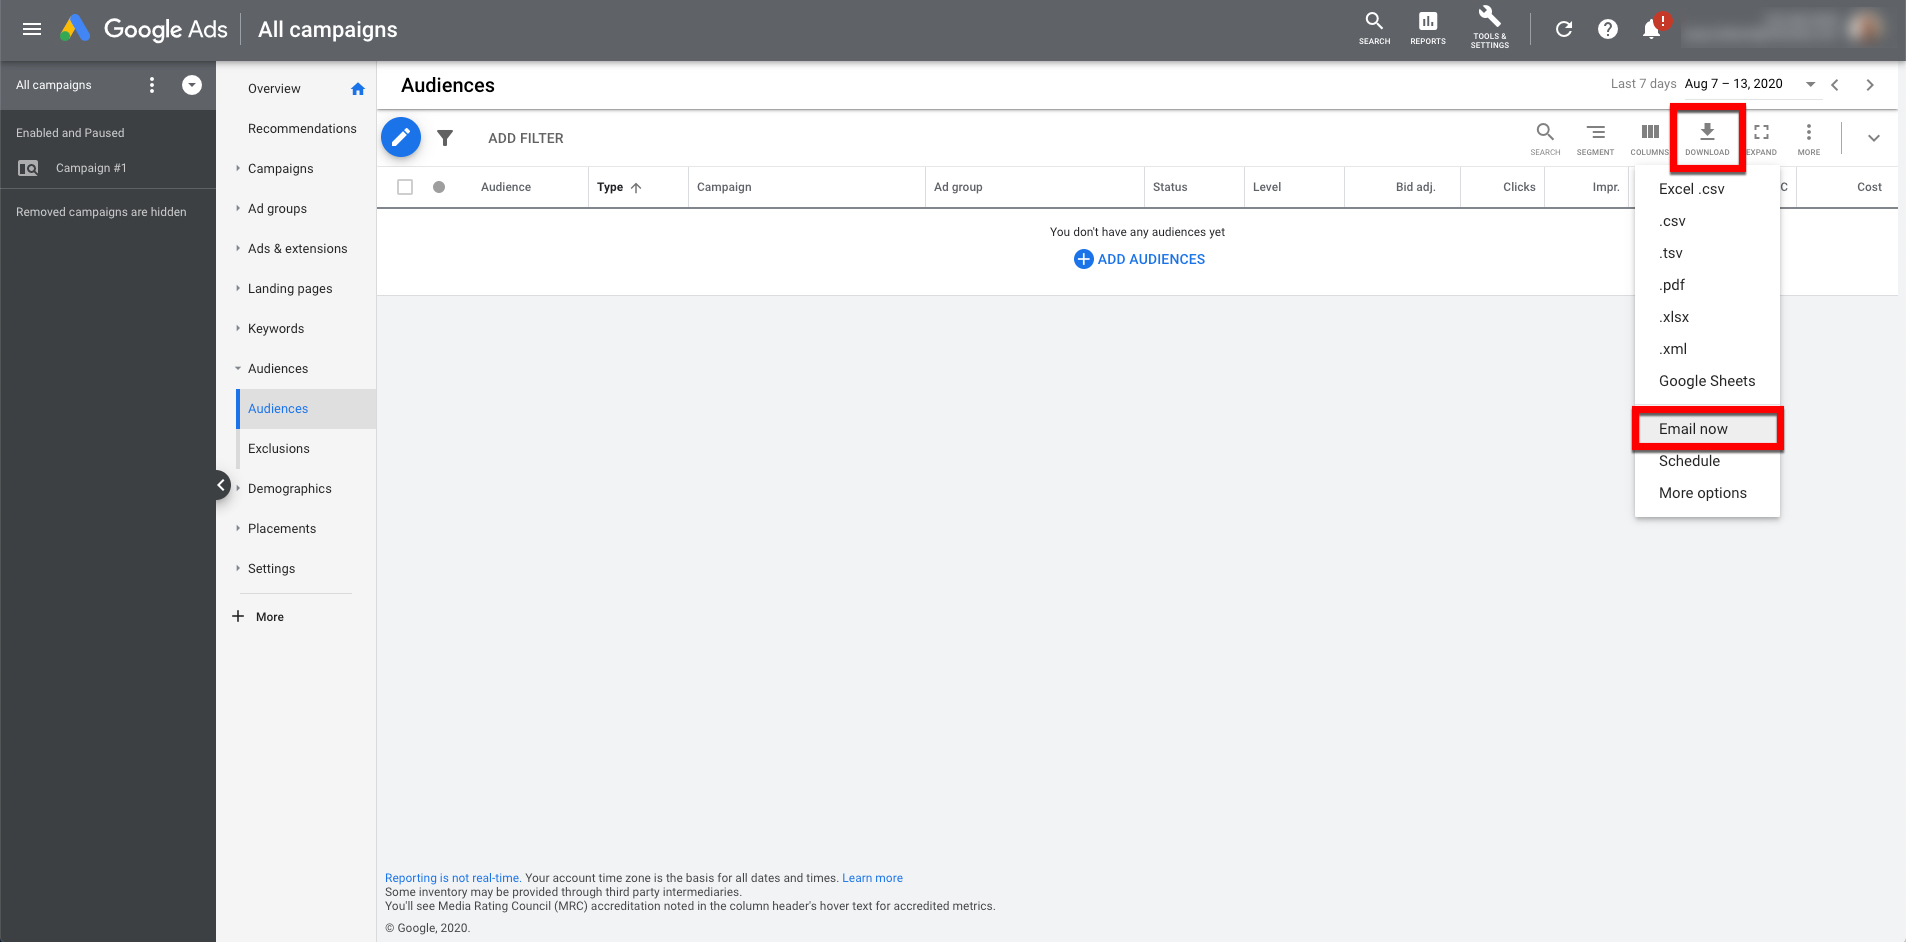
Enter “datausage@liveramp.com” as the recipient.
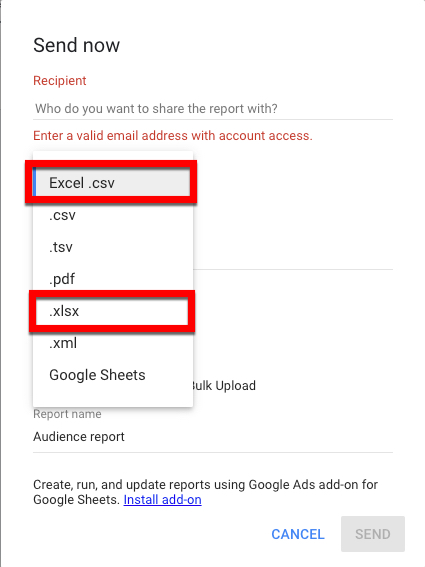
Select “Excel.csv” or “.xlsx” from the file type dropdown.
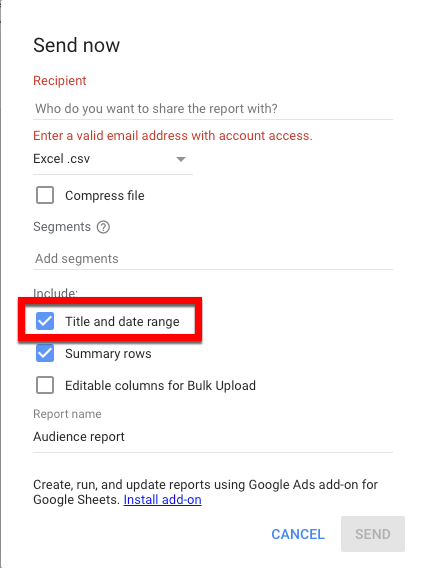
Make sure the check box for “Title and date range” is checked.
Name your report.
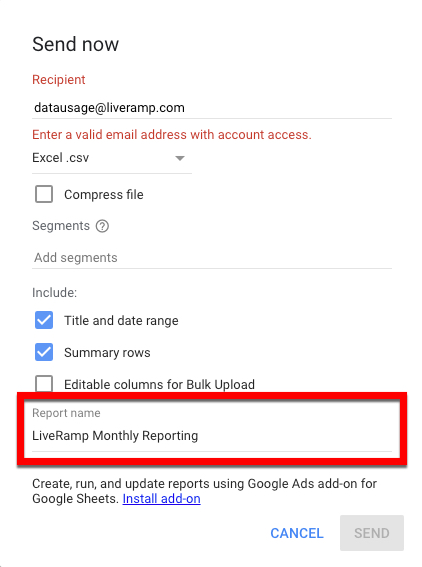
Tip
To make it easy to recognize the report for future use, we recommend naming it “LiveRamp Monthly Reporting”.
Click Send.
Send the Usage Reporting File to LiveRamp
Once you've downloaded and renamed the usage reporting file:
Provide a mapping between the campaign ID(s), the ad set ID(s), and the segment name and segment ID for each segment used:
Caution
LiveRamp must have the segment names and segment IDs to create the invoice.
Open the file that you just downloaded.
Insert two additional columns to the right of the existing columns and enter the column headings listed below:
LiveRamp Segment Names
LiveRamp Segment IDs
Following the example format shown below, provide pipe-delimited segment name(s) and pipe-delimited segment ID(s) (e.g, “10011111 | 10013393”) for each segment used.

Tip
You can find the segment names and segment IDs for standard segments on the Data Marketplace Segments page. See "View More Info and Stats for Data Marketplace Segments" for more information on downloading segment names and segment IDs.
To find segment names and segment IDs for custom segments, create a support case (see "Using the LiveRamp Community Portal" for instructions).
Email the file to LiveRamp using one of the methods listed below:
Use datausage@liveramp.com for all non-APAC distributions
Use datausage_APAC@liveramp.com for APAC distributions
If you require invoices to be split by brand or client, you will need to create child accounts for each brand or client that requires a separate invoice. Applicable destination accounts must be linked to the specific child account for that brand or client. For more information on creating these accounts, see the "Create a Client Child Account" section above.
If you require invoices to be split by campaign, to include an insertion order or purchase order number, or have any additional invoicing requests, include those requests on the usage submission email or contact your LiveRamp account representative.
After the usage is reported, LiveRamp creates an invoice based on the media spend reported and sends it to the designated billing contact(s) provided. If you need to update the billing contact, contact datausage@liveramp.com or your LiveRamp account representative.
Note
For questions on monthly reporting or billing, email datausage@liveramp.com.